This post may contain affiliate links.

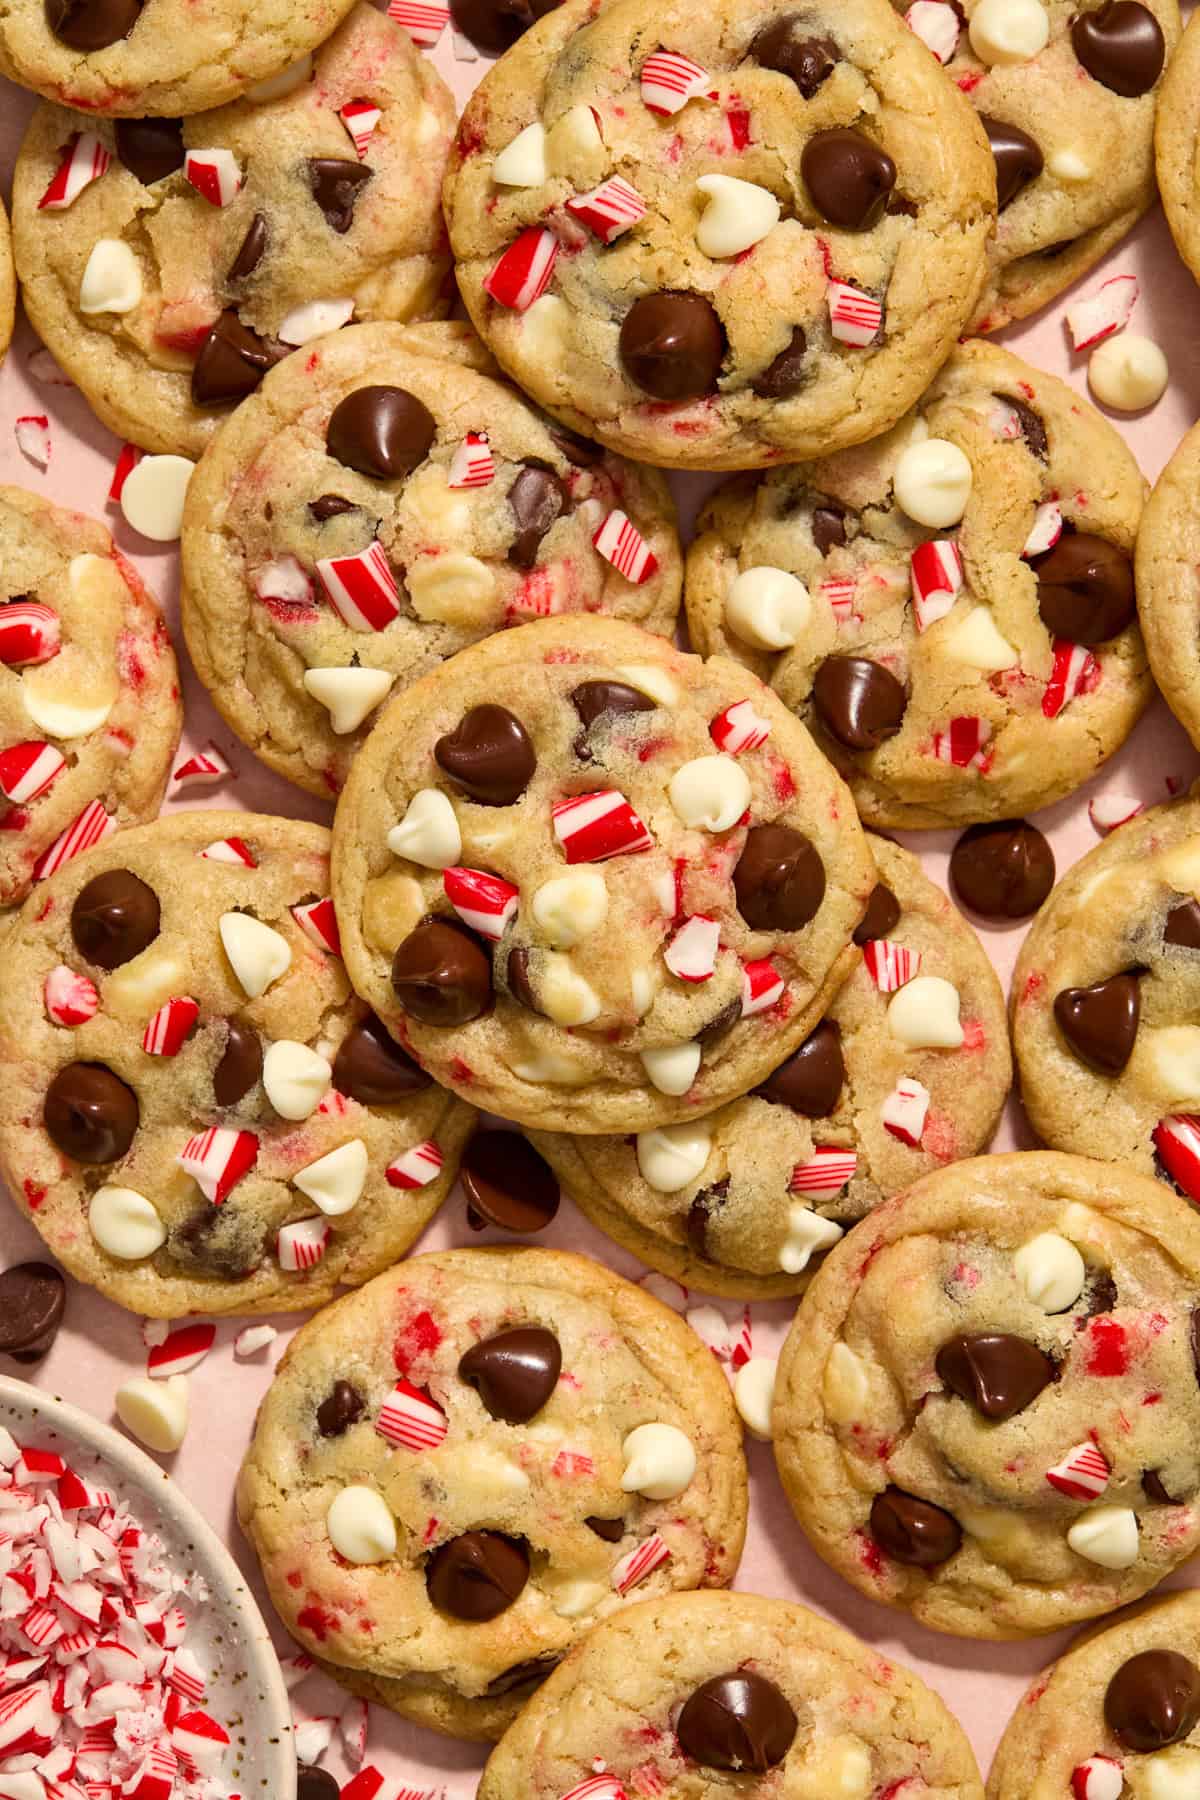
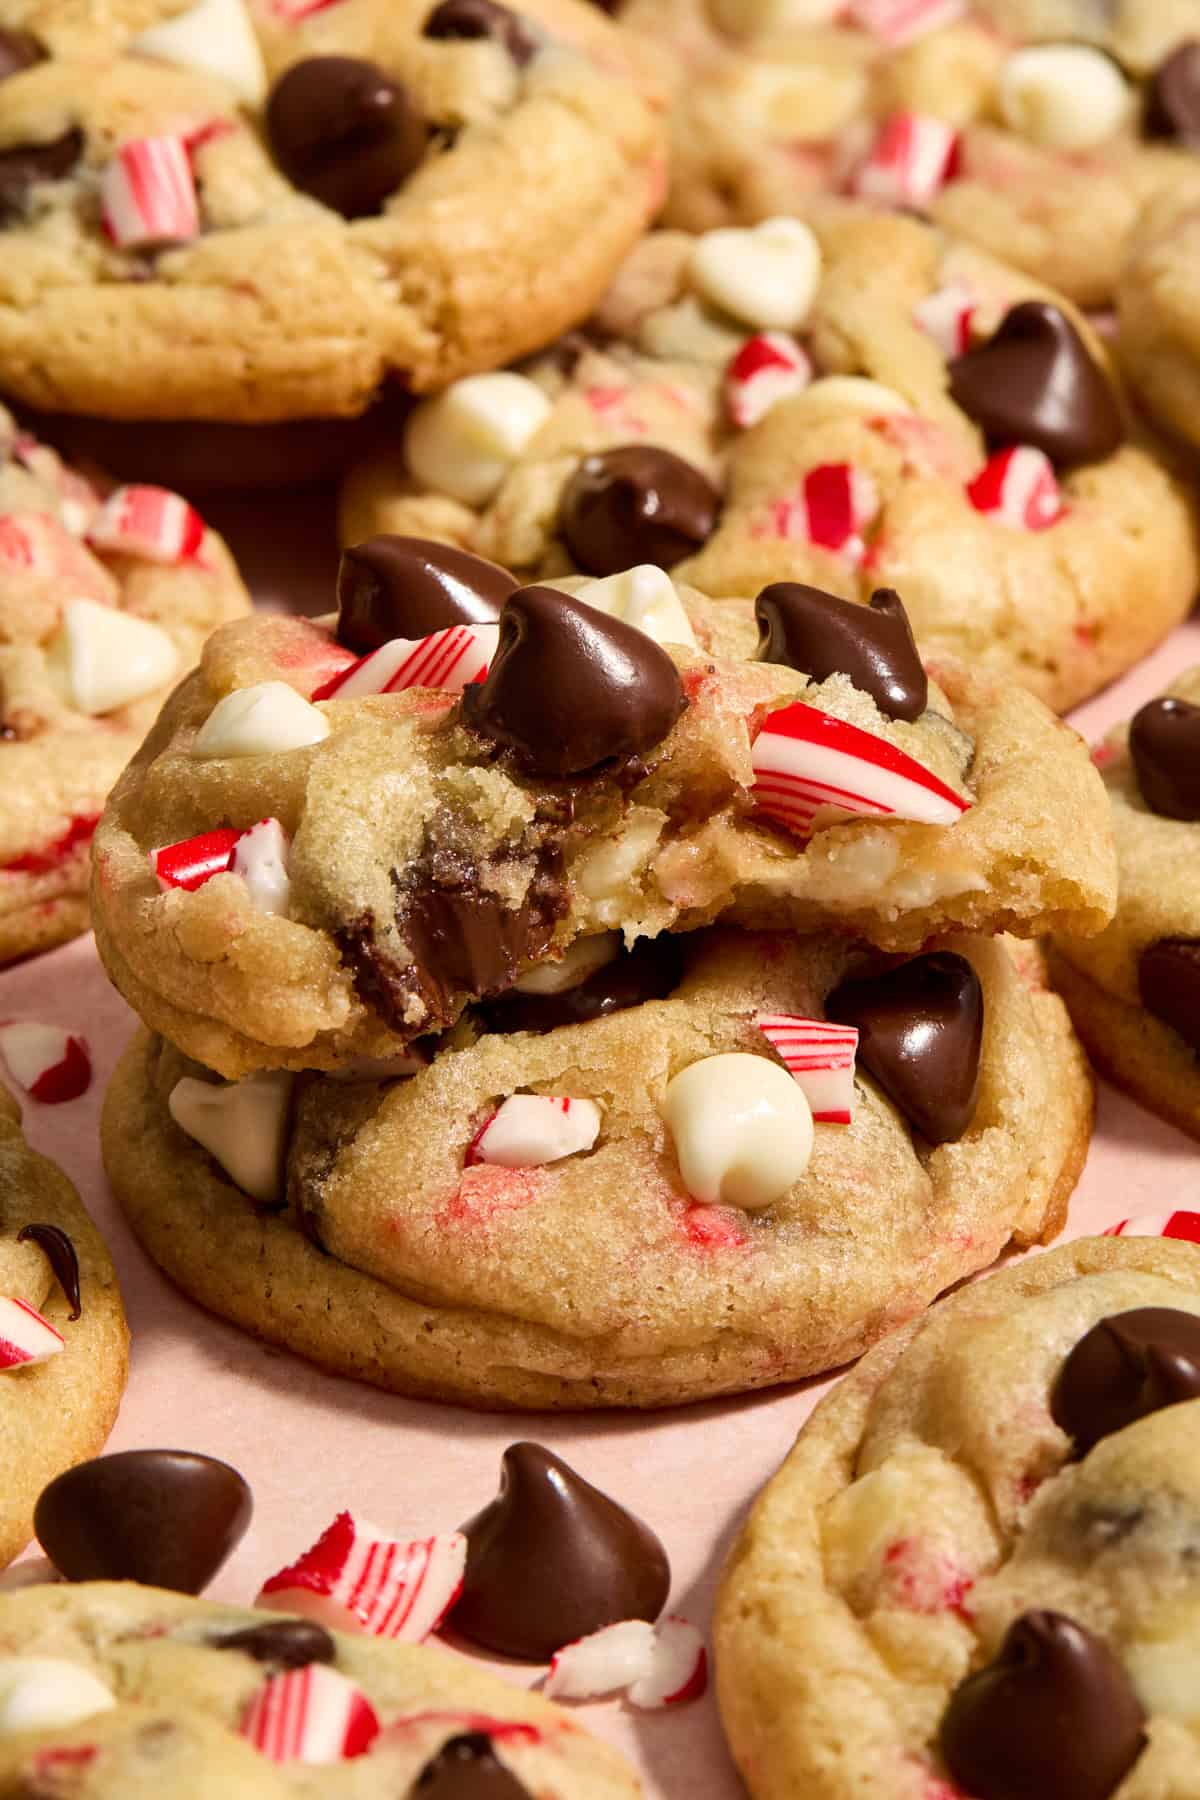
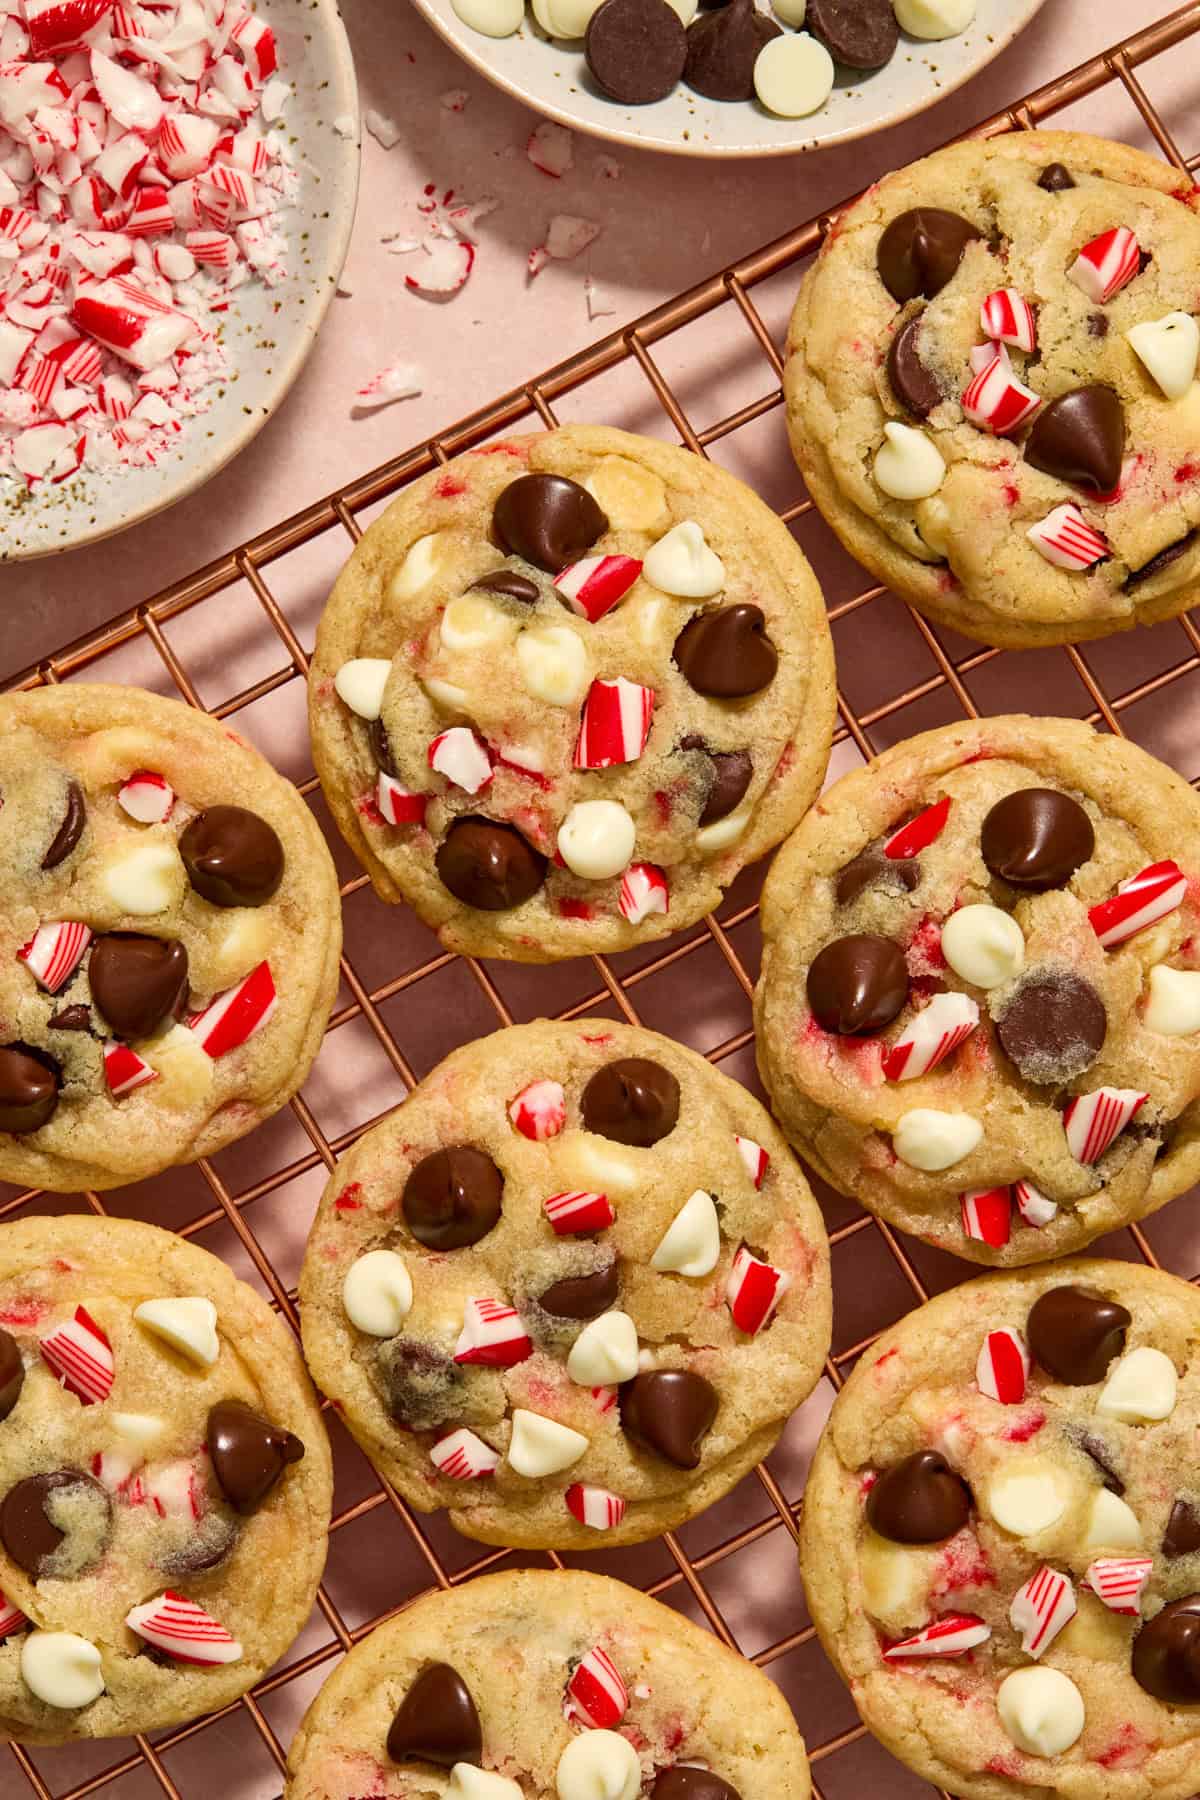
Soft and chewy, just like a chocolate chip cookie should be–these Peppermint Chocolate Chip Cookies are your new favorite Christmas Cookie! Take these to the cookie exchange–or save them for yourself–loaded with candy canes and lots of chips, they will make Santa extra happy!
As soon as the holiday season hits, all I want is chocolate and peppermint–and I will take it just about any way I can get it. These are my top holiday cookie recipe on the site and once you make them, you will know why!
These chewy peppermint chocolate chip cookies, full of crushed up candy cane pieces have become a tradition the past several years, and it wouldn’t be Christmas without them.
Love peppermint treats and all the Christmas recipes? Try these as well: No-Bake Peppermint Oreo Cheesecake, Peppermint Dark Chocolate Pretzel Bark, Peppermint Bark Brownies and this simple Christmas Puppy Chow!
Why We Love These Peppermint Chocolate Chip Cookes

These peppermint chip cookies have been a MUST MAKE cookie recipe over the holidays for almost 10 years now. They always get rave reviews and are the hit at every cookie exchange.
Make them once, and you will know why they are the best!
- They take a classic and give it a holiday kick! Who can resist a chocolate chip cookie? These chewy delicious peppermint chip cookies are the easiest way to take the classic CCC and make it extra festive. The peppermint flavor is a sure sign of the holiday season.
- These are super kid friendly. Get the kids in the kitchen. Oh what fun it is to CRUSH UP CANDY CANES! I can’t promise things won’t get messy though. My little guy loves helping make the crushed candy canes every time.
- They are delish! I mean, isn’t that the reason we bake cookies?? These are going to be the tastiest cookie at this year’s holiday cookie exchange–they fly off the dish every time I make them.
Ingredient Notes
See full list of ingredients with exact measurements below in the recipe card.

- butter: I use unsalted butter. Salted butter will work too, just half the amount of salt added later. Softened to room temperature, but not too soft that if you press into it, it is very mushy. Just enough to press a finger print into.
- flour: all purpose flour, if you can measure the weight, that is ideal. If not, stir the flour to aerate and then spoon and level into the measuring cup for best results. It is very easy to over measure flour especially if you scoop the measuring cup right into the flour.
- baking soda: make sure it is fresh. Expired baking soda can cause your cookies to be the opposite of a success!
- vanilla extract: You can also add a touch (1/4- 1/2 teaspoon) of peppermint extract for even more mint flavor.
- candy canes (or peppermint candies if not in season). You can also press small pieces of peppermint bark into the tops of the cookies from the oven or stir them into the cookie dough as well!
- dark and white chocolate chips: I prefer this combination, but you could use milk chocolate chips or bittersweet if preferred. You could also use the seasonal peppermint chips that are usually out around the holidays. You could also
Step-By-Step Instructions
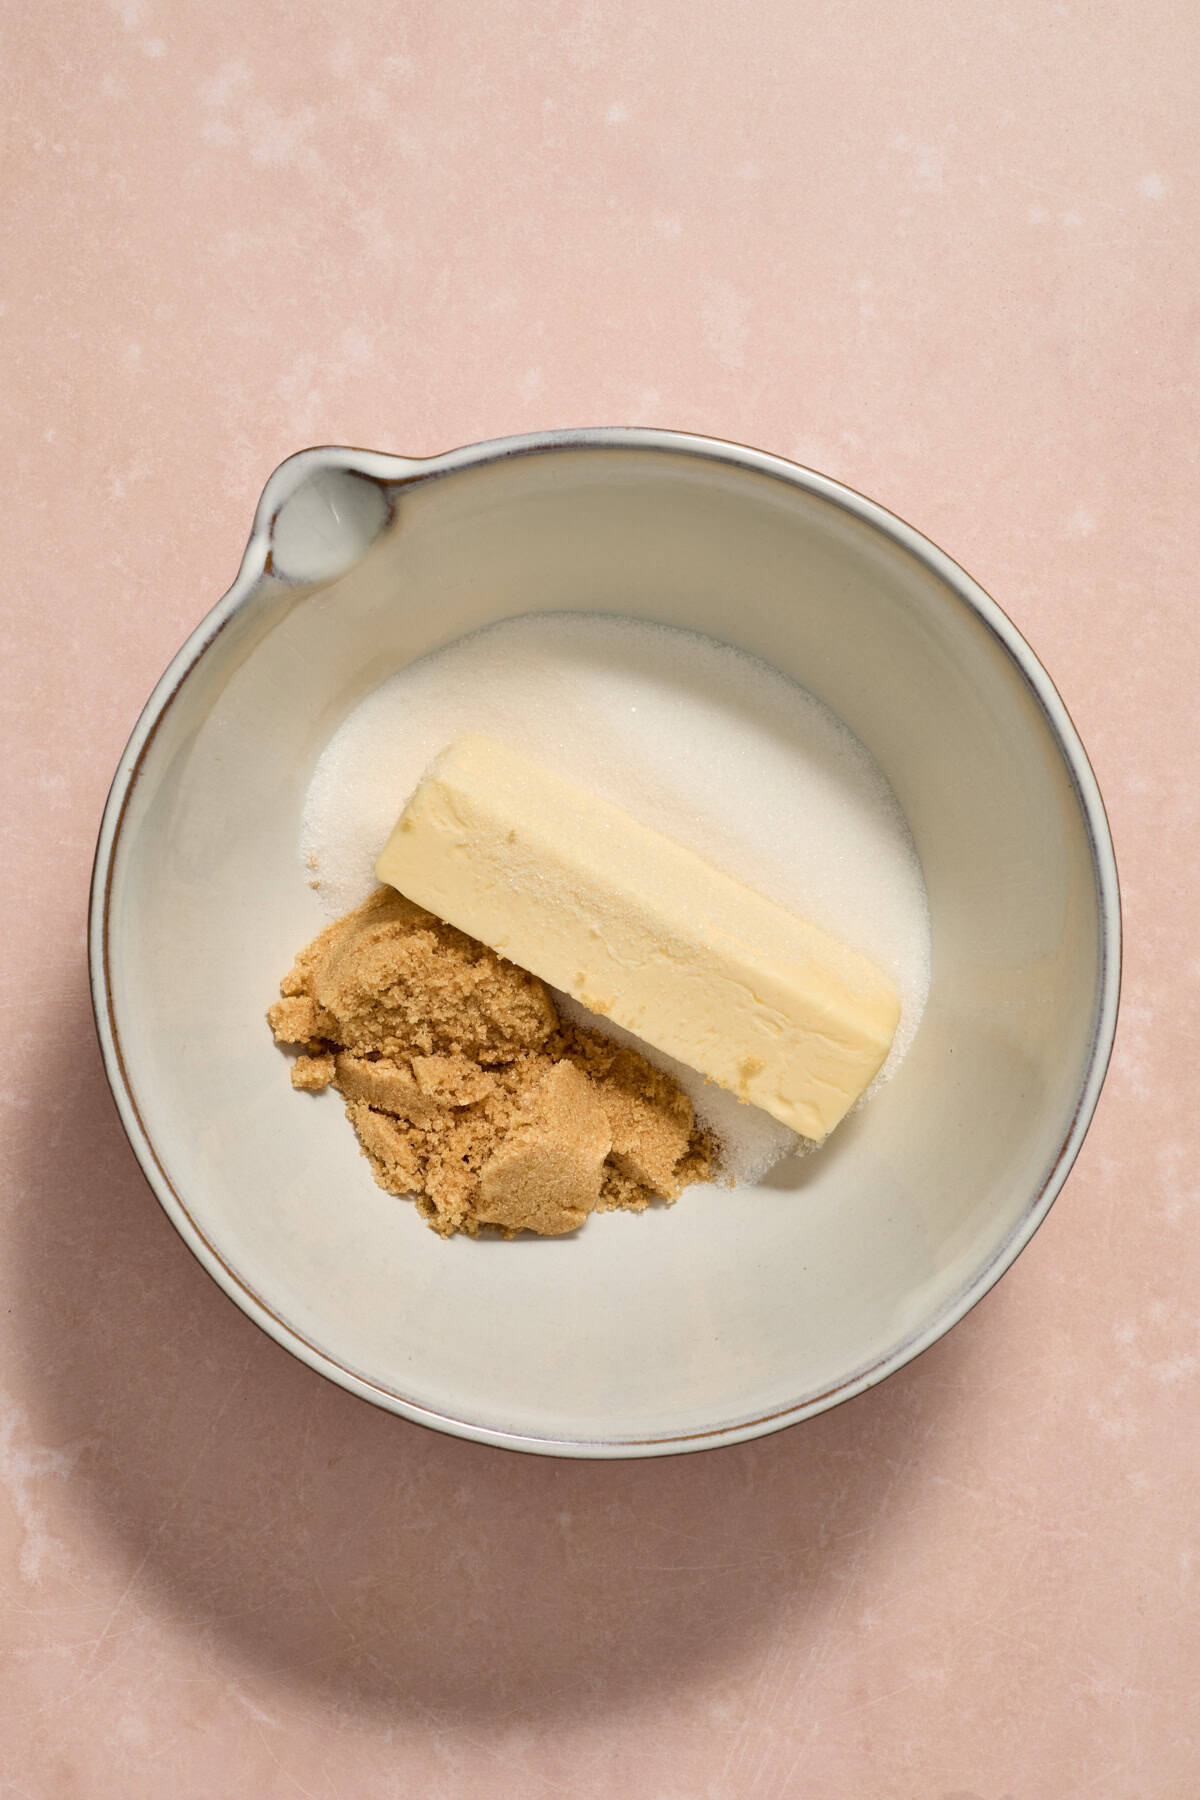
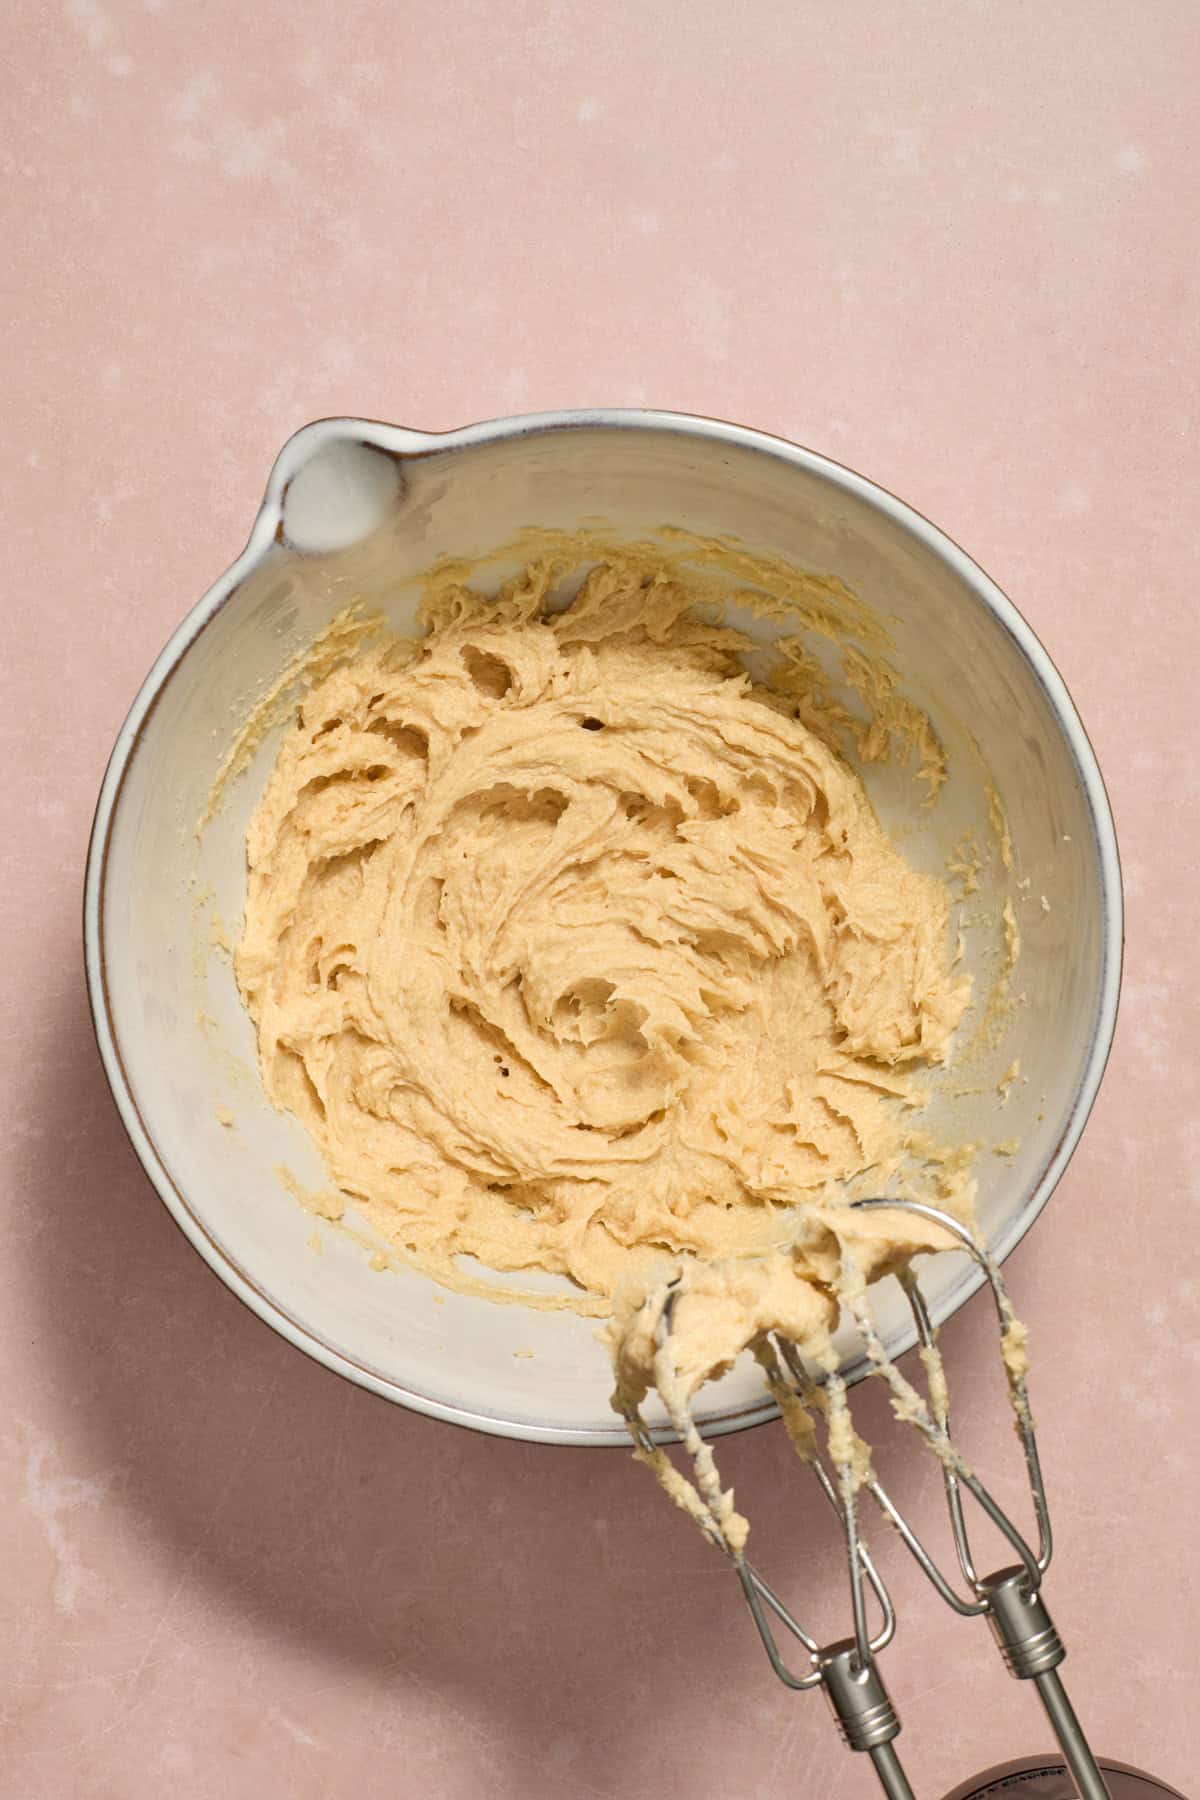
Step 1: Cream the softened butter and sugars until light and fluffy with an electric hand or standing mixer.
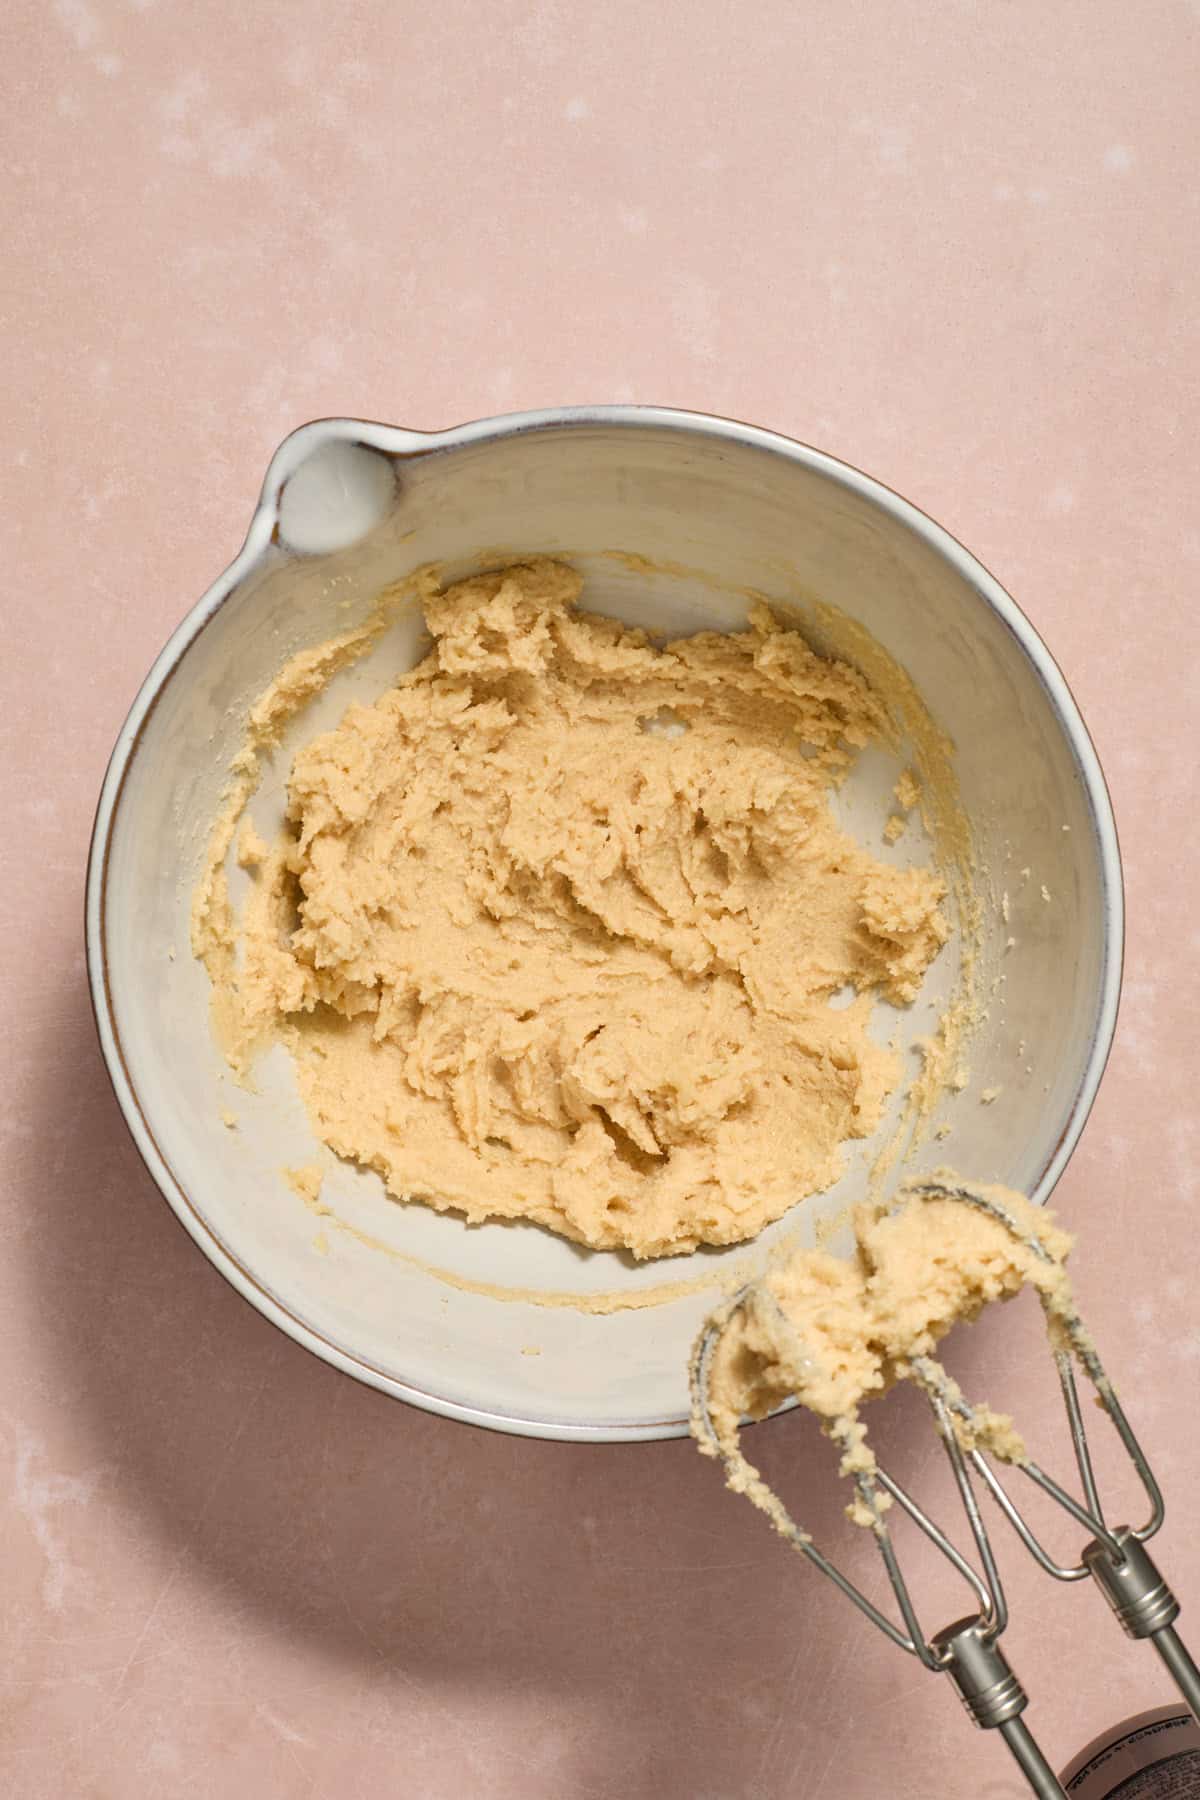
Step 2: Make sure to do this for about 3 minutes for optimal lift in your baked cookies. You want the mixture to be light and fluffy.
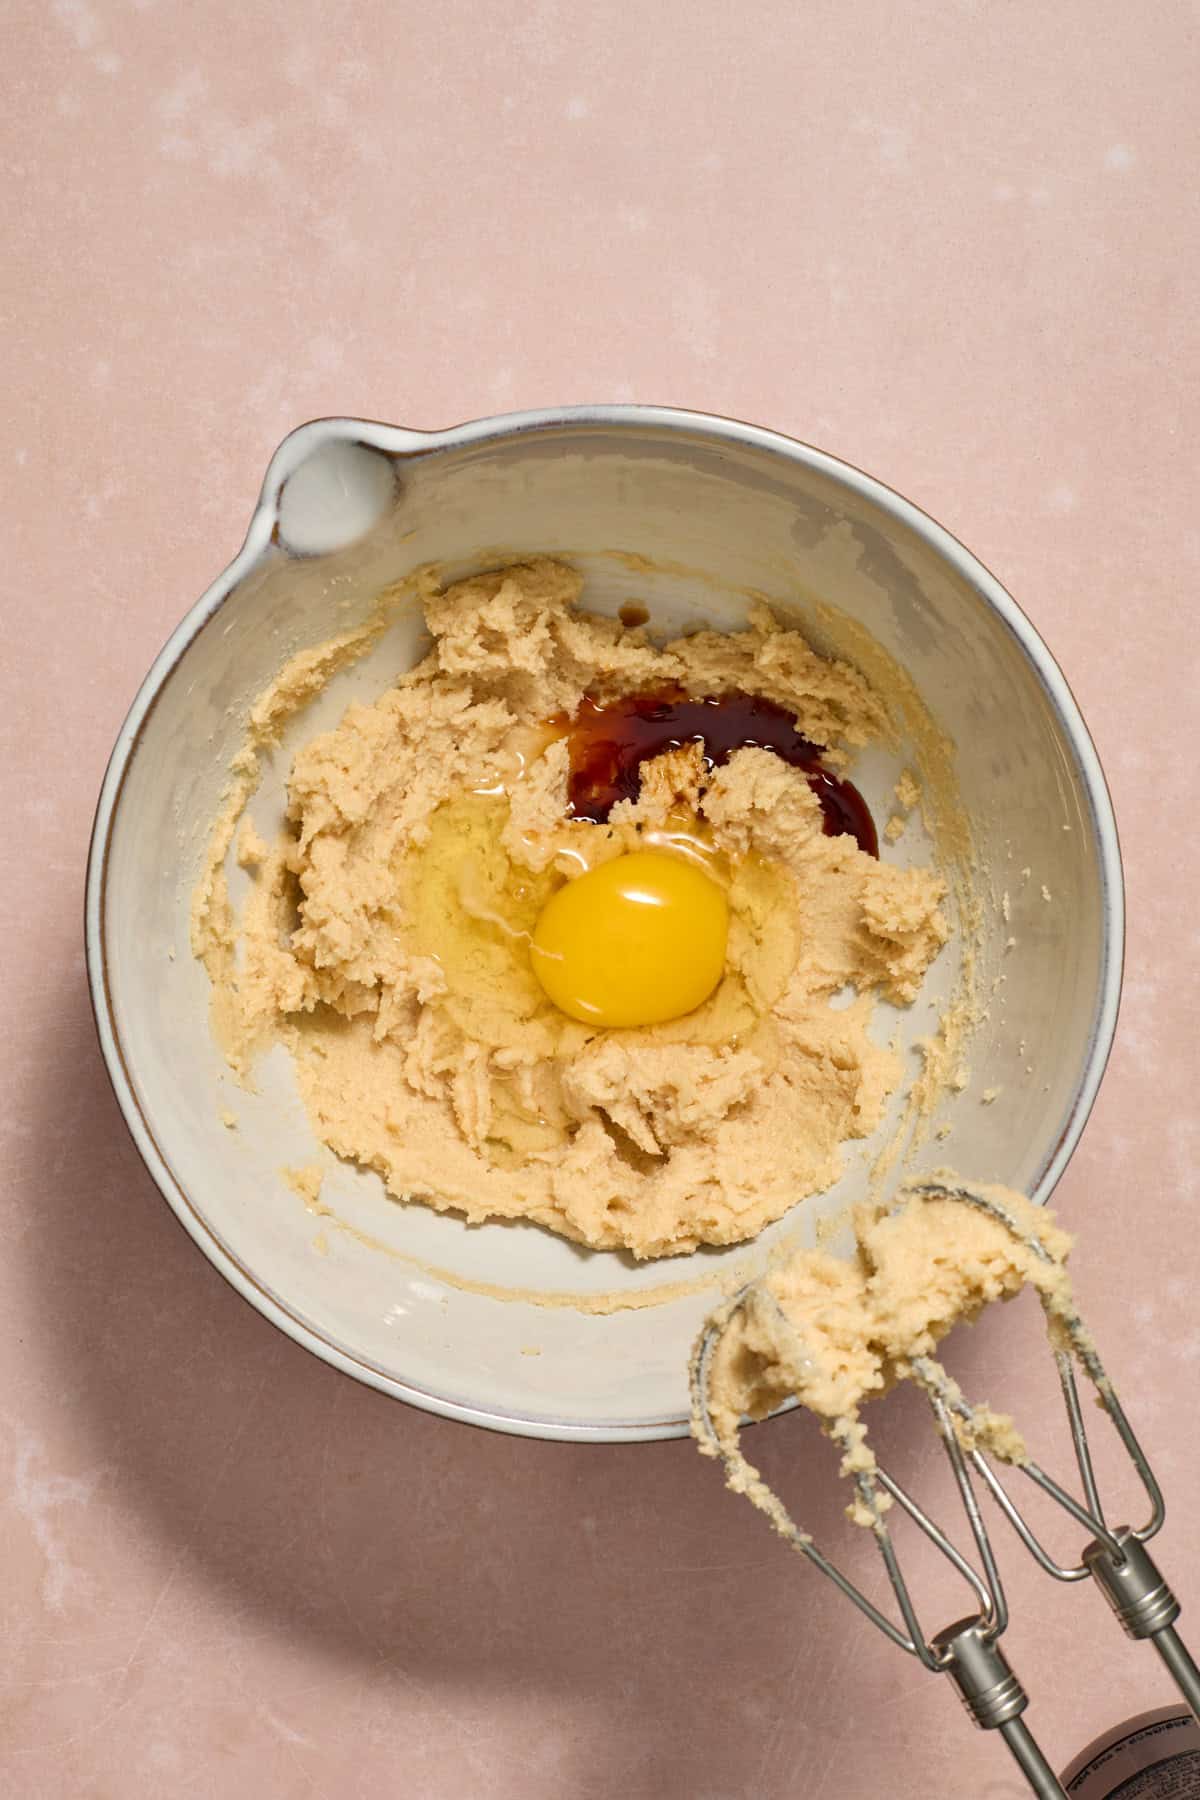
Step 3: Add in the egg and vanilla.
Step 4: Beat to incorporate.
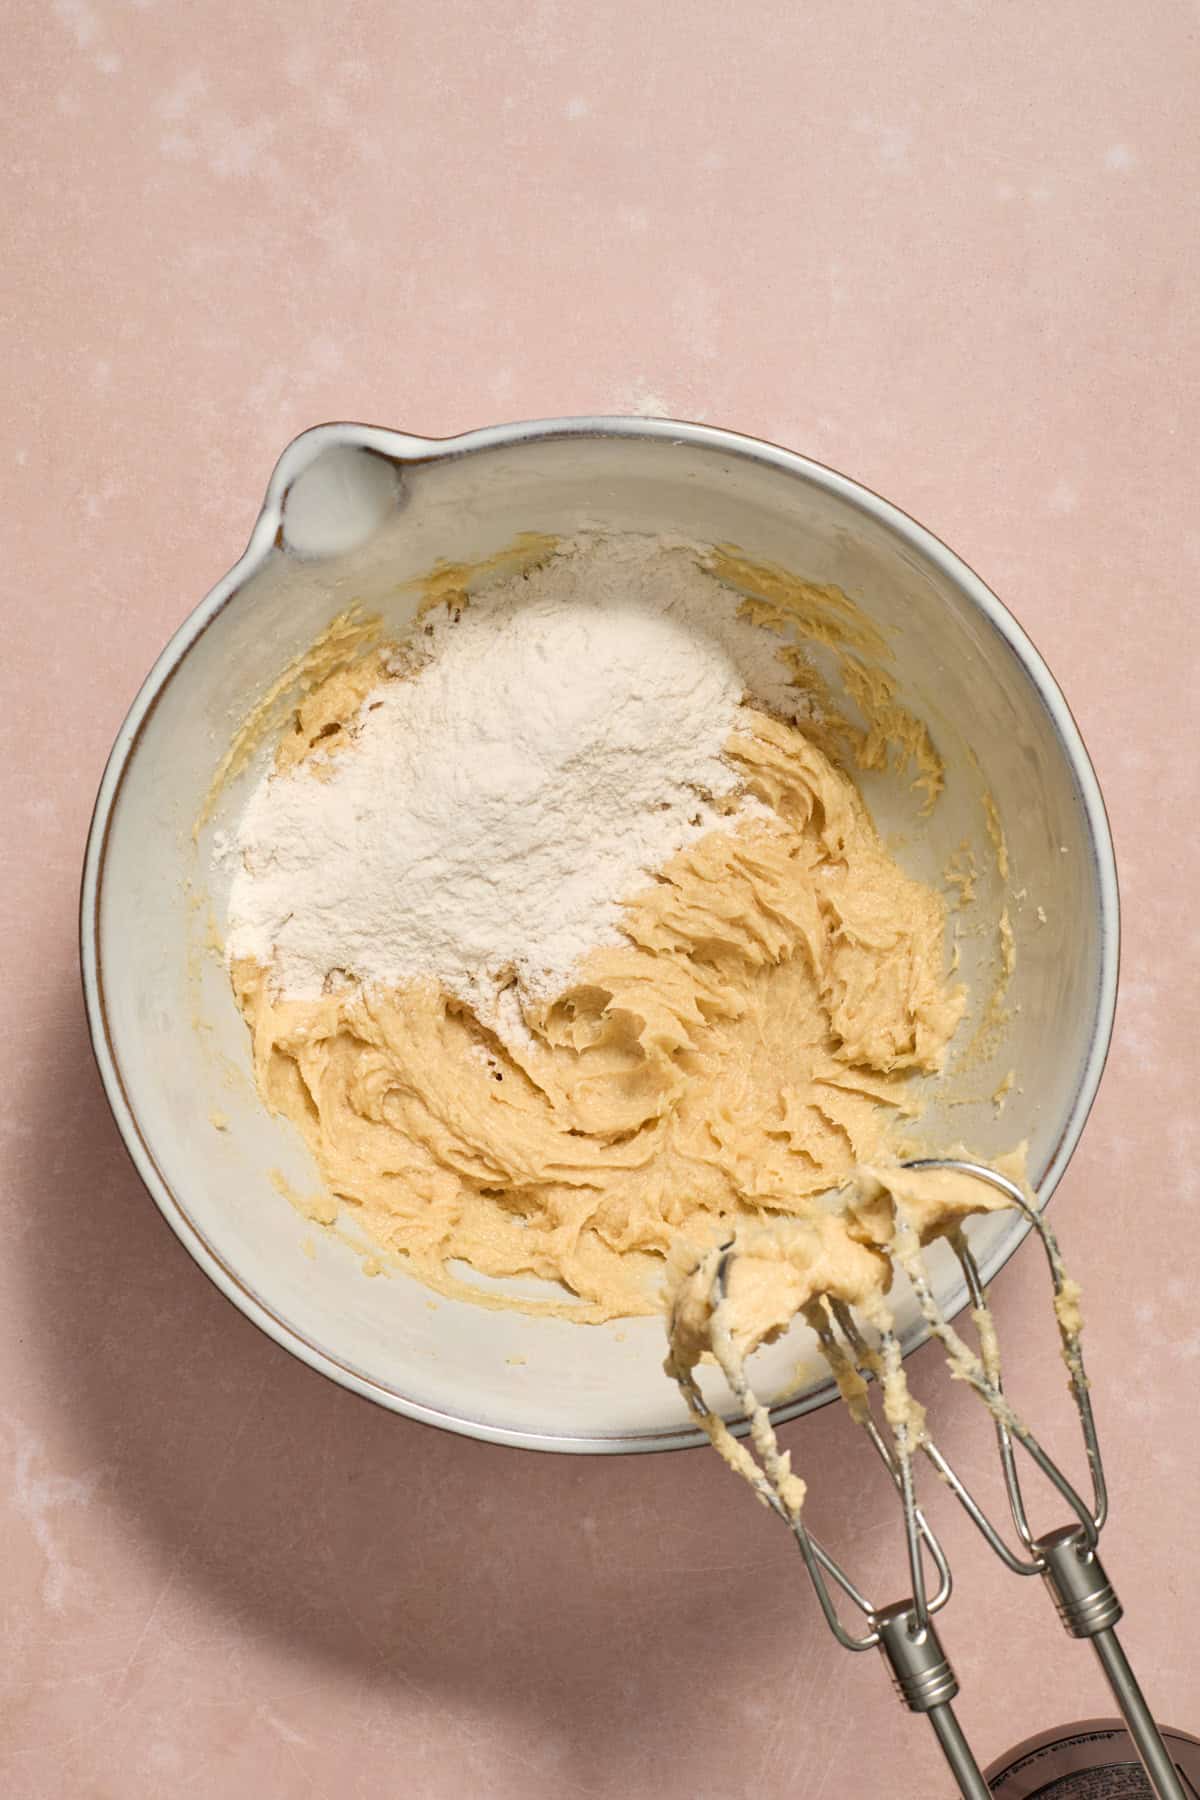
Step 5: In a separate bowl, whisk together the salt, flour and baking soda. Slowly add the dry ingredients and mix only to incorporate.
Step 6: You don’t want to over mix at this point–that can cause the cookies to become tough, flat and very dense.
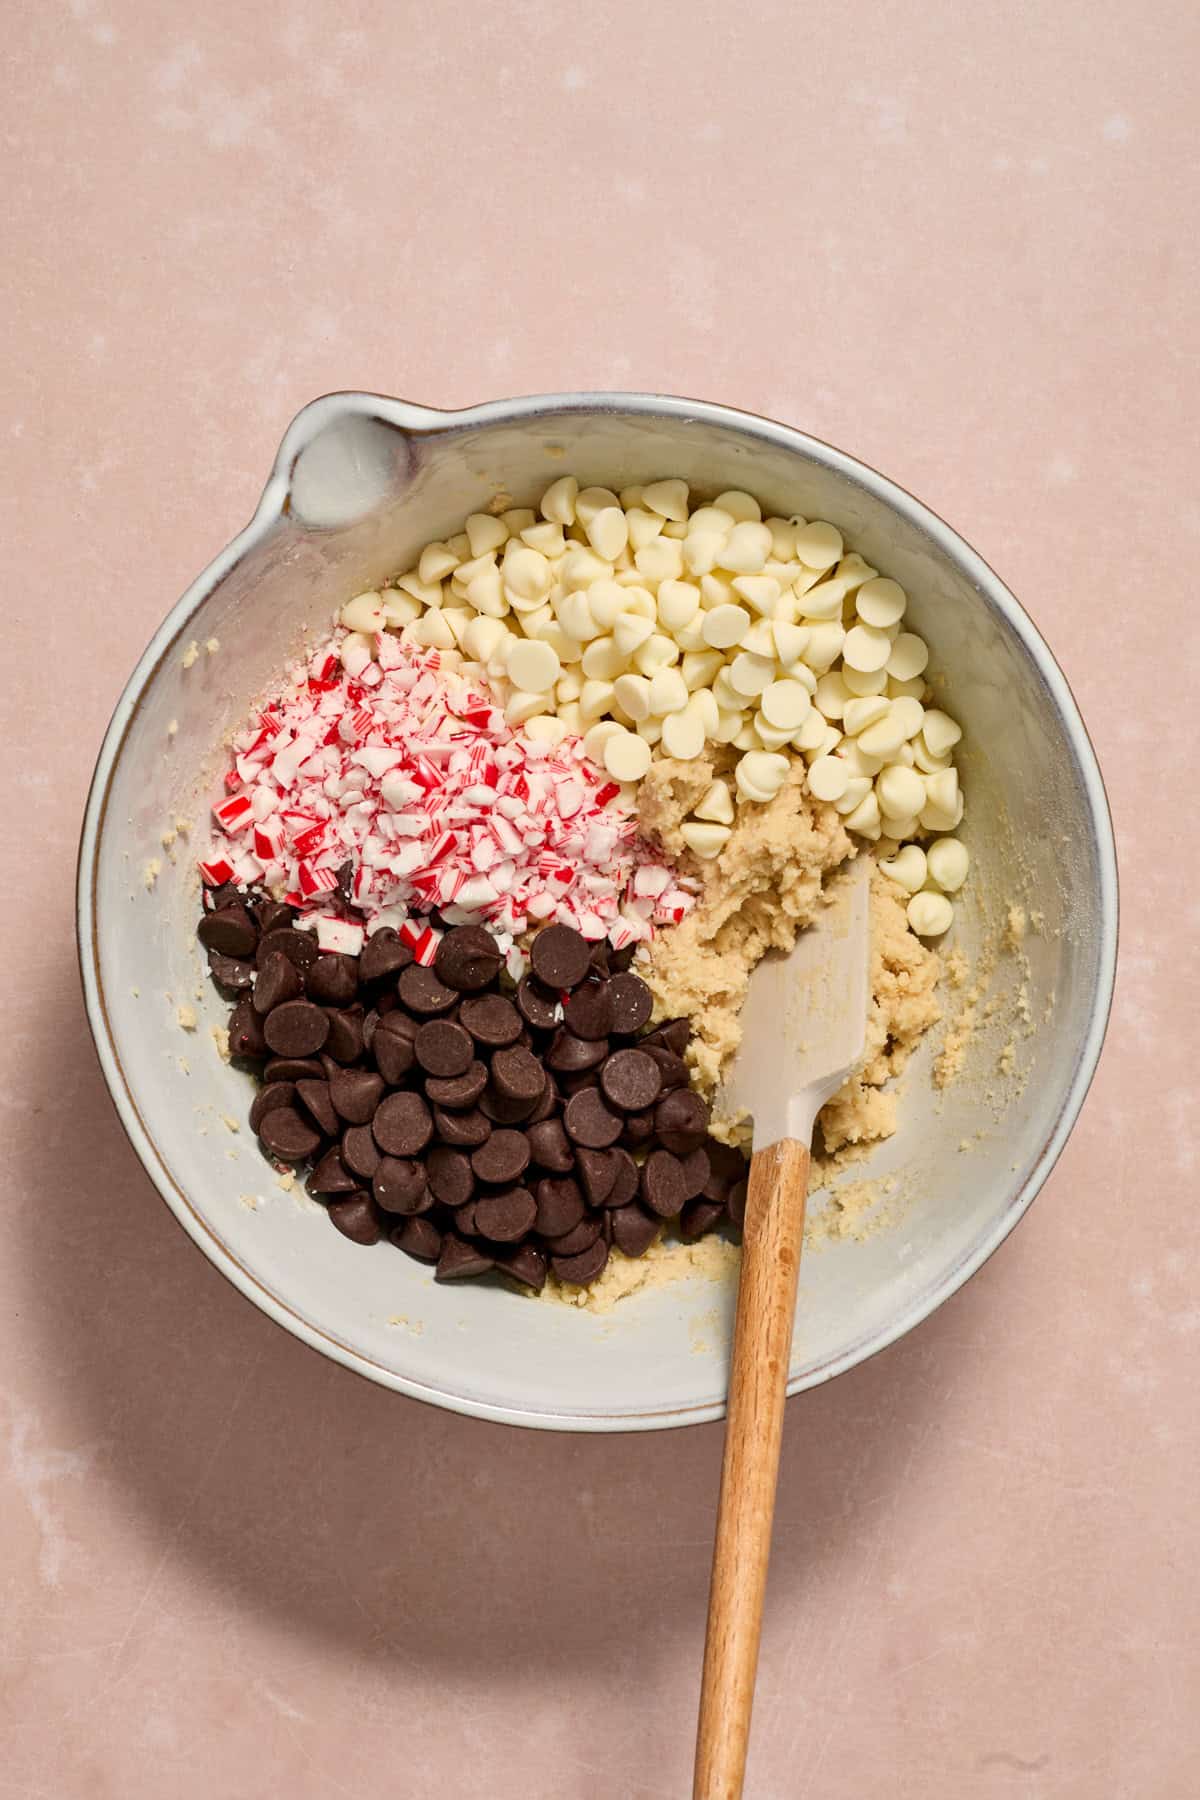
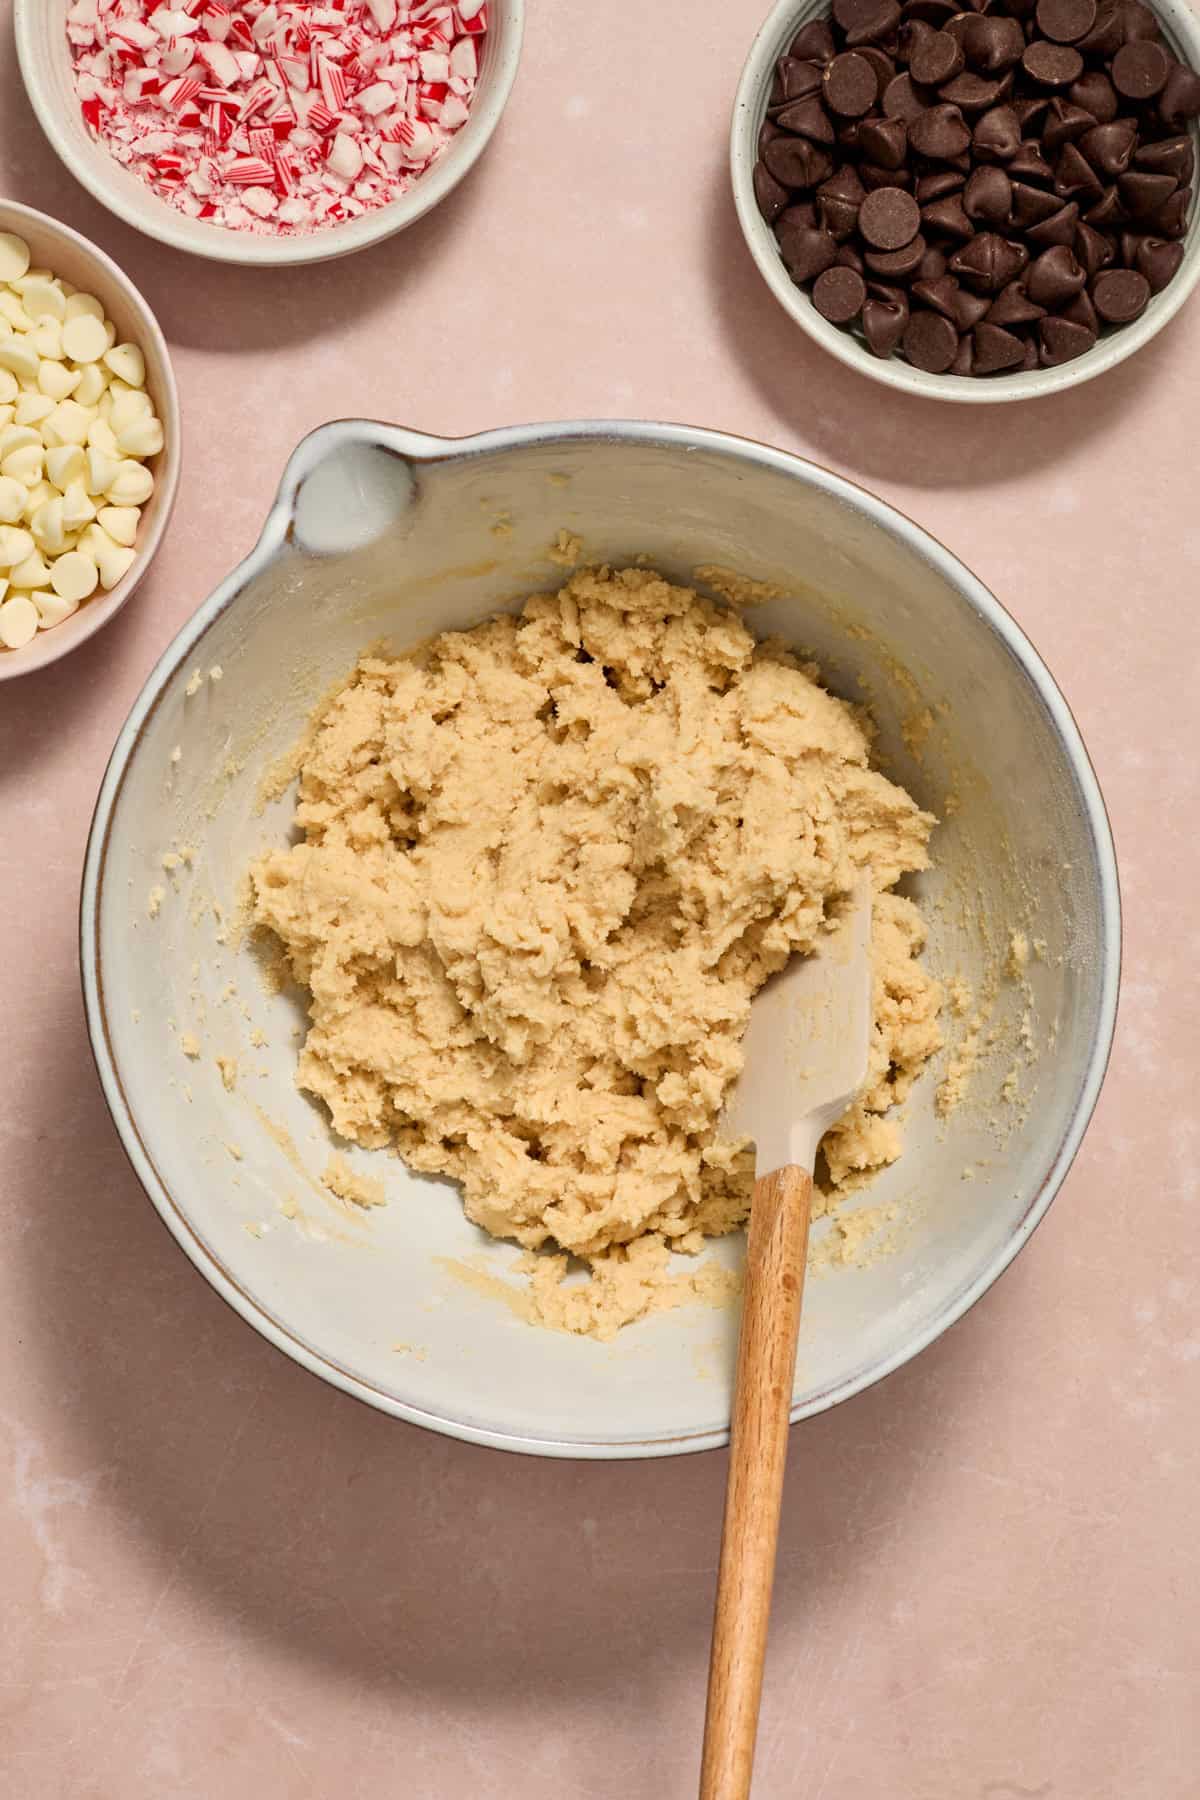
Step 7: Once the flour is incorporated, fold in the chocolate chips and crushed candy canes.
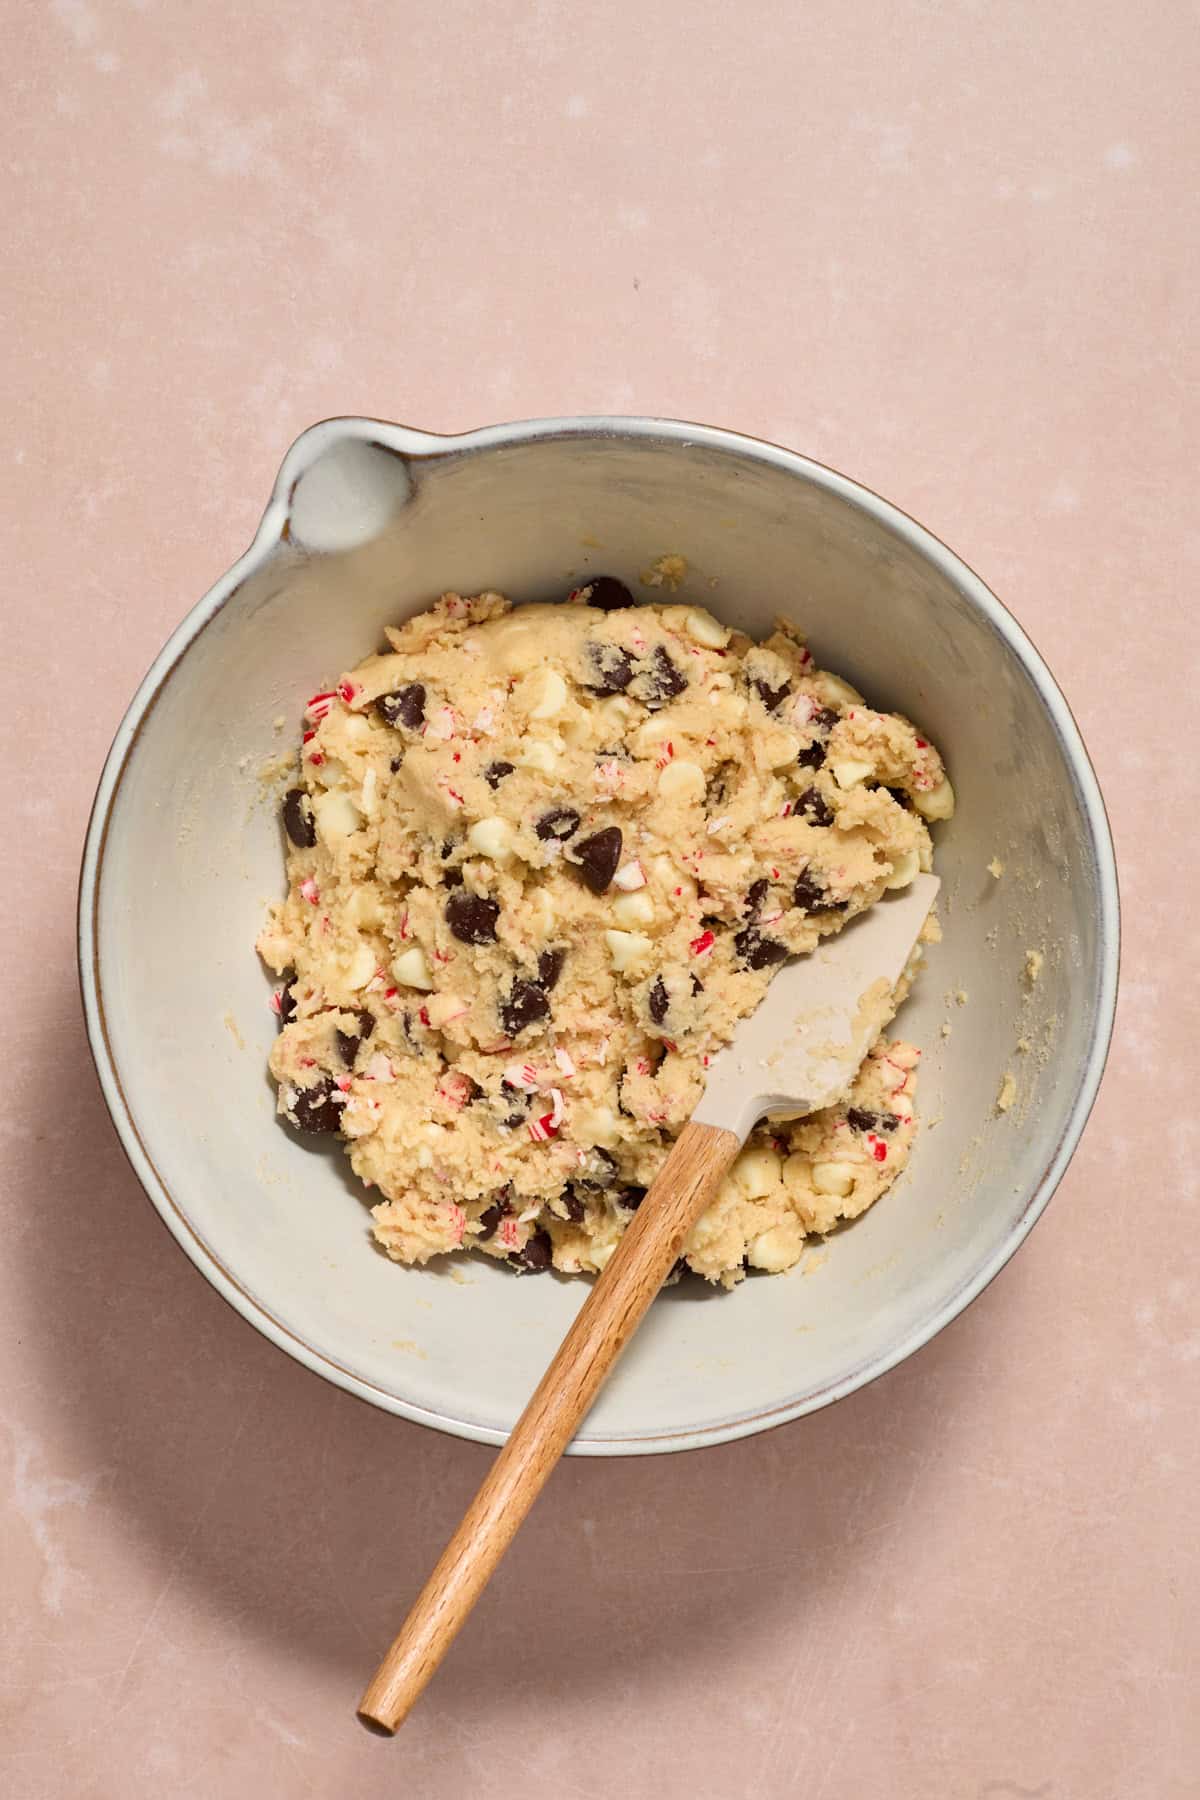
Step 8: Chill the cookie dough for about 30-60 minutes. You can use a cookie scoop or spoon and roll into approximately 1 1/2 inch balls and chill. I recommend chilling for at least 30 minutes or until ready to bake. If you chill longer than 2 hours, you may want to let the dough sit out a few before baking.
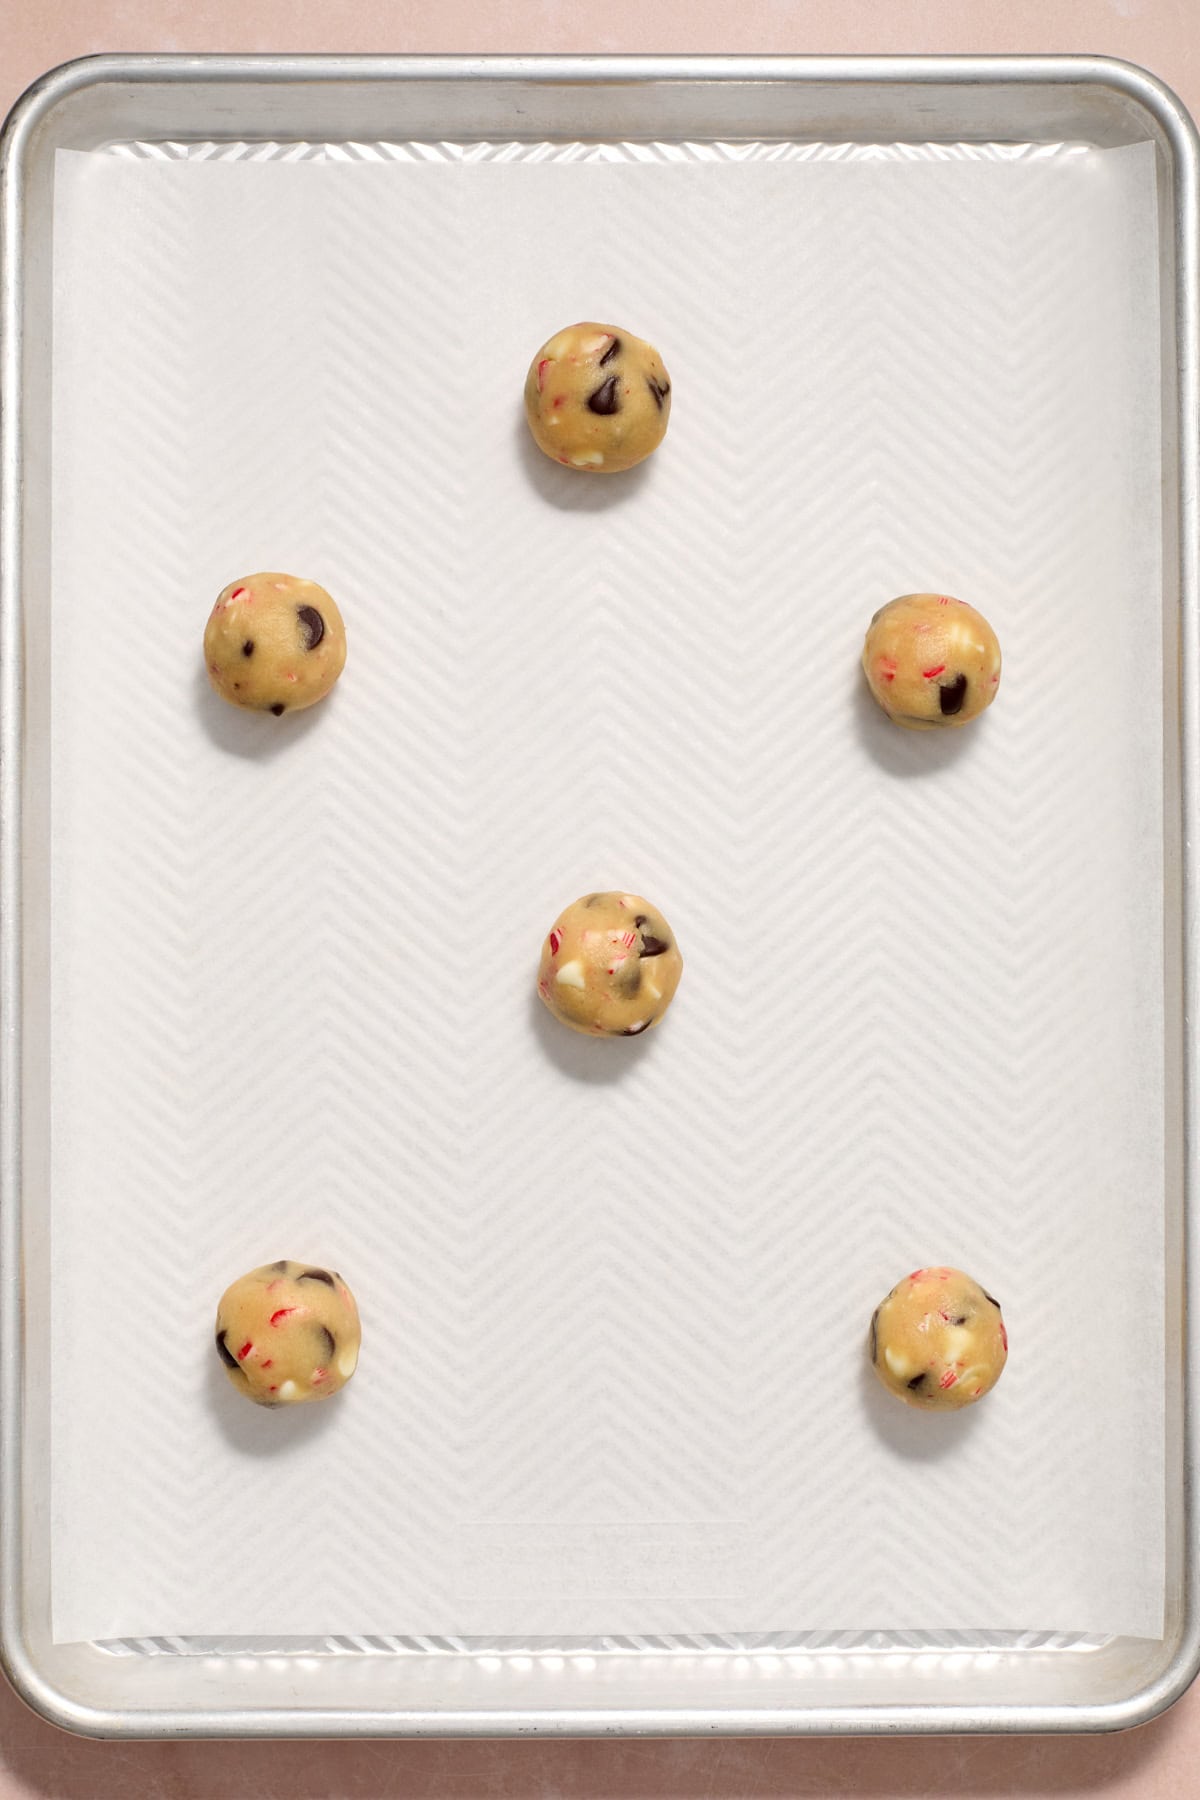
Step 9: Once chilled, arrange on a parchment paper lined cookie sheet about 2 inches apart. Bake until edges are slightly golden brown.
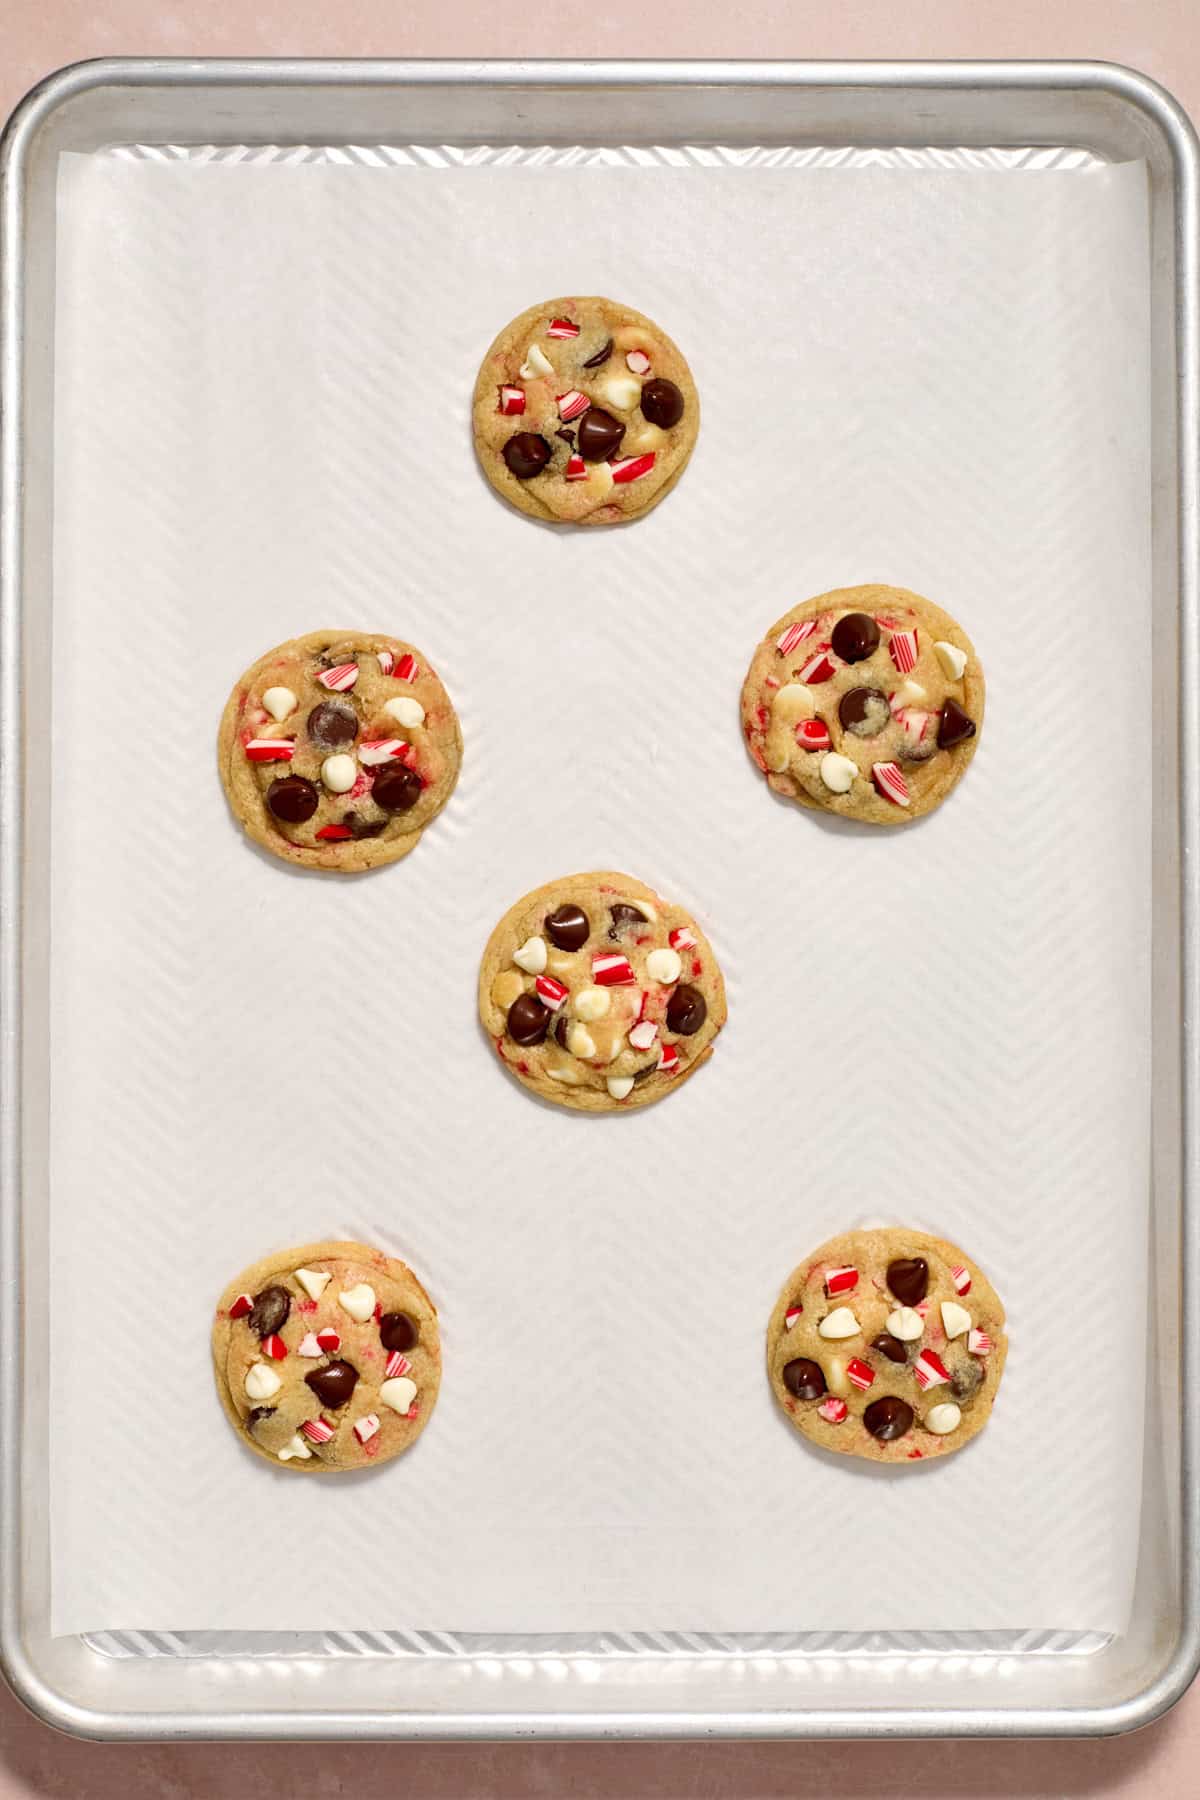
Step 10: When the cookies come out of the oven, use a biscuit cutter or wide mouth lid to shuffle them into nice round shapes (totally optional) and press a few extra chocolate chips and candy canes in to make them extra pretty, also optional.
Recipe Tips
- Too much candy cane near the edges of the cookie will run. Now this is the only issue I have with these cookies and I have been able to figure out a way for the most part to help keep the candy cane from running in all directions. When you scoop the cookies onto the cookie sheet, check around the edges to see if there are any big pieces of candy cane. If there are, either pull them out or try to press them into the dough. Having the candy cane run doesn’t ruin the cookie–it just doesn’t look quite as pretty!
- When in doubt, crush the candy canes REALLY SMALL. This will alleviate most issues with candy canes running. Just skip the big chunks–you will still love these!
- Chilling cookie dough is always a great idea. It helps to solidify the fats in the cookie so that when baking it takes longer for them to soften. No time to chill? Not the end of the world, but there will be a difference in the chewiness of the cookie.
- Always, always ALWAYS make sure that your baking soda is fresh. Old or expired baking soda can make your cookies flat. No one wants a flat cookie!
- I tried to make these simple to double the batch if you are wanting to make more to share with the people you love! I have made double the batch several times with great results!
- All the chips! The key to the best chocolate chip cookies is extra chips, right? Add whatever you like! I like to add more to the tops of the cookies fresh from the oven to get that melty chocolate look.
Storage
Store baked cookies in an airtight container at room temperature for up to 5 days. They will be at their best texture within the first 2 days.
To freeze these cookies, transfer them to a freezer safe container, adding a layer of wax paper or parchment paper between layers and freeze for up to 2 months. You can also freeze cookie dough. I suggest rolling into cookie dough balls first and then lining them on a plate or sheet pan and freezing them for about an hour or so before transferring to a freezer bag or container.
You can bake the cookie dough from frozen by adding about 2-3 minutes to bake time or bring to room temperature and bake from there!
Check out some of my cookie baking tips and FAQs here before you start baking these cookies!
Are Your Cookies Flat?
Flat cookies are often a result of one of the following:
- Not enough flour. I like to test one cookie in the very beginning. If it comes out too flat, I add a couple tablespoons into the cookie dough to help give them more lift and less spread.
- The dough is too warm. If you think you have the right amount of flour, the dough just might need to be chilled for a bit. Roll into balls and pop in the fridge for about 30 minutes before baking. It is also possible the the butter was too warm from the beginning and the creaming process was not the ideal temperature to really get lots of air into the butter and sugar mixture. This can also cause things to turn out a bit off.
- Cookie dough was over mixed. Over mixing cookie dough can cause dense, flat cookies. When adding the dry ingredients, only mix until it is incorporated and then stop.
- Your butter was too warm. Softened butter should still hold shape fairly well. If it becomes overly warm or soft, it can cause the cookies in the end to be not only a bit flat but also look somewhat greasy. When softening your butter, test it by pressing your finger into it. There should be a slight indentation, but it should not fully give and easily just press right through.
- Leavening agents are old. it’s possible that your baking soda is old or expired. Sometimes it can still be within the date range but had too much air exposure. In this case, you may just have to enjoy some flat cookies, sad but true.
Other Holiday Treats:
- Nutella Stuffed Ritz Cracker Cookies with Peppermint White Chocolate
- Cream Cheese Snowball Cookies
- One Bowl Small Batch Chocolate Chip Cookies
- Christmas Golden Oreo Truffles
- Snickerdoodle Cheesecake Stuffed Crescent Wreath
- Dark Chocolate Candy Cane Pretzel Bark
- Dark Chocolate Peppermint Puppy Chow
- Individual Cranberry Orange Crisps
- Maple Vanilla Spiced Pecans Recipe
- Nutella Crumble Bars
HUNGRY FOR MORE? Subscribe to my newsletter and follow me on Facebook, Instagram and Pinterest for all the latest!
Peppermint Chocolate Chip Cookies

Ingredients
- ½ cup unsalted butter, softened*, 1 stick
- ½ cup sugar
- ⅓ cup light brown sugar, packed firmly
- 1 ½ tsp vanilla
- 1 large egg
- 1 ½ cups flour** (204 g) see note!!, **If doubling the recipe, please see notes for grams!!
- ½ tsp sea salt
- ½ tsp baking soda
- ¾ cup white chocolate chips
- ¾ cup dark or regular chocolate chips
- 5 candy canes, crushed into fine pieces, about 1/4 cup plus a tablespoon
Instructions
- Using a hand or standing mixer, cream butter, sugar and brown sugar until nice and creamy. (Mix for at least 3-4 minutes –don't skip this part!*) Add in vanilla and egg and beat until incorporated. You don't want to over do this part or cookies will be stiff. Just enough until the egg is mixed in (about 20 seconds.)
- In a separate bowl, whisk together flour, sea salt and baking soda. Mix dry ingredients into wet ingredients until combined.
- Stir in chocolate chips and candy canes.
- Chill the dough for about 30-60 minutes, seal tightly and chill up to 3 days before baking. (Allow to sit out 10-15 minutes before you bake them if you chill longer than about 2 hours.)
- When ready to bake, preheat oven to 350°F. Roll dough into balls or use a cookie scoop and line on a parchment lined baking sheet. Bake for 9-12 minutes or until cookies look slightly golden. When cookies come out of the oven, you can "pull them together" by putting a circle cookie cutter or biscuit cutter around each cookie and gently scoot them to form nice round cookies. Do not overbake your cookies–pull them out just before you think they are done.
- Allow to cool for several minutes before transferring to your mouth–er, a cooling rack.
Video
Notes
Nutrition
Nutrition information is automatically calculated, so should only be used as an approximation.
Shop This Post:
 Buy Now →
  Buy Now →
  Buy Now →
 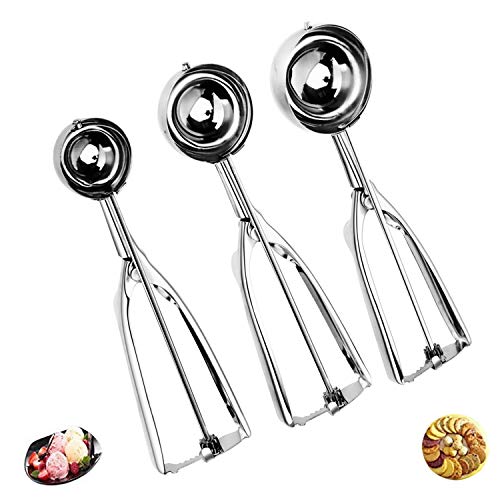 Buy Now →
  Buy Now →
Yummy! These cookies are great! I followed the recipe exactly and they came out perfect! Two thing: The first is, if you cream the butter and sugar with a hand mixer, it will take a lot longer than 4 minutes. It took my mixer about 10 minutes. The second and most important thing is, the flour measurement. If you don’t have a scale, make sure you at least sift the flour, but your cookies will be better with a scale.
Love these! So delicious! Best cookies I’ve made!
In the recipe it says 1 stick of butter for standard recipe & if you double or triple recipe, it still says 1 stick of butter. Thinking this is a typo? The cup measurement increases, but it still says 1 stick. Please clarify.
It’s also a bit challenging creaming the two sugars w butter to a fluffy texture. Not getting fluffy, but seems well mixed after 4-5 minutes.
Last question, do I use mixer or fold in flour when adding to the sugar/butter mixture? Thanks
Hi! Yea, I cannot quite get it to work the way I want it to when doubling and tripling the recipe–trying to find a good solution. As long as your butter and sugar have been beaten well and they are fully incorporated, you should be ok. Is the butter you are starting with still quite firm? Also, beat the flour mixture in–I need to adjust the wording of that, thanks for spotting it!
Really good but is the measurement of the chocolate correct??? 3/4 cup each seems like too much to me..
Hi! That is what we add, and we press more into the tops after they come out of the oven sometimes–you are welcome to adjust to your liking!
To. Die. For! So good, gooey, flavorful, and sinful. I love them, my husband loves them, and I expect anyone to whom I offer one will love them. It goes straight to my Keepers collection of recipes.
I am so so so happy these were such a hit for you because they are our family’s all time favorite Christmas cookie!