This post may contain affiliate links.

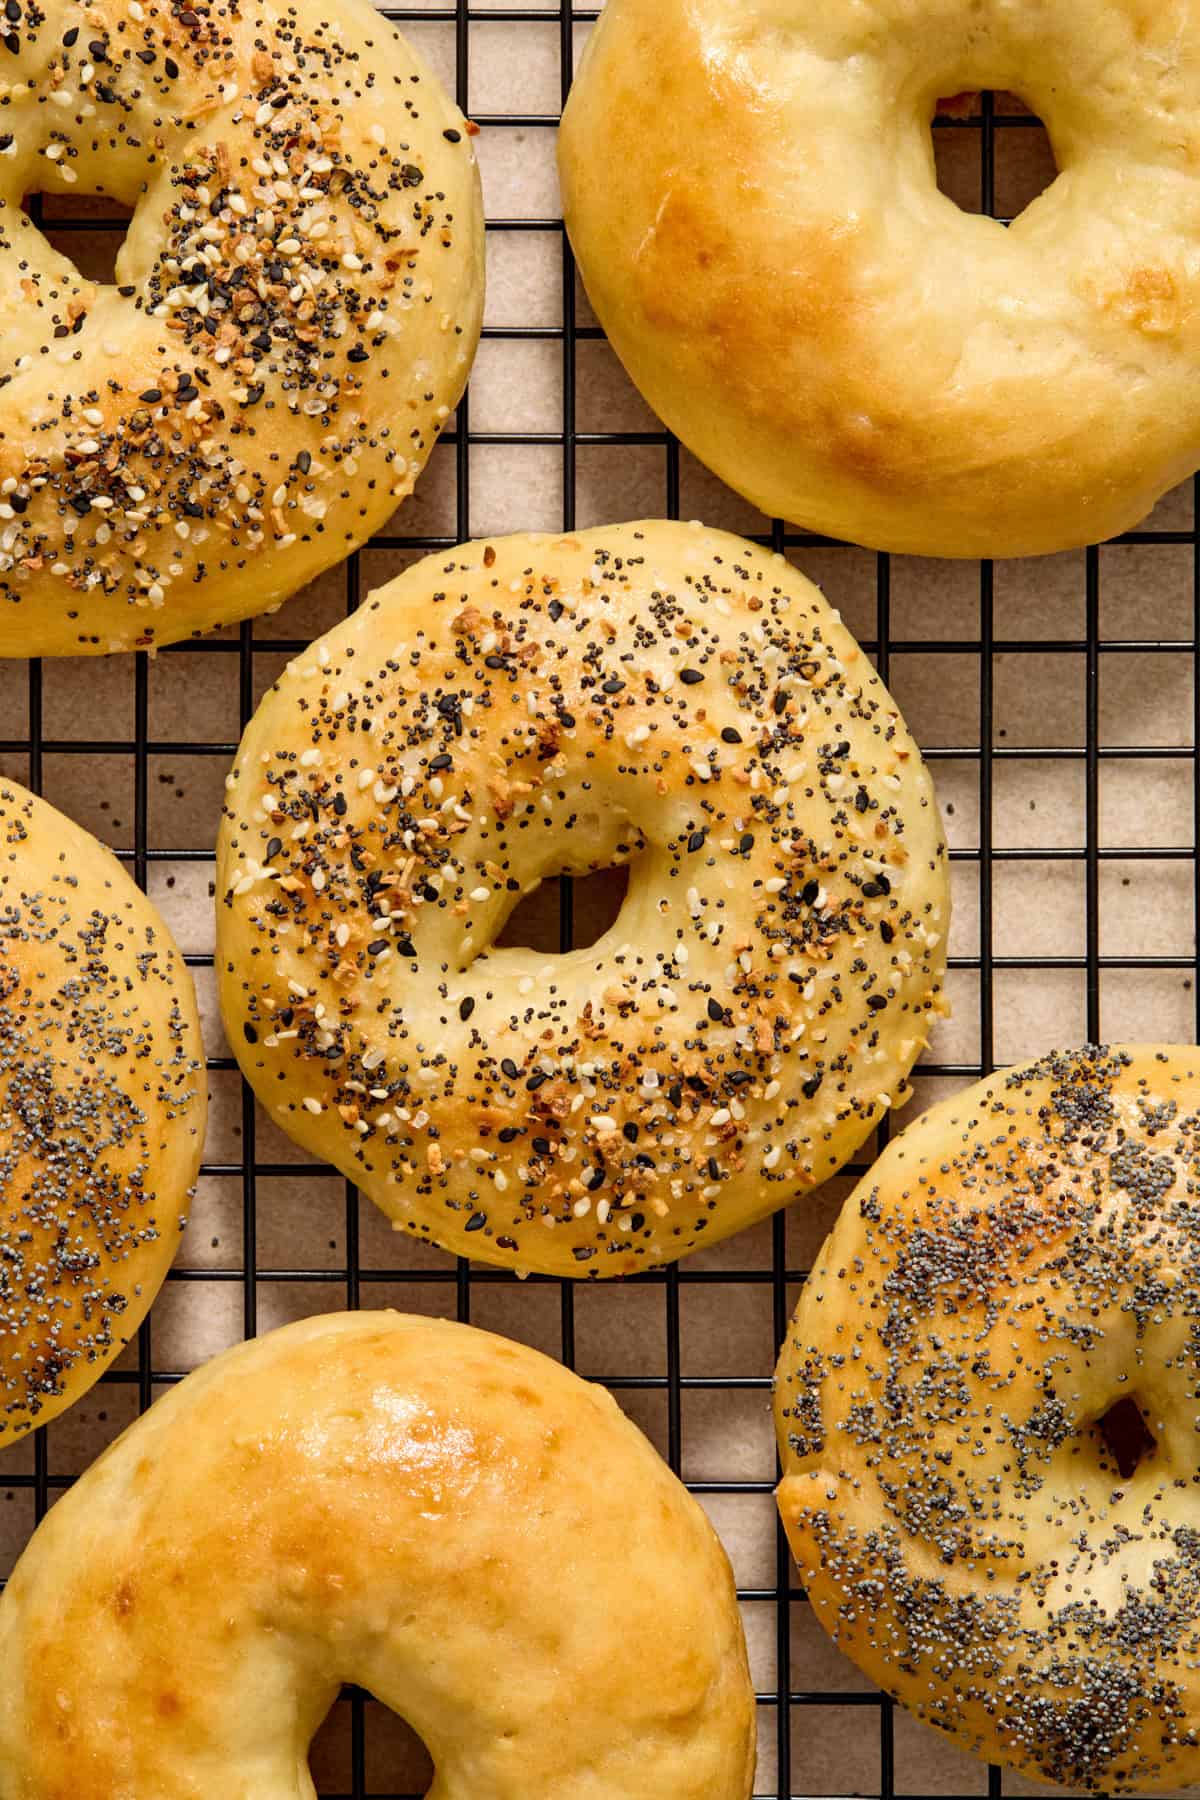
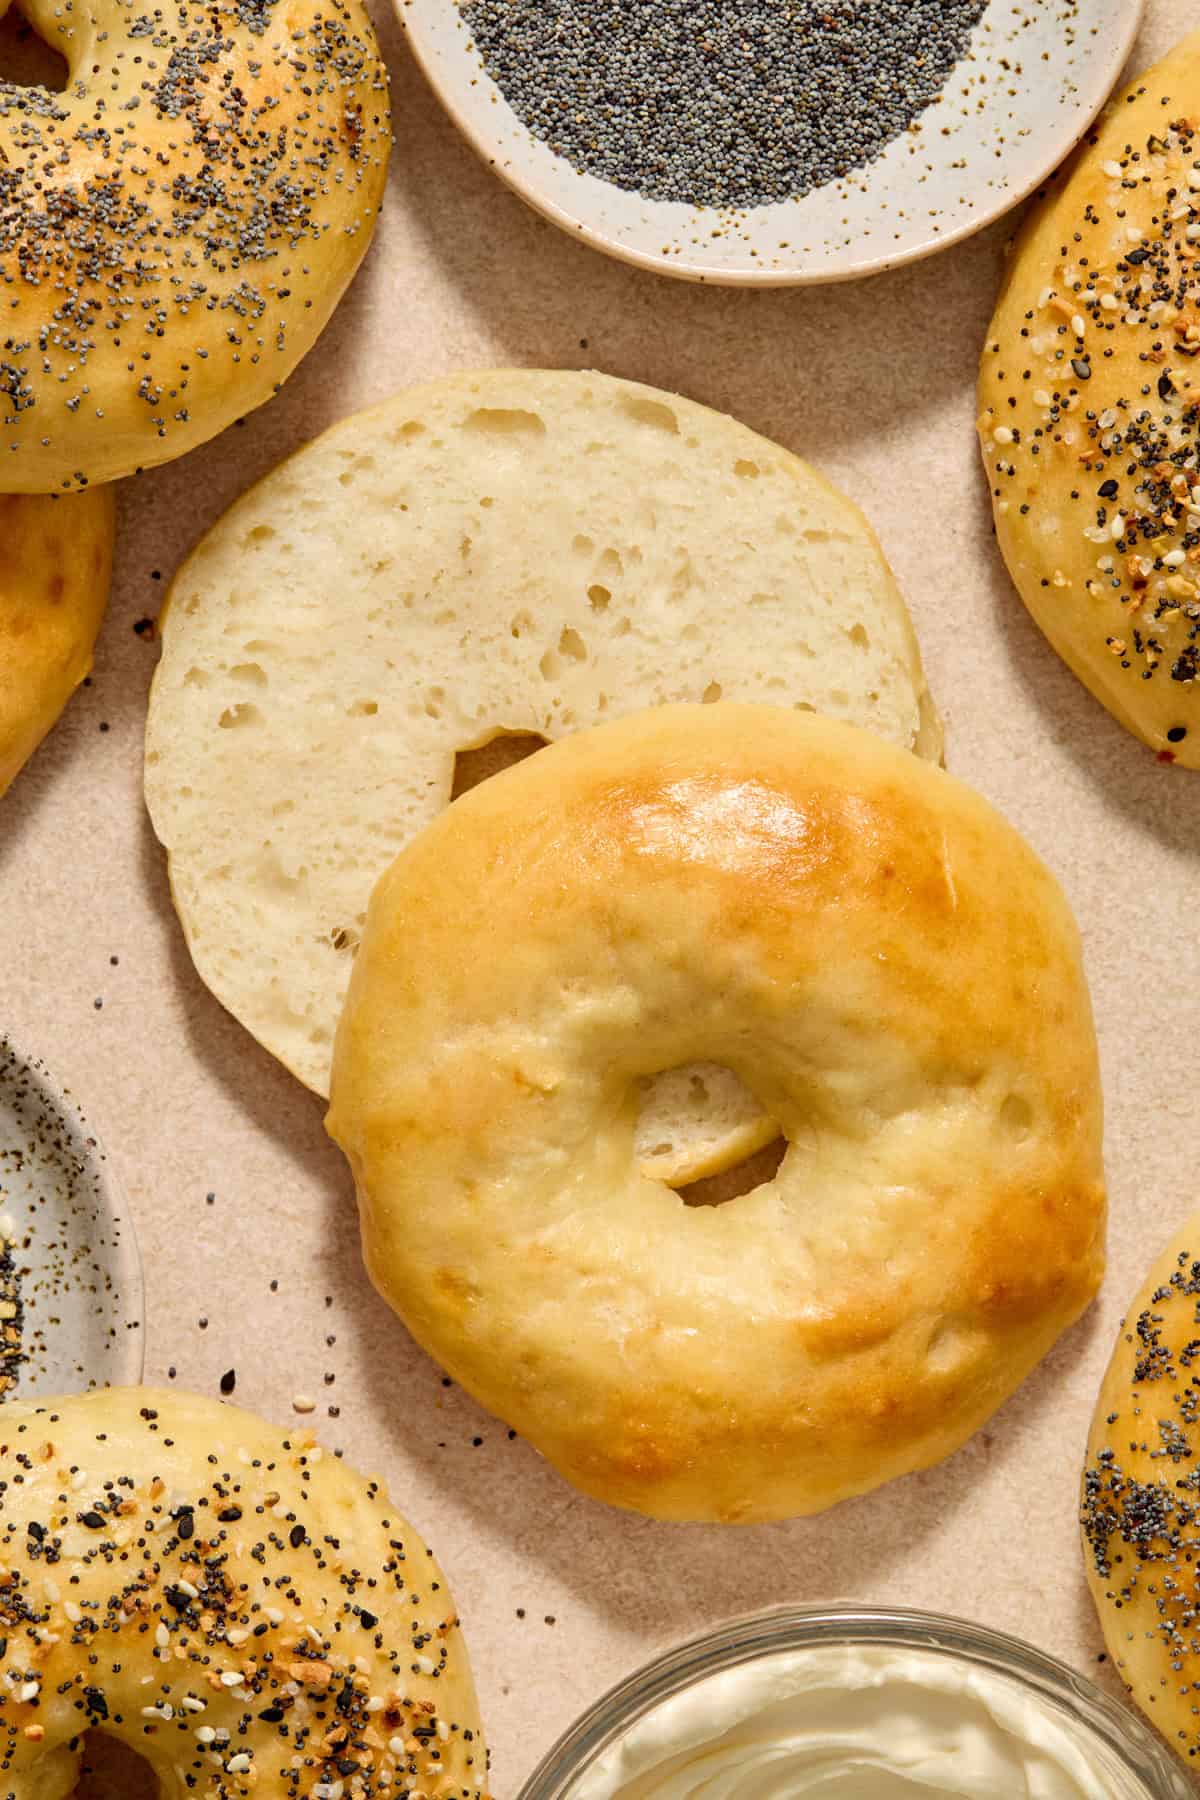
These simple, soft and chewy and protein packed Greek Yogurt Bagels are so easy to make they are almost too good to be true! But they are so real! No yeast needed, only 6 ingredients and about 10-15 minutes to prep, no boiling needed. Each bagel packs in 12 grams of protein and are great for sandwiches, smothered in cream cheese and more!
We have been making these Easy Cinnamon Raisin Bagels for years and over that time, I have had quite a few requests as to how to make a plain variation.
So now it’s here! And this simple Greek yogurt bagel recipe is going to WOW everyone in the family.
Only a handful of kitchen staples and less than 20 minutes to get these in the oven–what are you waiting for?!
Need some more recipes to use up that Greek yogurt? Try these as well: Peanut Butter Chocolate Greek Yogurt Bark, Whole Wheat Greek Yogurt Donuts, Peanut Butter Yogurt Fruit Dip Recipe and these Peanut Butter Greek Yogurt Overnight Oats as well! And make sure to try these Cottage Cheese Waffles as well for a protein kick!
Why We Love These Greek Yogurt Bagels So Much
- They are SO easy to make. Mix, knead (like 10 times, not that much!), form and bake! This is one the kiddos will even love to pitch in on and can easily participate!
- Simple ingredients. We have all the ingredients for this simple breakfast recipe (and beyond) on hand at all times–a real no brainer in general.
- Freezer friendly. We make these and freeze half the batch to have them on hand in a pinch. They can last up to 3 months in the freezer!
- Super kid friendly. The kiddos LOVE these.
- Very versatile! You can add a variety of different toppings, serve these up as sandwiches, with cream cheese and so much more.
Ingredient Notes
See full list of ingredients with exact measurements below in recipe card.
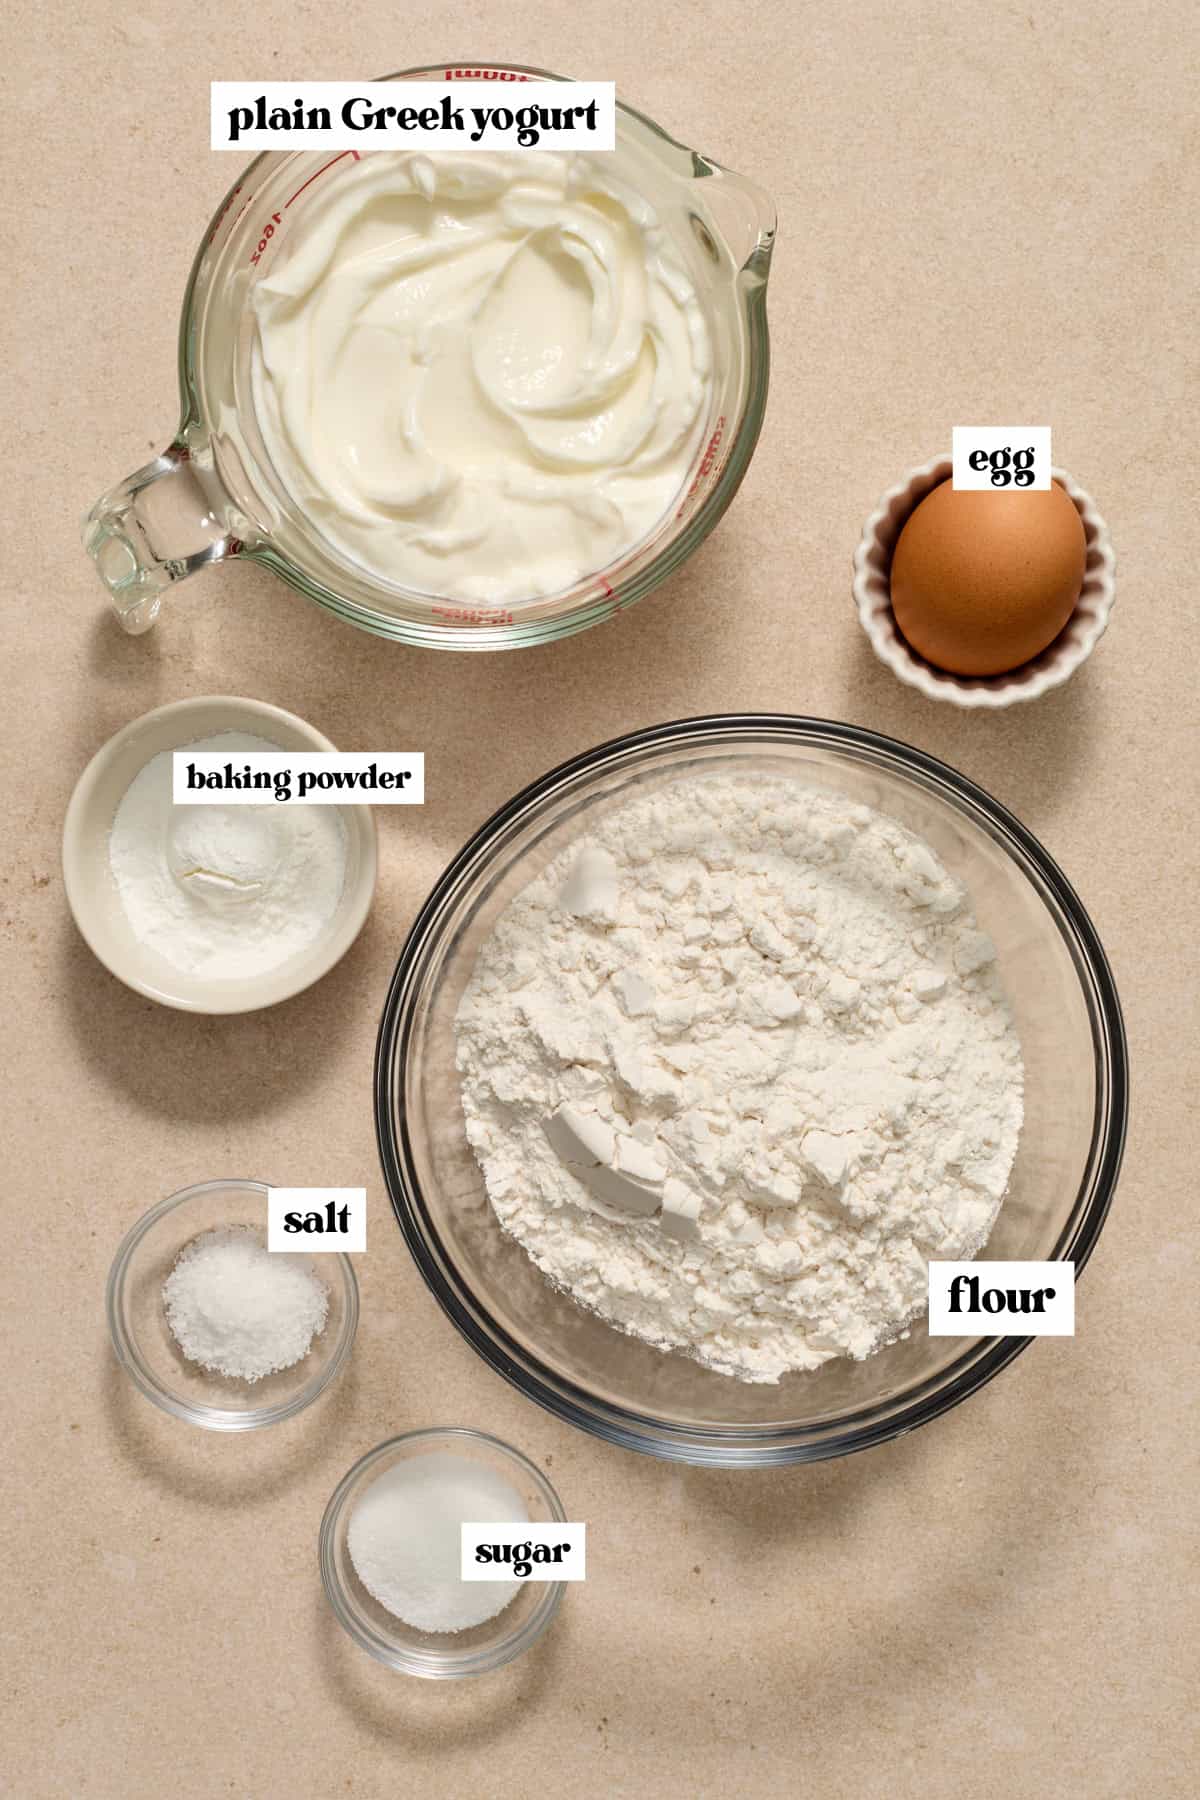
- plain greek yogurt: do not sub regular yogurt for the greek yogurt in this recipe. You will not have the same results. I prefer full fat greek yogurt when making these high-protein bagels.
- sugar: you can omit the sugar if you don’t want to add it. I like the addition of it to give the bagels another subtle layer of flavor that others may not.
- You can use an all purpose 1:1 baking gluten free flour instead of the regular flour to make these bagels.
Recipes Variations
Feel free to think outside of the box for any and all of your favorite toppings. You can stir in some garlic or onion powder when mixing the dough or even some fresh herbs. Top them with shredded cheese, or brush with butter and herbs fresh from the oven.
How to make this recipe

Step 1: Whisk together the dry ingredients in a large bowl.
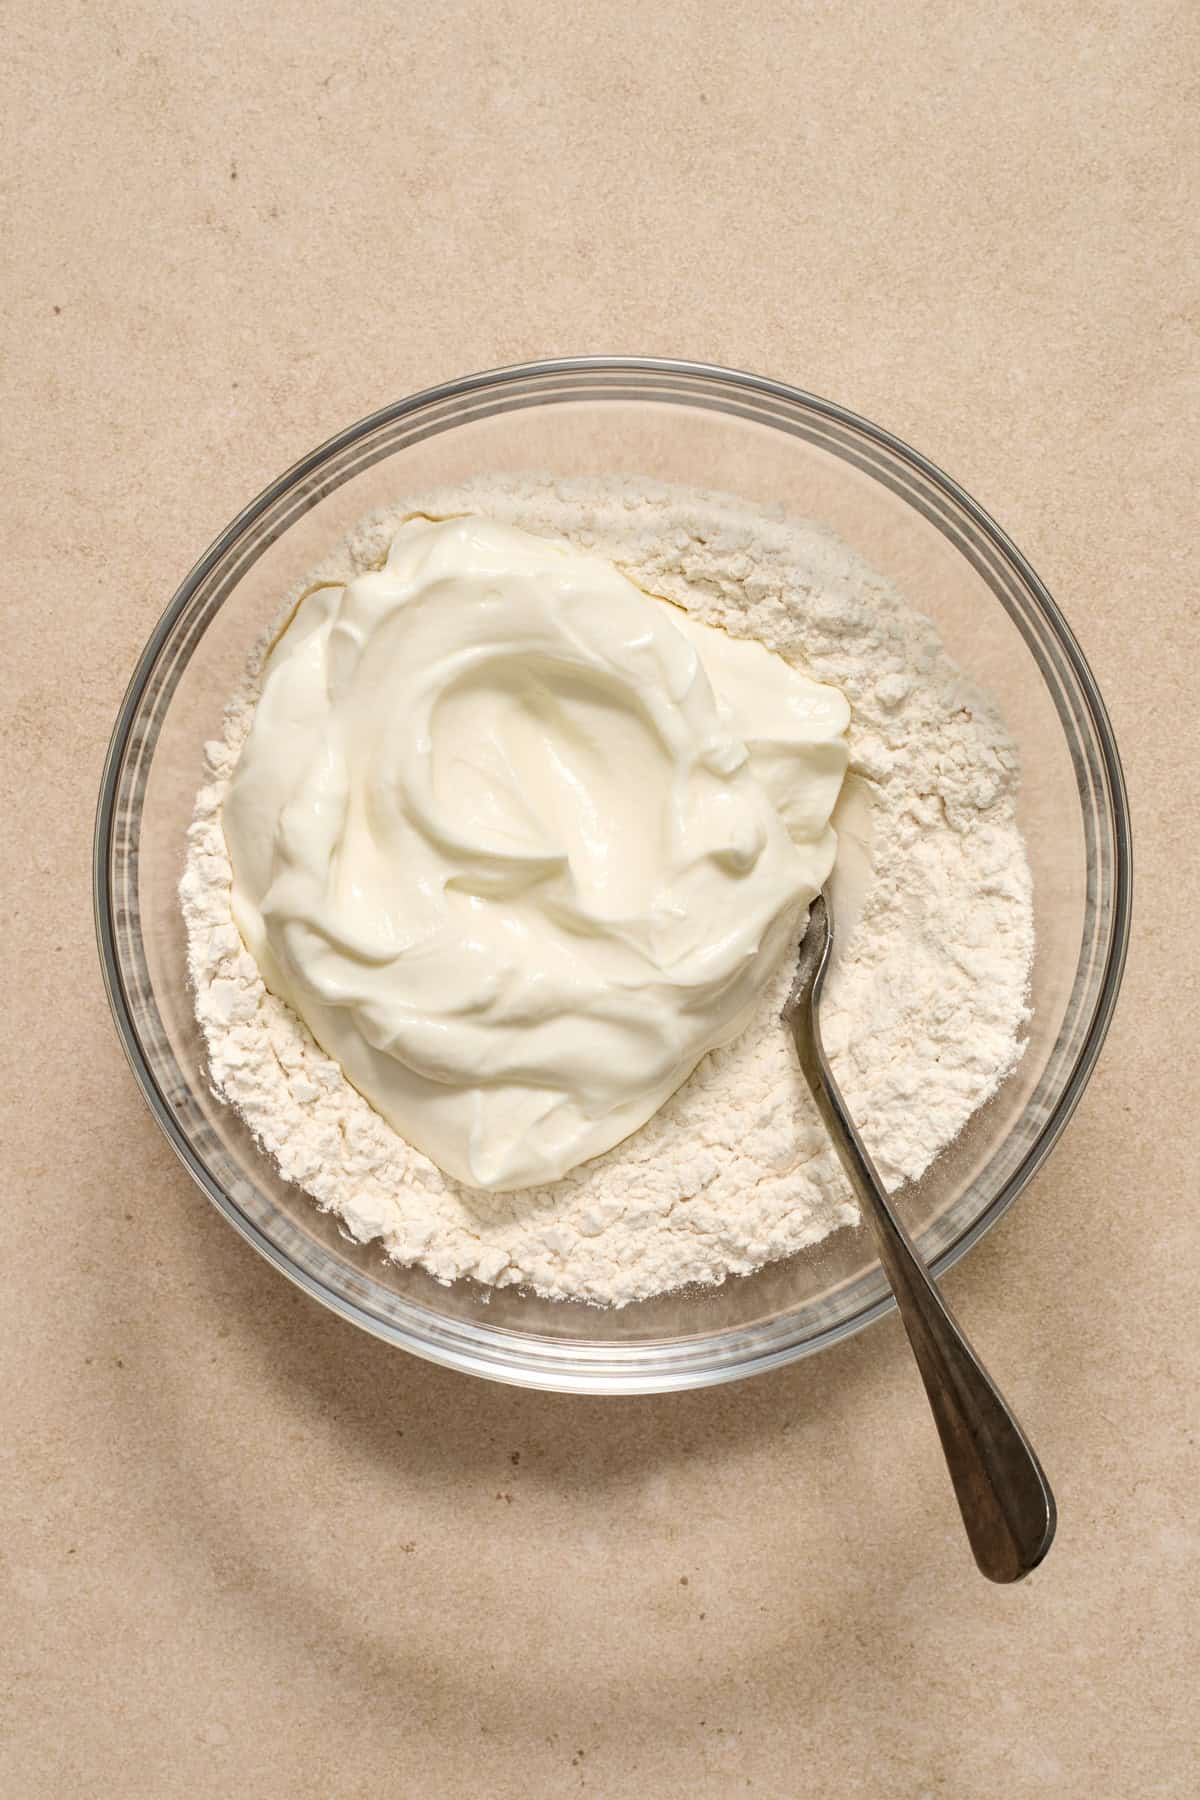
Step 2: Add in the Greek yogurt.
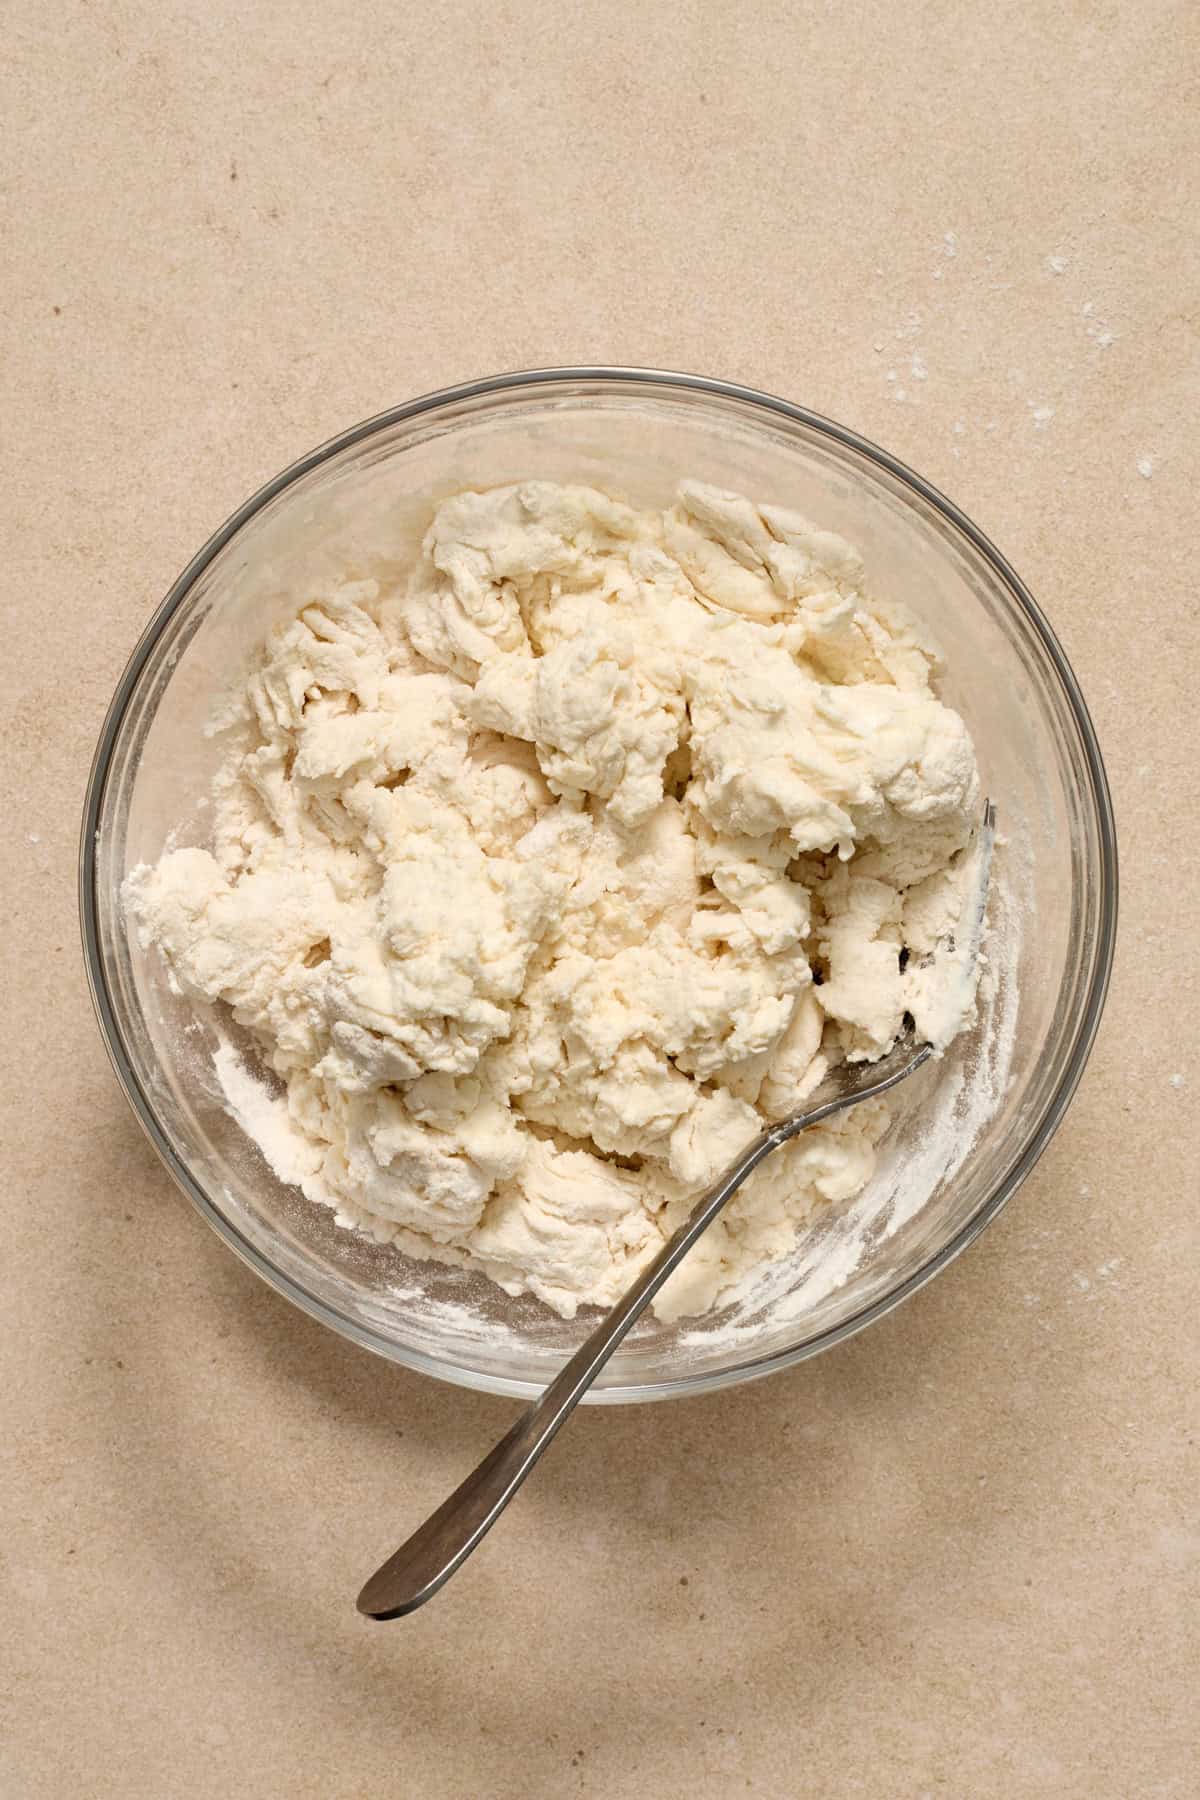
Step 3: Stir or use your hands to combine until a dough begins to form.

Step 4: Mixture will be somewhat crumbly or clumpy. If it seems too sticky, you may need a touch more flour. If the dough seems dry at all, add a teaspoon or so of water to help or you can add another spoonful of yogurt. Pull the dough into a large ball and place on a lightly floured surface. Knead the ball of dough about 10-15 times.

Step 5: Form into 6 equal sized balls. Roll each of the balls out into a long, thin (no more than about 1 inch) wide piece. Form them into circles and pinch the ends together well to combine into one. (You can also form the dough into balls and then poke a hole with your finger and then twirl it around your finger to enlarge the hole.)
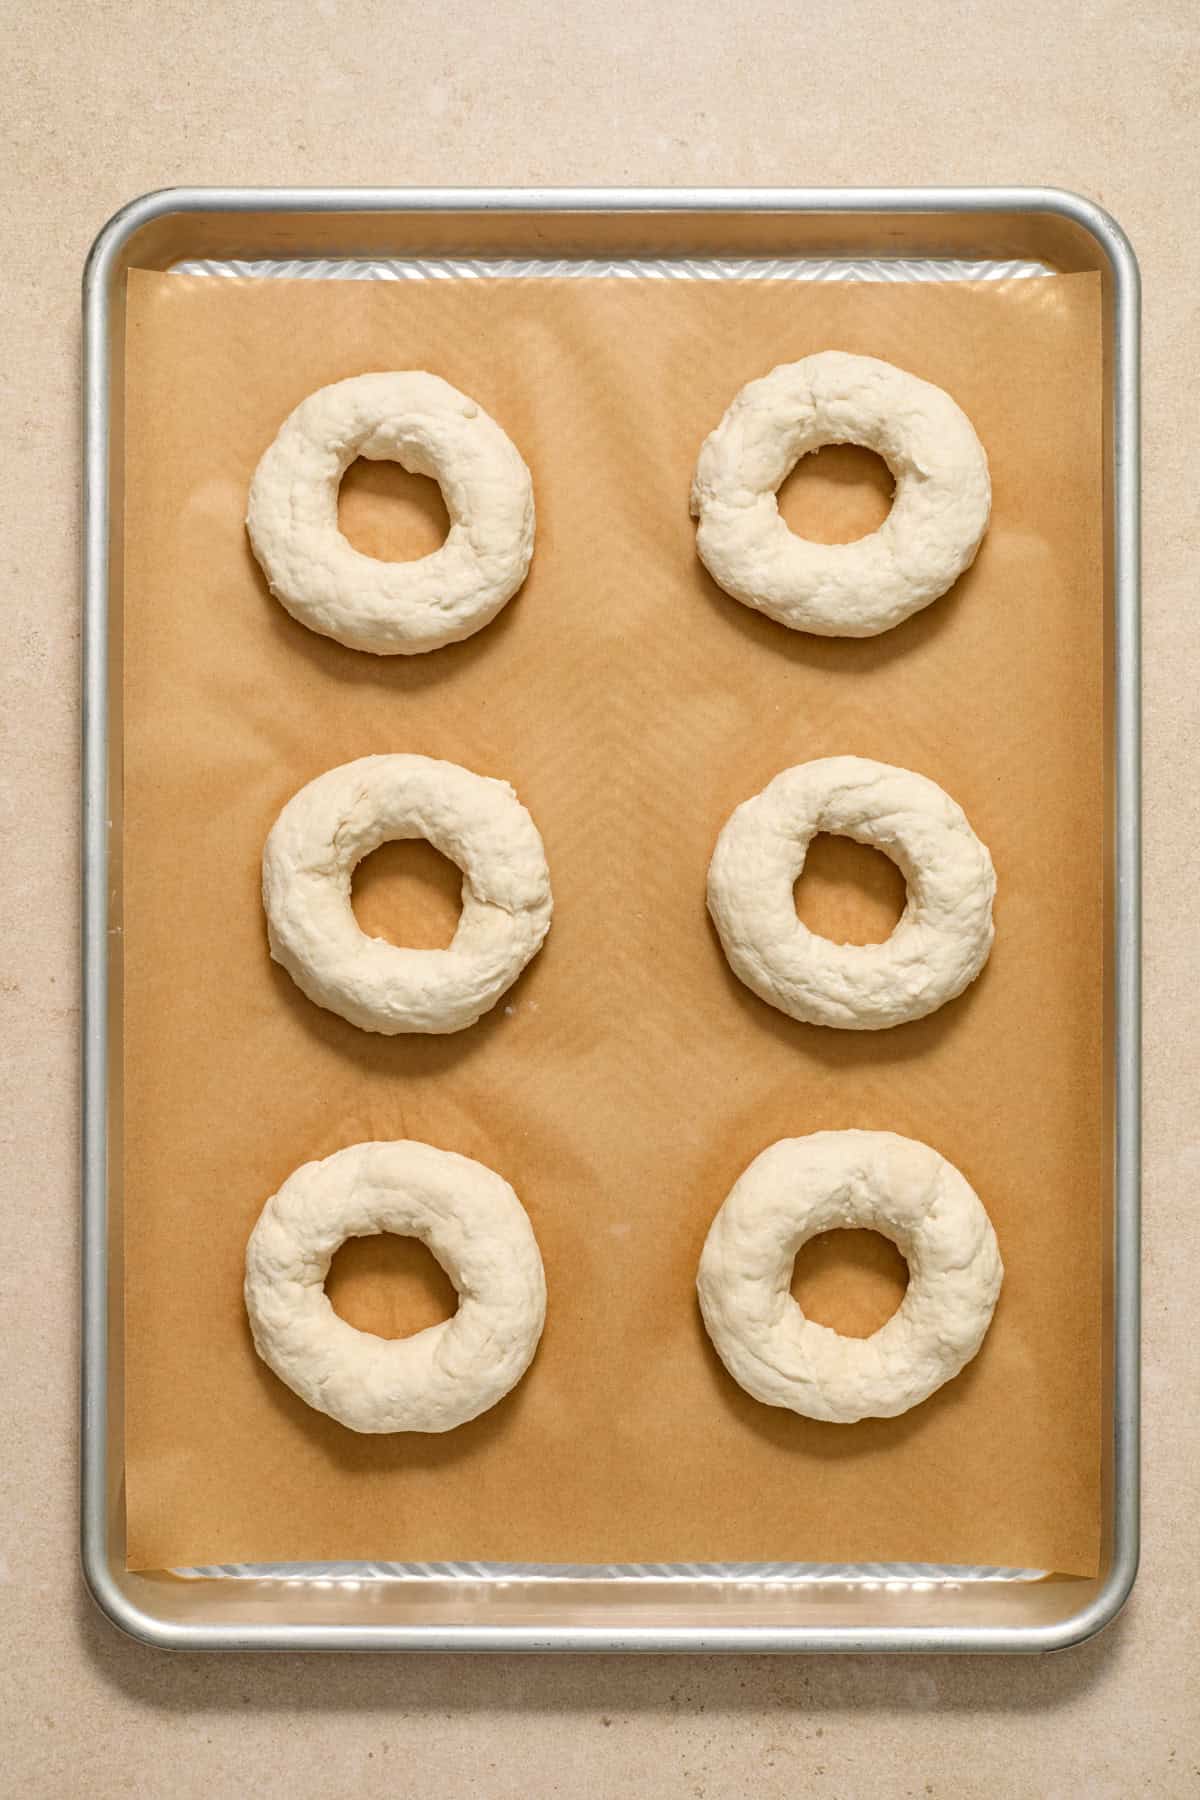
Step 6: Place on parchment paper lined cookie sheet.
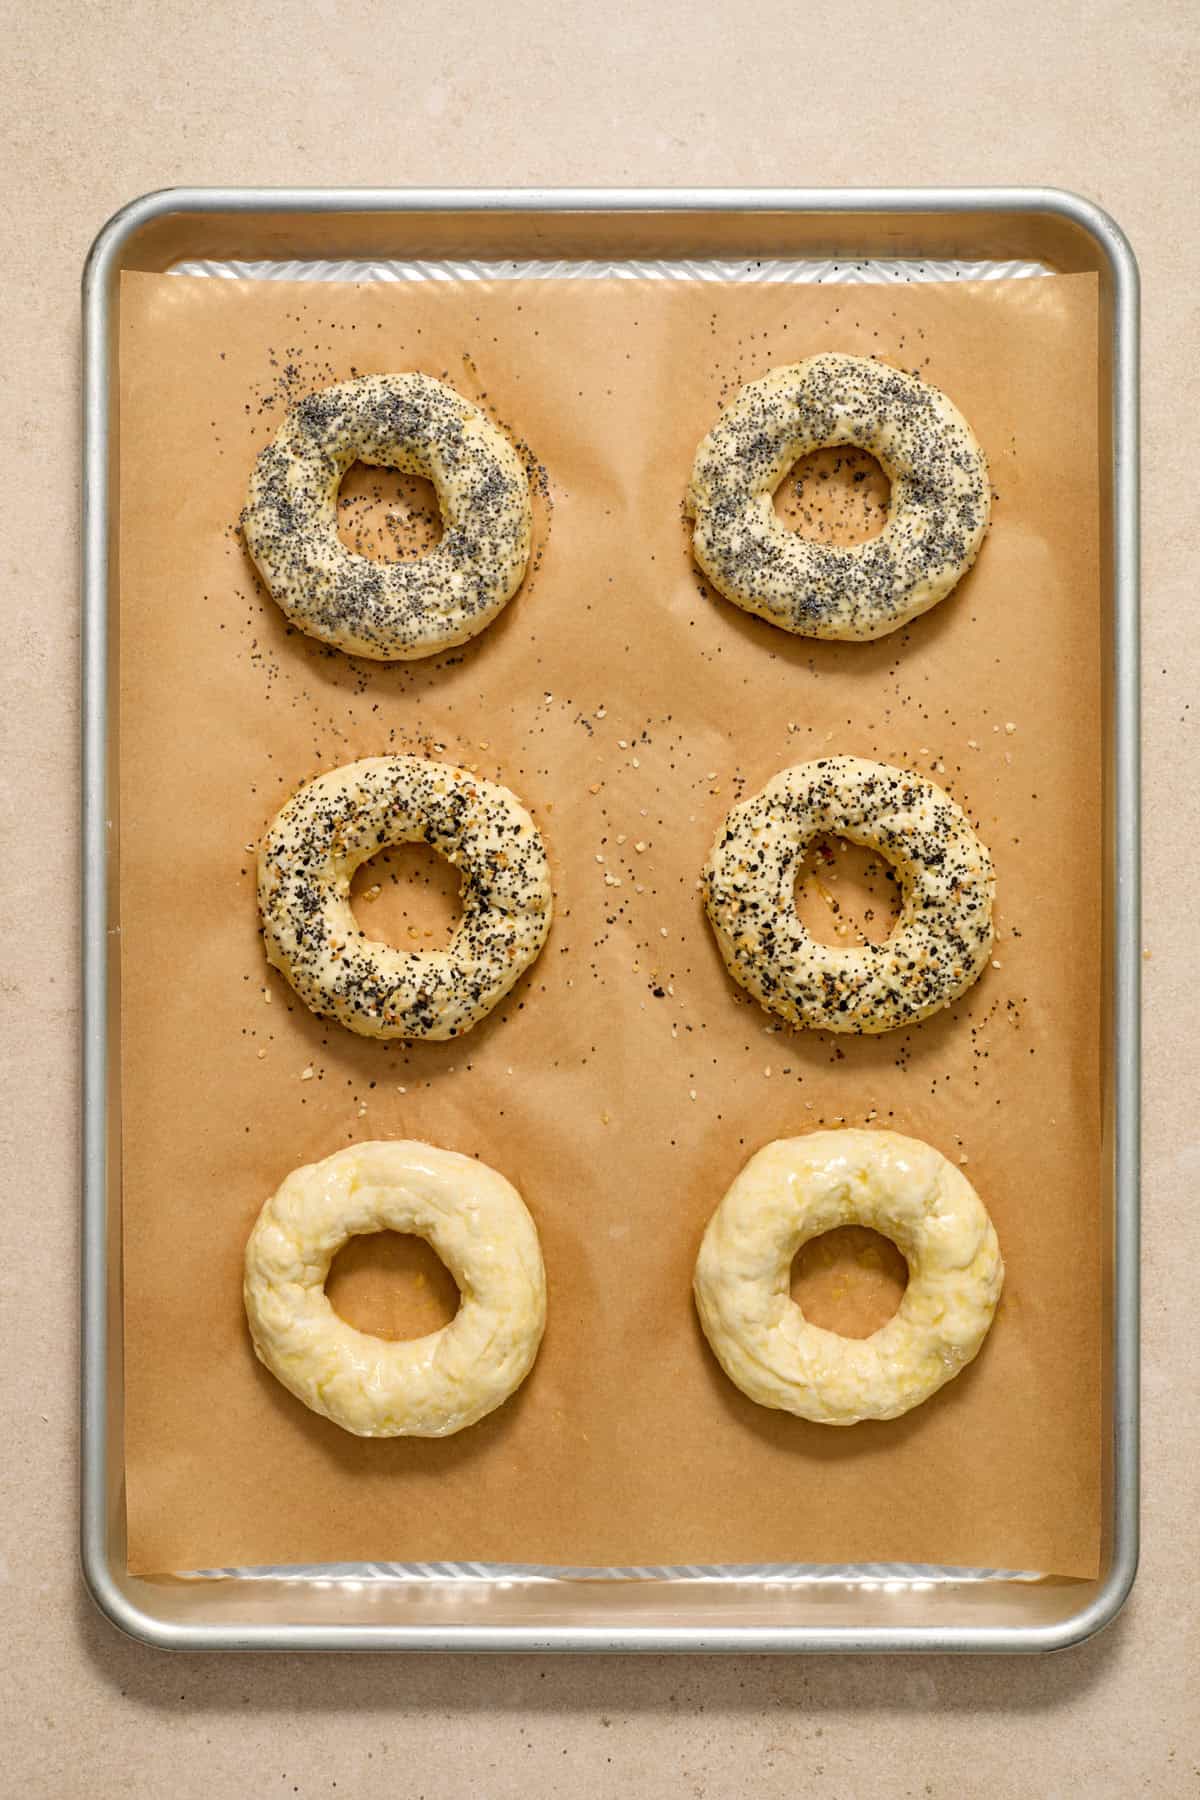
Step 7: Whisk the egg in a small bowl and then spread a generous layer of the egg wash on all the bagels to cover. Get into the middle of each bagel as well. Sprinkle any toppings on your bagels at this time.
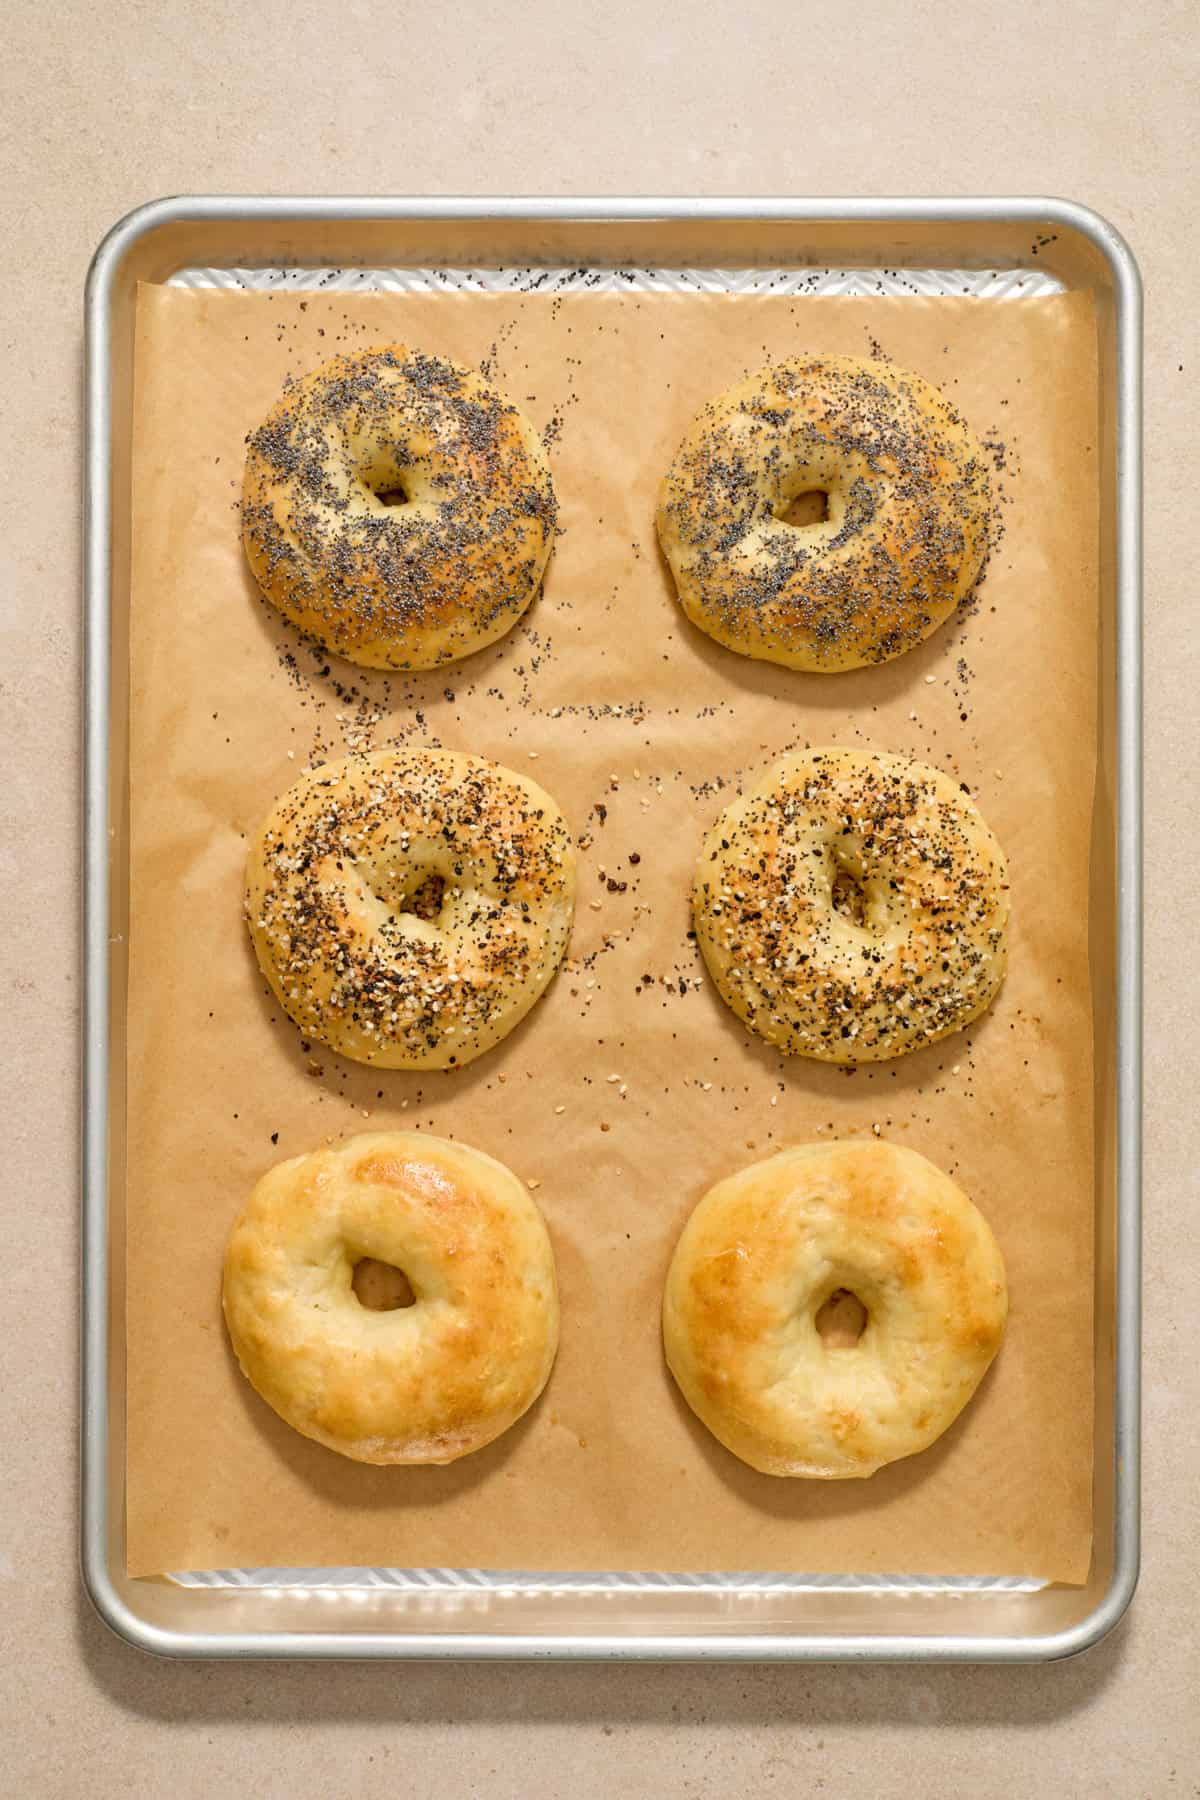
Step 8: Bake and enjoy! Warm from the oven they are so so delicious! Try not to over bake these bagels or they will be too dry inside.
Recipe Tips
- We use a full fat or low fat greek yogurt when making this bagel recipe. A fat free greek yogurt can work, but we have found the addition of some fat to make the flavor and texture much better. I usually use Fage brand.
- Make sure your baking powder is not expired. If it’s not fresh, these bagels will not rise–it’s a must when making this recipe.
Storage
Wrap bagels in plastic wrap and store at room temperature for 1-2 days or store in an airtight container in the refrigerator for about 4-5 days. To freeze, allow them to cool completely. Wrap individually and then place in a freezer safe bag or container. Freeze for up to 3 months!
Common Questions
You do not need to boil these bagels. If you want more of a traditional flavor and texture of bagels, you certainly can, but this recipe is a quick and easy variation and does not require boiling–we think the bagels are still tasty and have a great texture.
Recipes To Serve With These bagels


HUNGRY FOR MORE? Subscribe to my newsletter and follow me on Facebook, Instagram and Pinterest for all the latest!
Greek Yogurt Protein Bagels

Ingredients
- 2 c all purpose flour
- 1 ¾ c Greek yogurt, we use full fat greek yogurt
- 4 tsp baking powder
- 1 ½ tsp sugar
- ¾ tsp sea salt
- 1 egg
- optional toppings: everything bagel seasoning, poppy seeds, sesame seeds, flakey sea salt
Instructions
- Preheat oven to 375°F.
- Combine flour, baking powder, sugar, and sea salt. Use a whisk or fork to mix.
- Add in Greek Yogurt and mix well to combine. Mixture will be somewhat crumbly or clumpy. Pull the mixture together into one ball and transfer it to a lightly floured surface. (if it seems a bit dry, add a tsp of water or you can add a small spoonful more of yogurt)
- Knead the dough about 10-15 times and then divide it into 6 even pieces. (you can cut into it or just pull it apart, both work fine!)
- Roll each piece into a thin (about 1 inch or just less in diameter) long rope and then make a circle and join the ends trying to press them together. Place on a parchment lined baking sheet. Repeat with the rest of the bagels.
- Whisk the egg for the egg wash in a small bowl. Brush the egg wash all over each bagel, getting every part of the bagel that is showing, including the middle of the bagel. Add any optional toppings at this time.
- Bake for about 19-23 minutes or until golden brown. Allow to cool before serving, or heck, eat them warm–yum! (you do NOT want to overcook these, so grab them the sooner than later.)
Notes
Nutrition
Nutrition information is automatically calculated, so should only be used as an approximation.
Shop This Post
 Buy Now →
  Buy Now →
  Buy Now →
My batch was sticky. I couldn’t knead it because it was stuck to the surface and my hands. Not sure what I did wrong. Any suggestions??
This usually is just a sign that you need a bit more flour. We all measure flour a bit differently, I didn’t add weight to this recipe because the flour amount can certainly vary slightly based on yogurt used, etc. If it’s sticky, just add another couple tablespoons of flour until it seems to be kneadable. Hope that helps!
I think I love you!! ❤️😅 I made my batch this morning and it came out MUCH BETTER than ANY protein bagels I’ve ever made. I’m super stoked! Thank you so much for sharing your wonderful recipe!
Awwww this makes me so so happy to hear!
Oh.My.Goodness! These and the cinnamon raisin bagels are wonderful! Just made 6 of each (poppyseed on 3 of these plain bagels) and I am absolutely thrilled with the results. Actually made a sandwich on a poppyseed bagel after they cooled. I will share these two recipes with all my friends. A+++++ Thank you for this recipe.
Amazing to hear!!!! I have some of these in the freezer now–thanks for the reminder, ha!
Hi! Mine came out a little too flat. Did you use the oven on conventional or convection mode?
I use conventional. Make sure that your baking powder is super fresh for sure!
Currently on my 3rd batch in the last month–we can’t stop making them–hope you love them as much as we do!