This post may contain affiliate links.

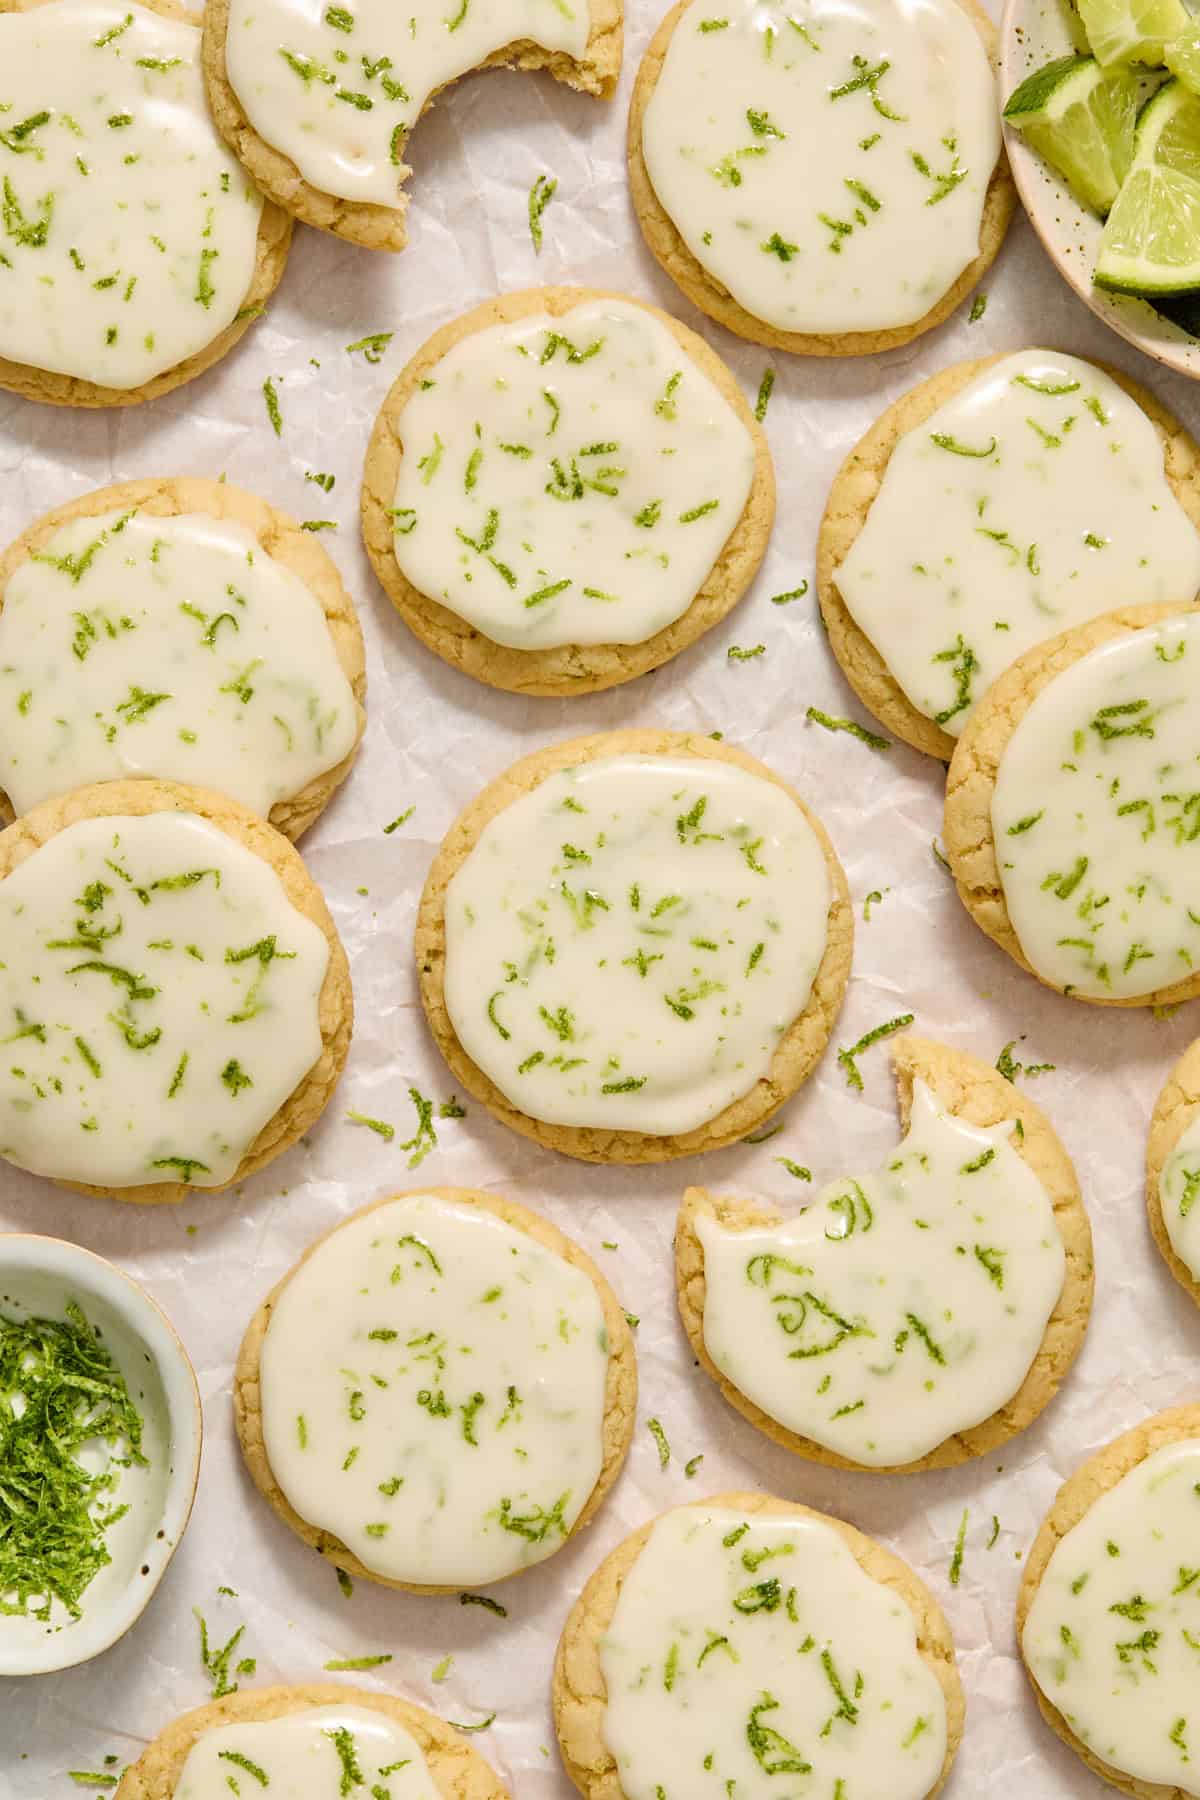
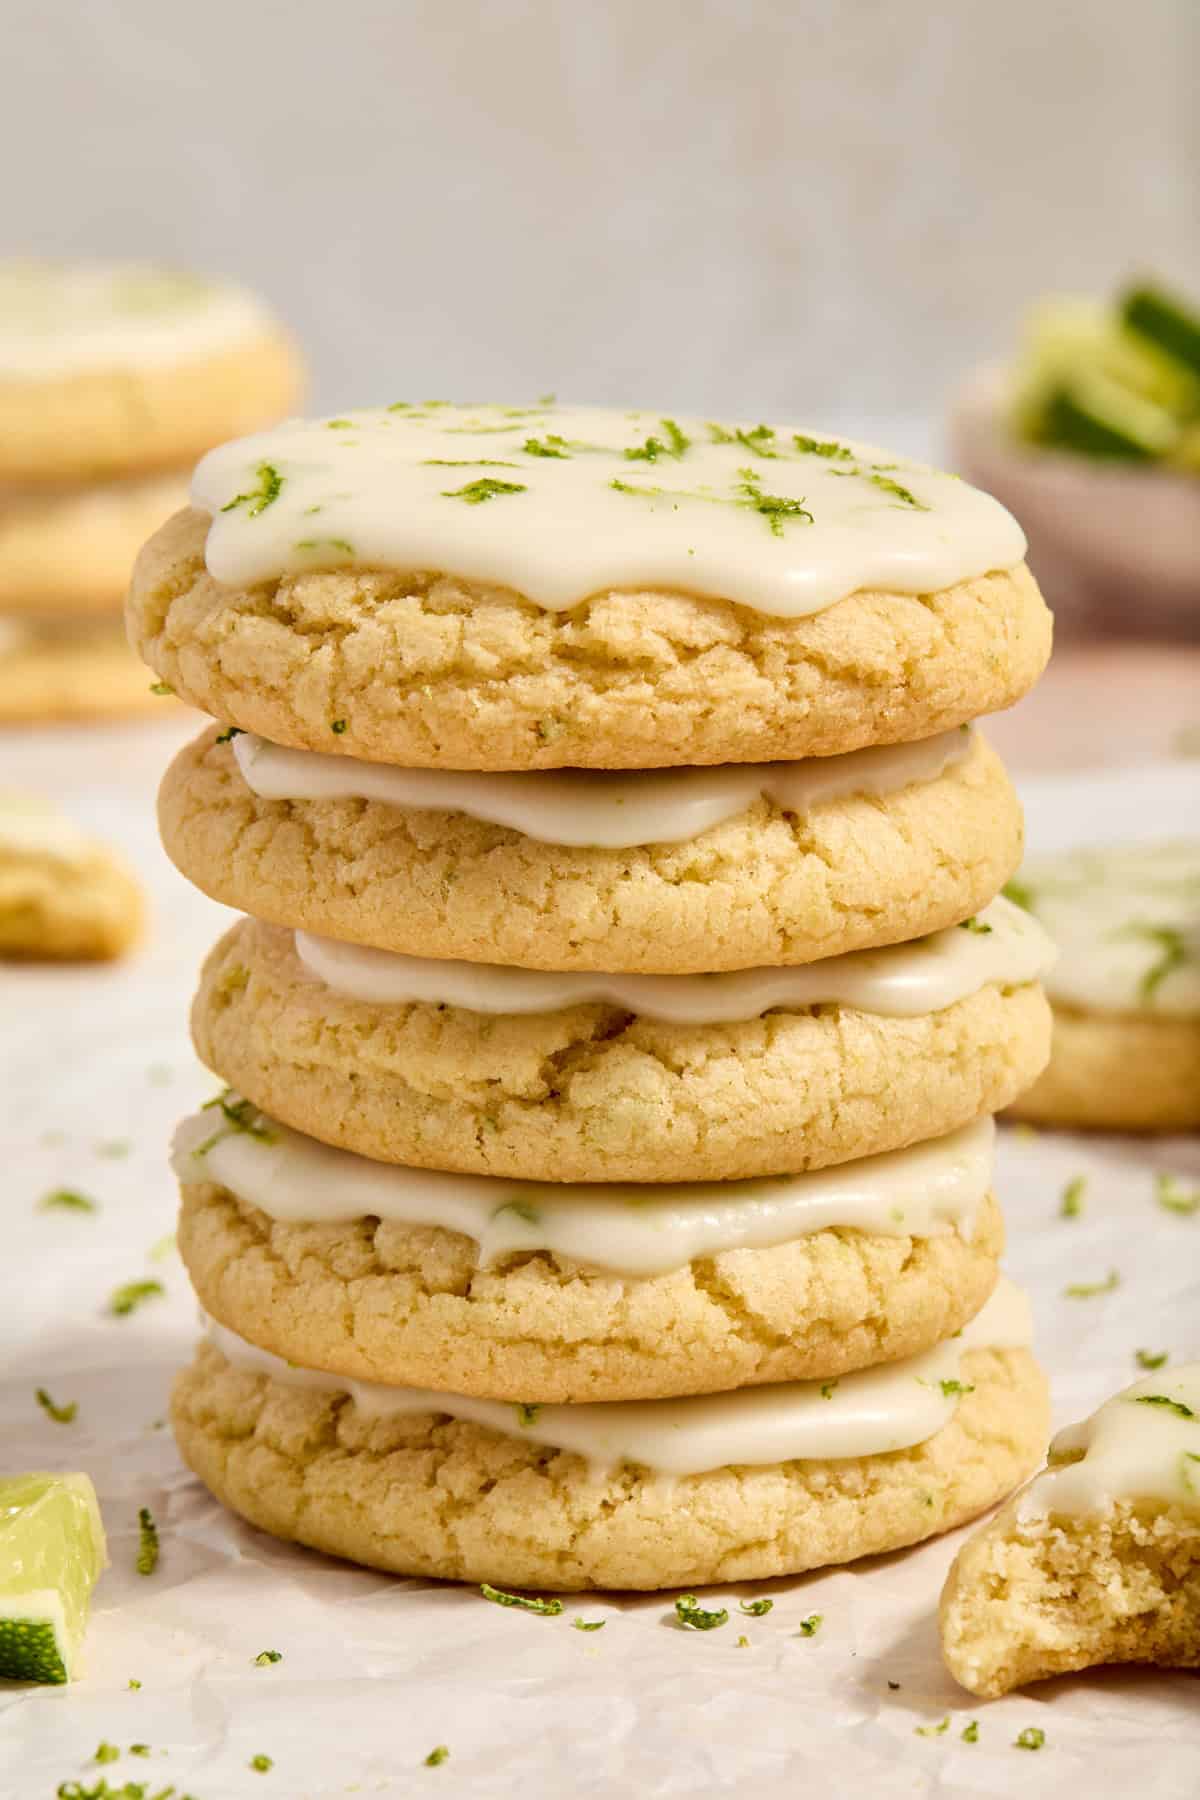
Move over key lime pie, these soft and chewy Key Lime Cookies are so refreshing and delicious. The perfect texture cookie iced with a key lime glaze–these simple cookies are every lime lover’s dream come true! Only 10 minutes to prepare the cookie dough!
Citrus and cookies is seriously the best. Orange cookies, lemon sugar cookies and now these chewy key lime cookies. I cannot get enough, especially when the sun is shining!
I mean, I will never deny a chocolate chip cookie, but there is something so refreshing about these lime cookies that make them so irresistible and a great way to switch things up a bit.
Check out some other favorite cookie recipes: Chocolate Cake Mix Cookies, Ginger Cream Cookies, Gluten Free Almond Flour Oatmeal Chip Cookies or these Oreo Chocolate Chip Cookies.
Why You Will Love These Key Lime Cookies
- Soft and chewy texture. If you love soft chewy cookie recipes then these will be a treat for you! Baked so that the edges are just starting to set so that you have the right amount of chew in each bite!
- Super refreshing. Nothing beats the fresh and slightly tart flavor of key limes. If you love key lime desserts, then cookies with the same vibrant flavor need to be yours!
- Very simple to make. No chilling required, basic ingredients (aside from the key limes), only about 10 minutes to prep and baked in no time–gotta love it!
- A perfect summery cookie. Who says summer recipes don’t include baking? Certainly not us! We love a good cookie and this one is sure to help you beat the heat of summer. If you love lime, try these creamy margarita bars as well!
Ingredient Notes
See full list of ingredients with exact measurements below in the recipe card.
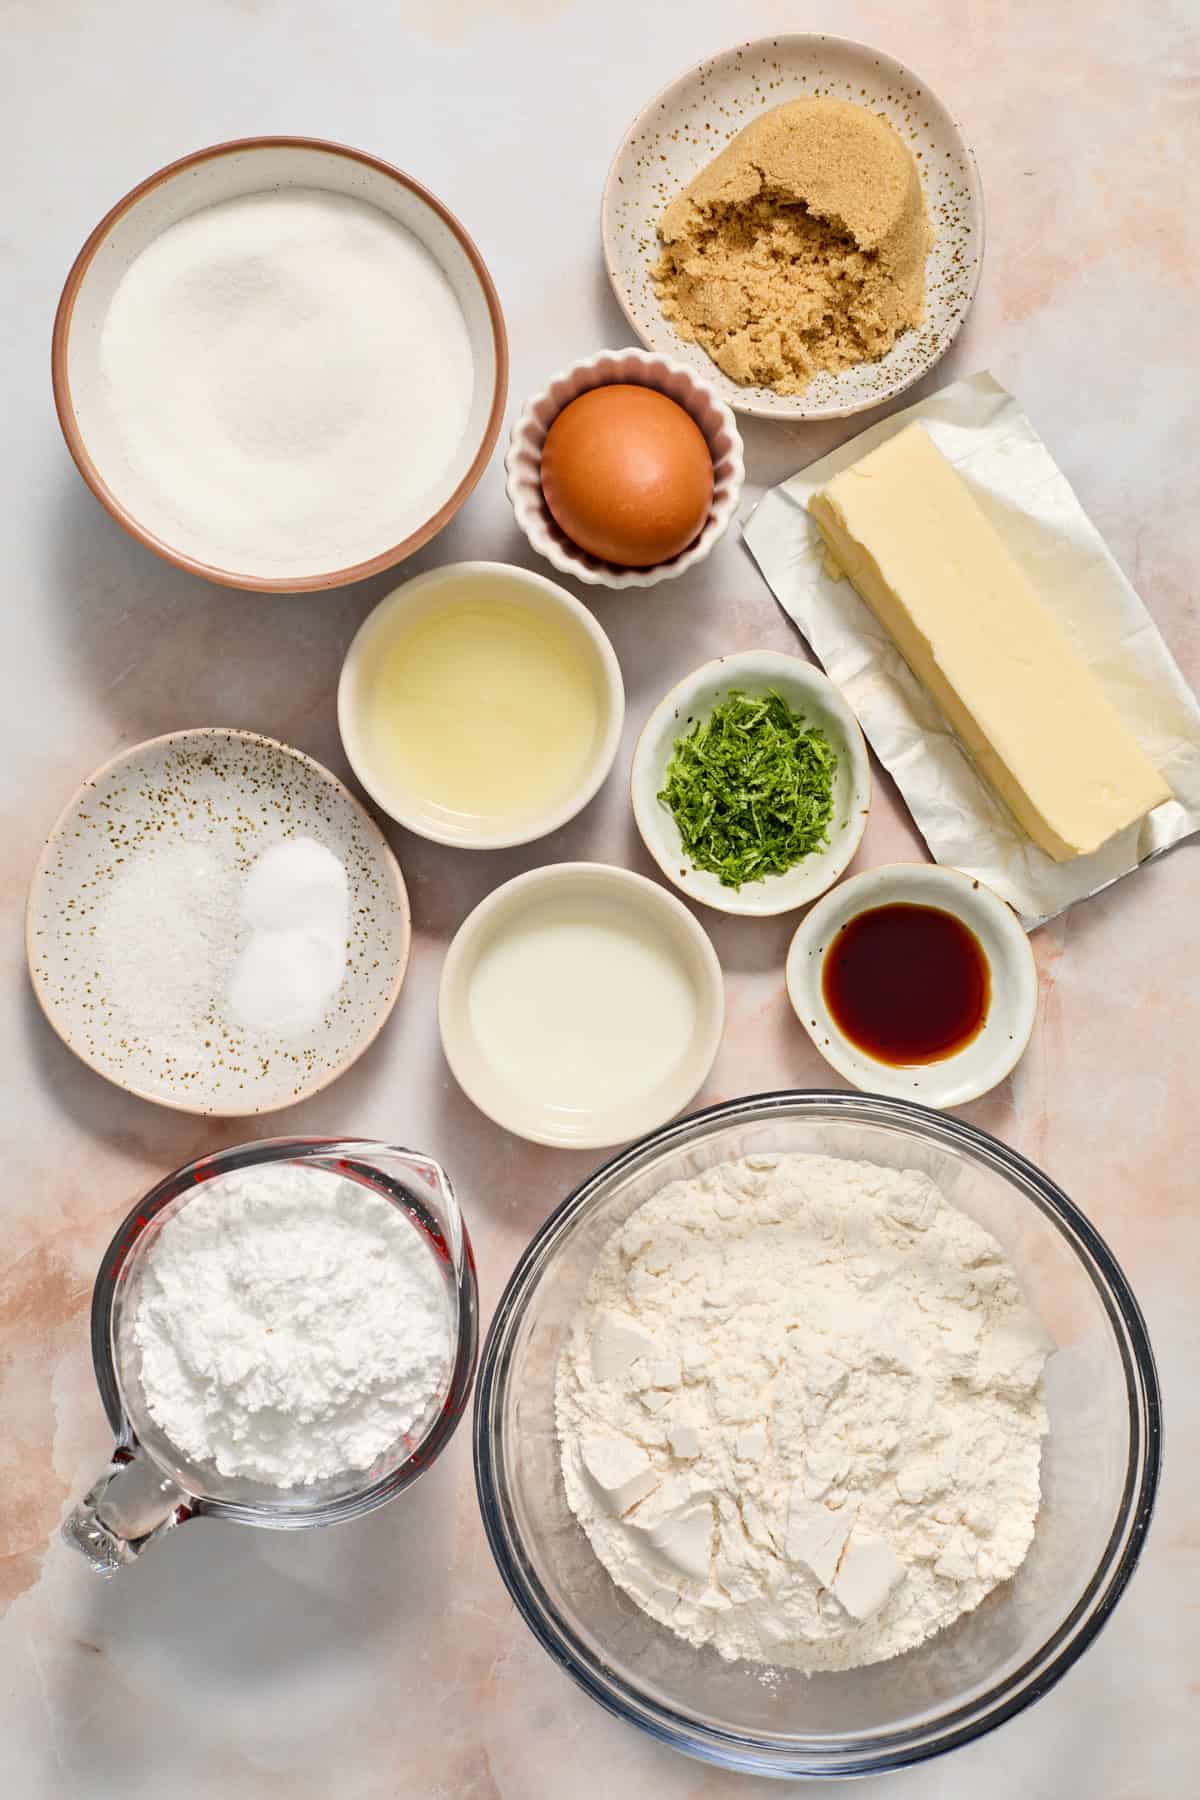
- butter: unsalted butter and softened to room temperature
- brown sugar: opt for light brown sugar when making these iced lime cookies
- egg: a large egg, brought to room temperature for best results
- vanilla: I prefer vanilla extract but if you want a stronger lime flavor, you could do 1/2 teaspoon of vanilla and 1/2 teaspoon lime extract.
- key limes: I only use the zest for the cookies and then zest and juice for the icing. Fresh key limes are obviously needed for that. The zest makes for a nice vibrant key lime flavor in the cookie! If you can’t get a hold of key limes, regular lime zest and juice will work as well.
- flour: all purpose flour, measured at 219 grams if possible to weigh your flour. If not, spoon to aerate and then scoop and level your flour.
- powdered sugar: also called confectioners’ sugar, make sure you have enough extra to add to the icing if you overdo it on the liquid!
What is the Difference Between Key Limes and Regular Limes?
Key limes and regular limes are very different in the way they look. Key limes are very small and round. Their skin is also very thin as compared to your typical lime.
The flavor of a key lime is more tart and more aromatic with floral hints as compared to your typical lime.
Key limes are not always easy to find so if all you can get your hands on is regular limes, they can still certainly be used. The flavor will be slightly different, but once baked it’s not as noticeable as you would think. Both are refreshing!
Step-By-Step Instructions:
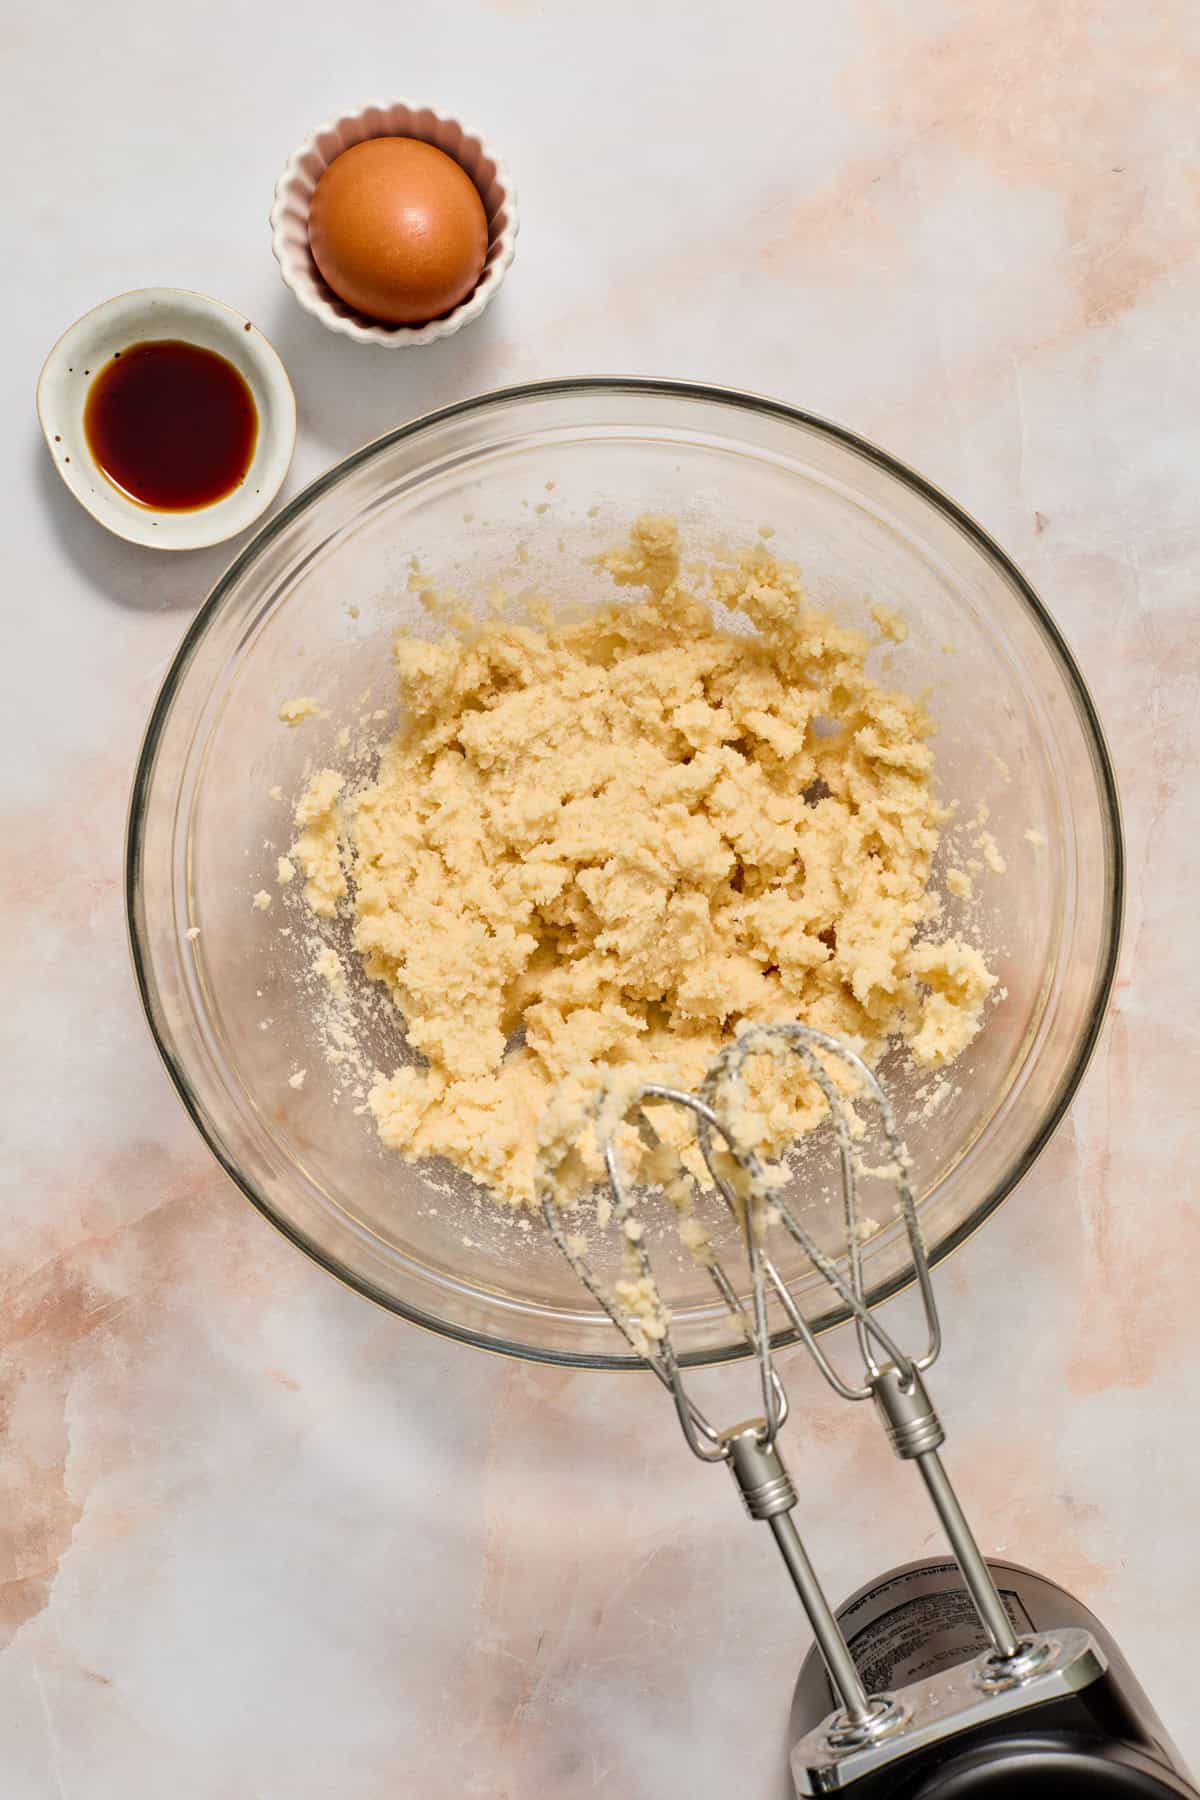
Step 1: Start by creaming the butter and sugar in a large bowl. Use an electric hand mixer or stand mixer and beat on a high level for at least a minute or so until light and fluffy. Don’t skimp on creaming!
Step 2: Add egg and vanilla and beat until mixed in. Whisk the flour, baking soda and salt in a small bowl.
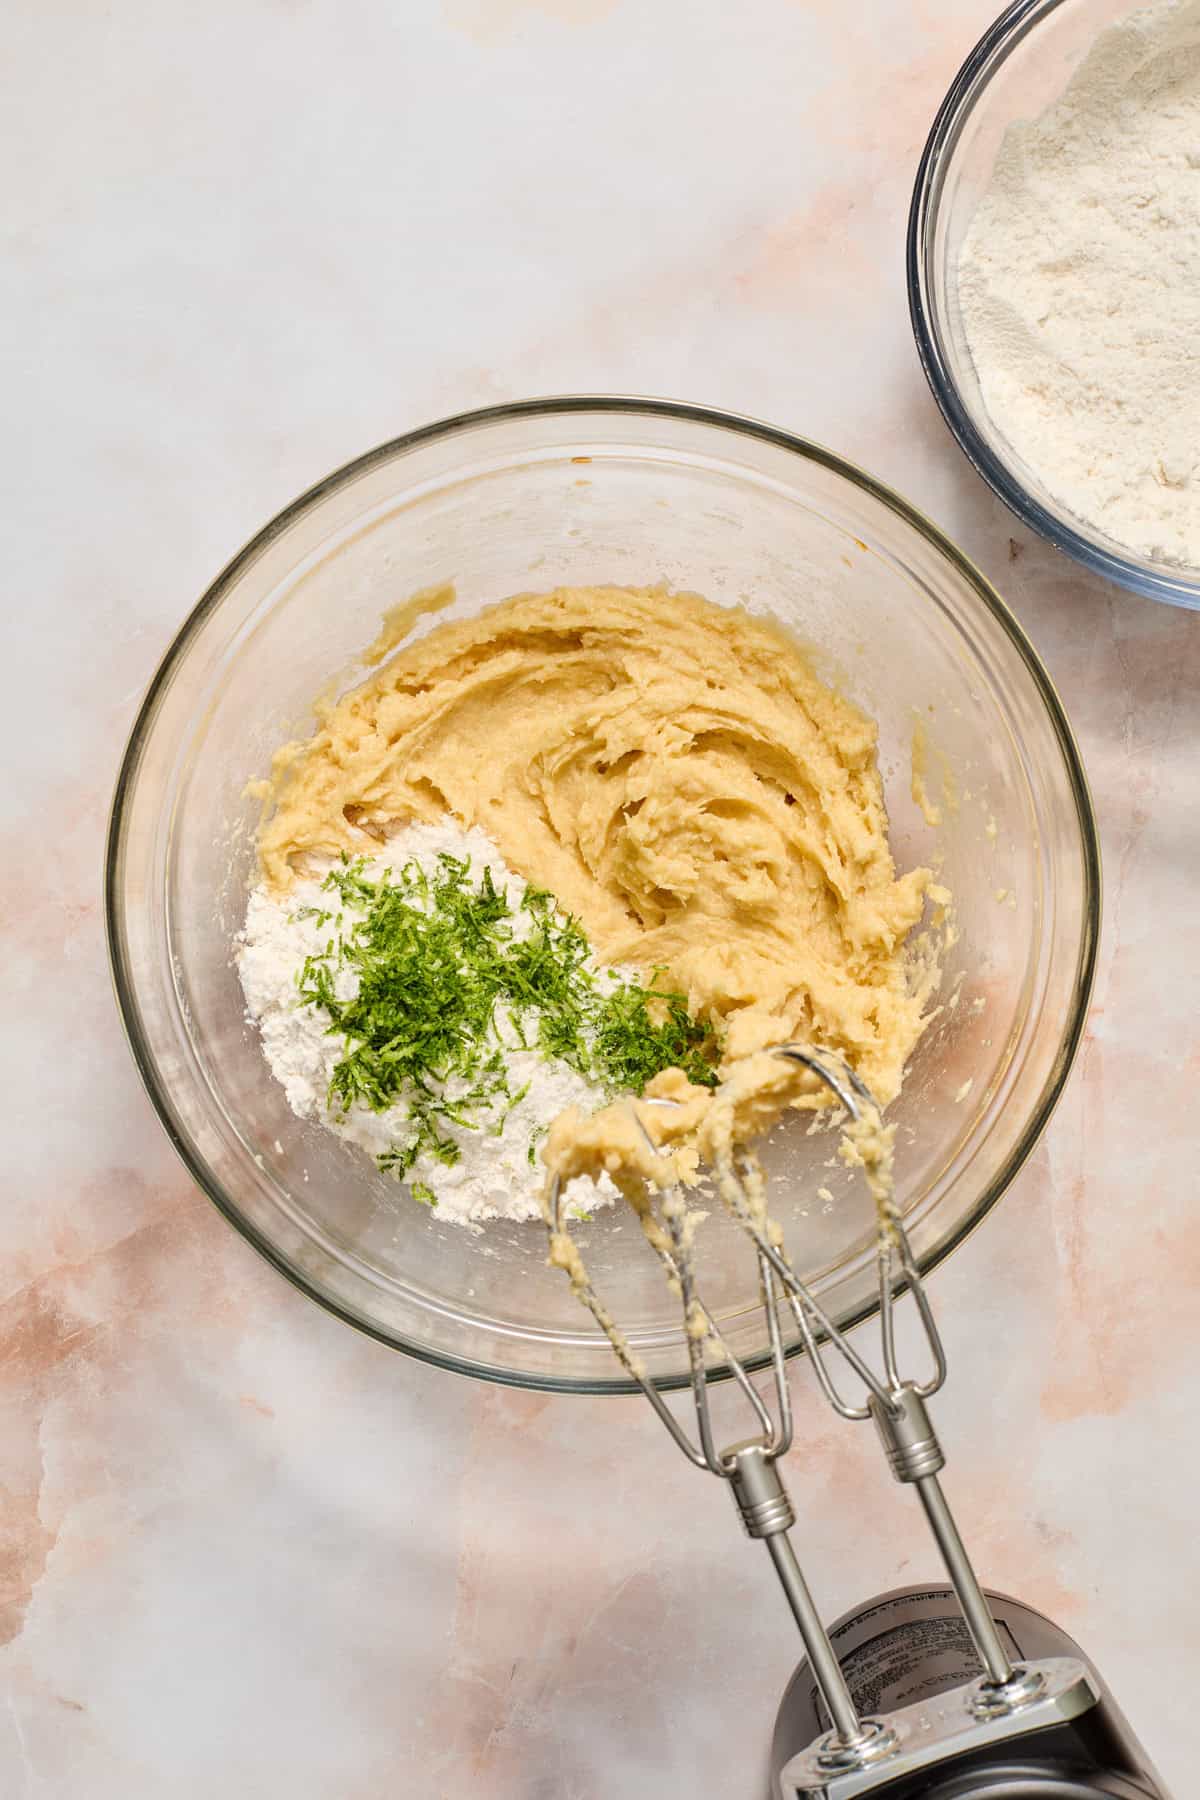
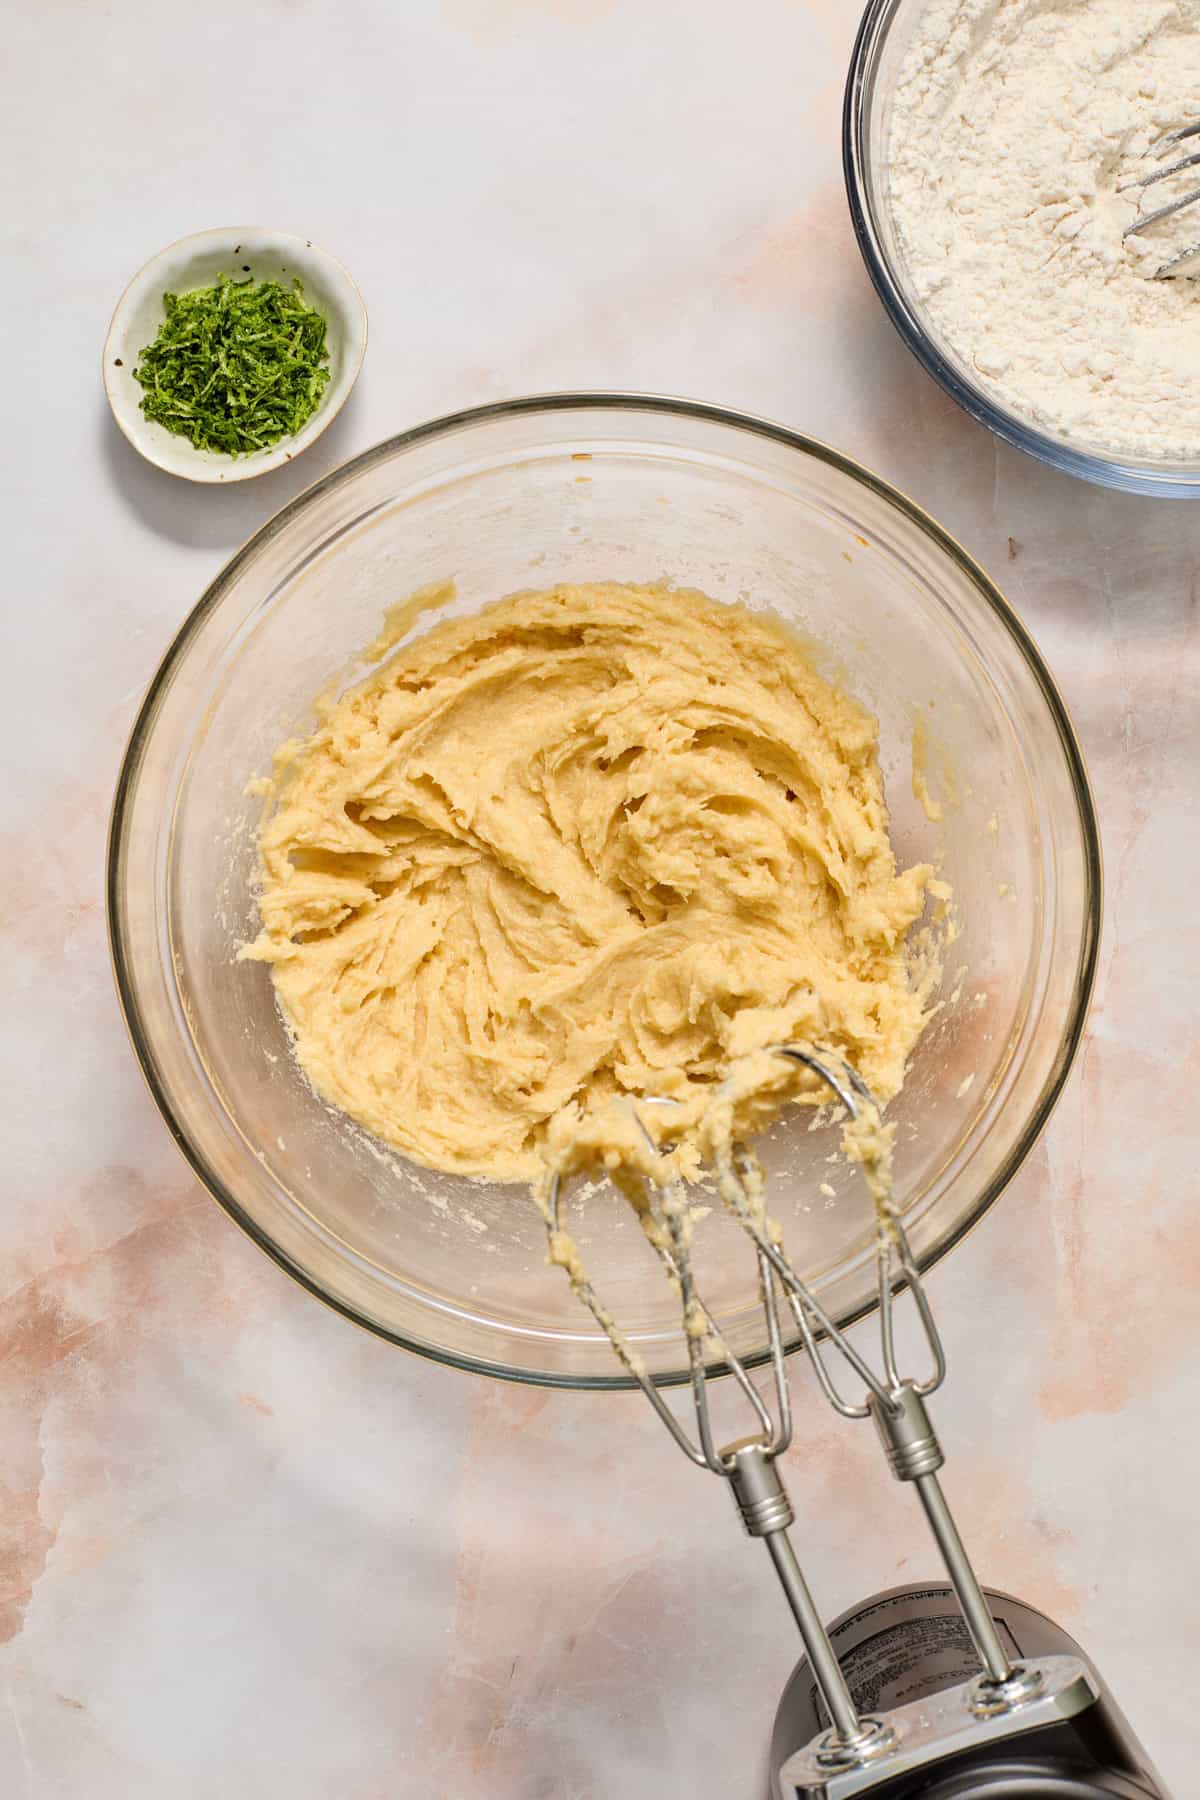
Step 3: Slowly add in the dry ingredients about 1/3 at a time along with the lime zest just until mixed in.
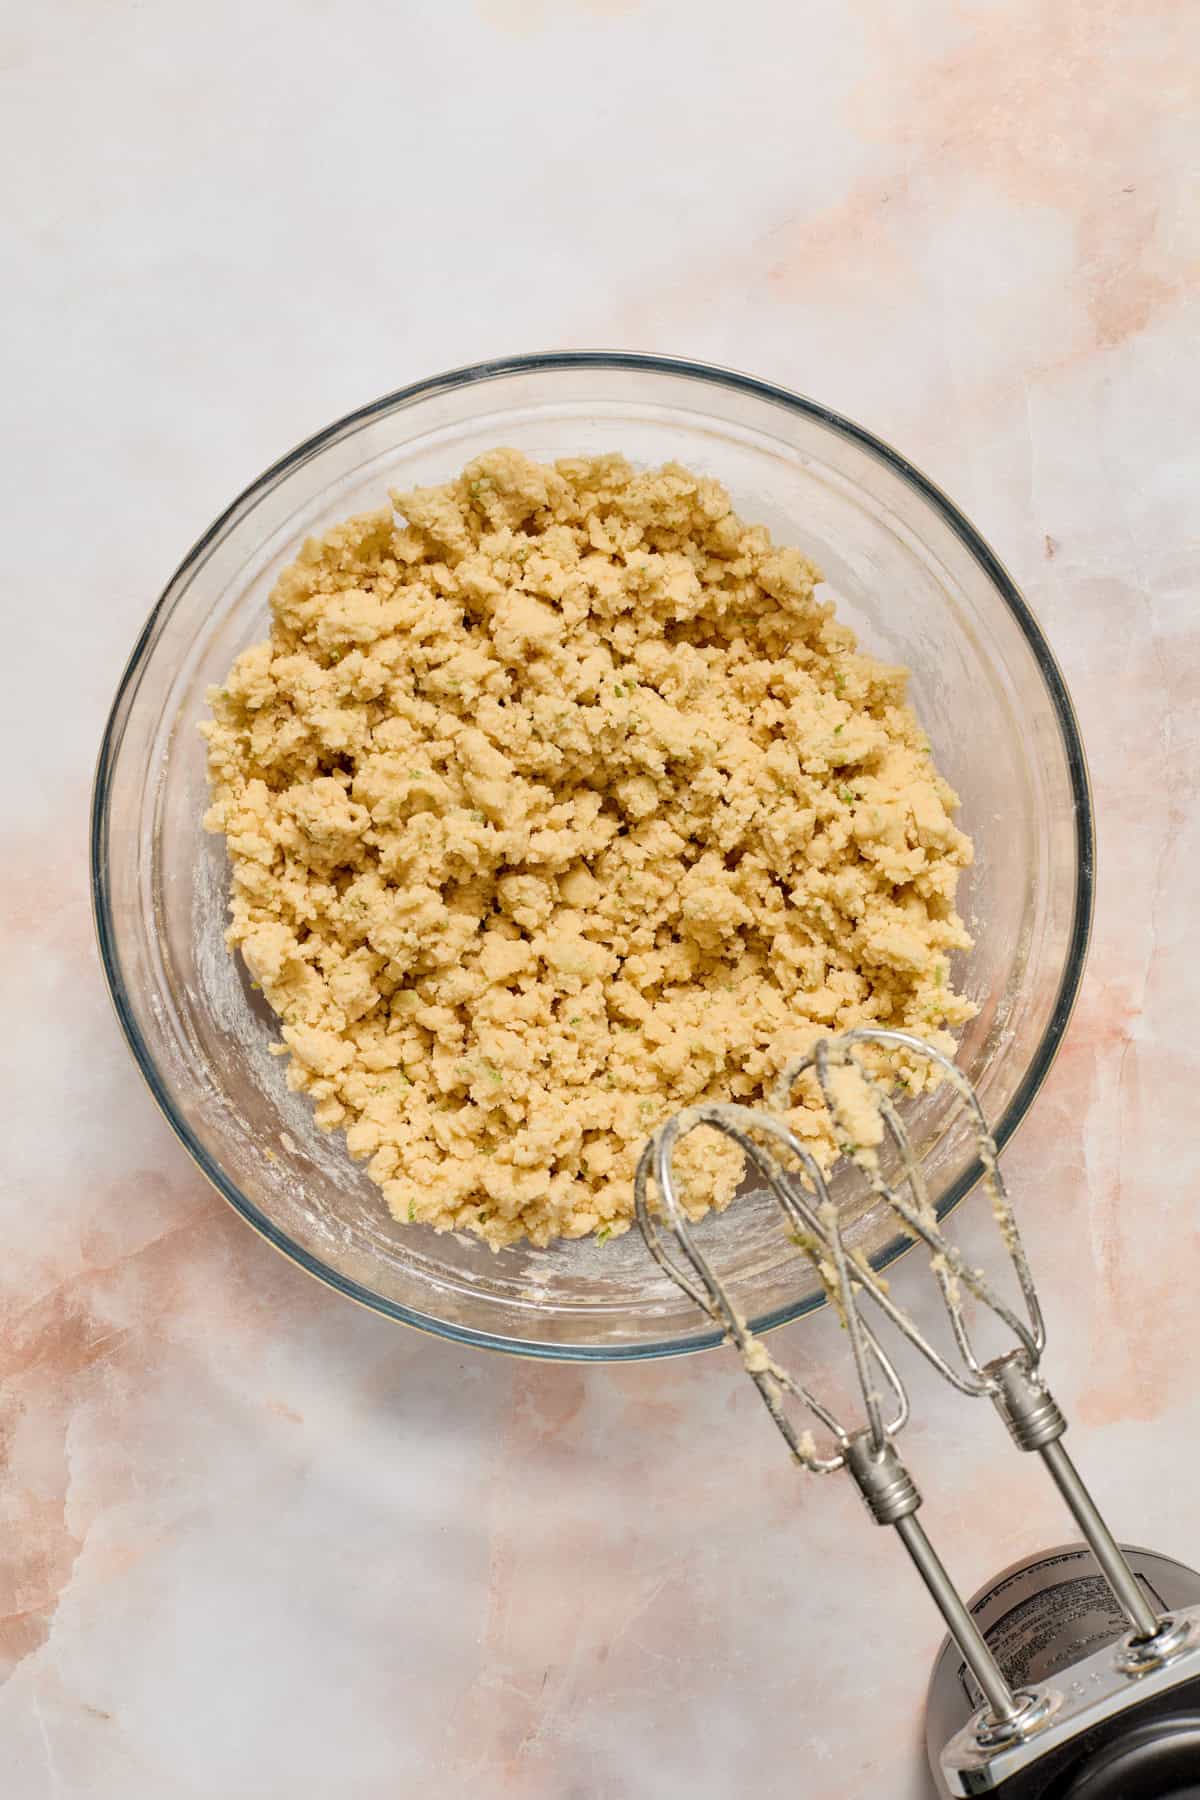
Step 4: Make sure not to over mix once you start adding the flour.
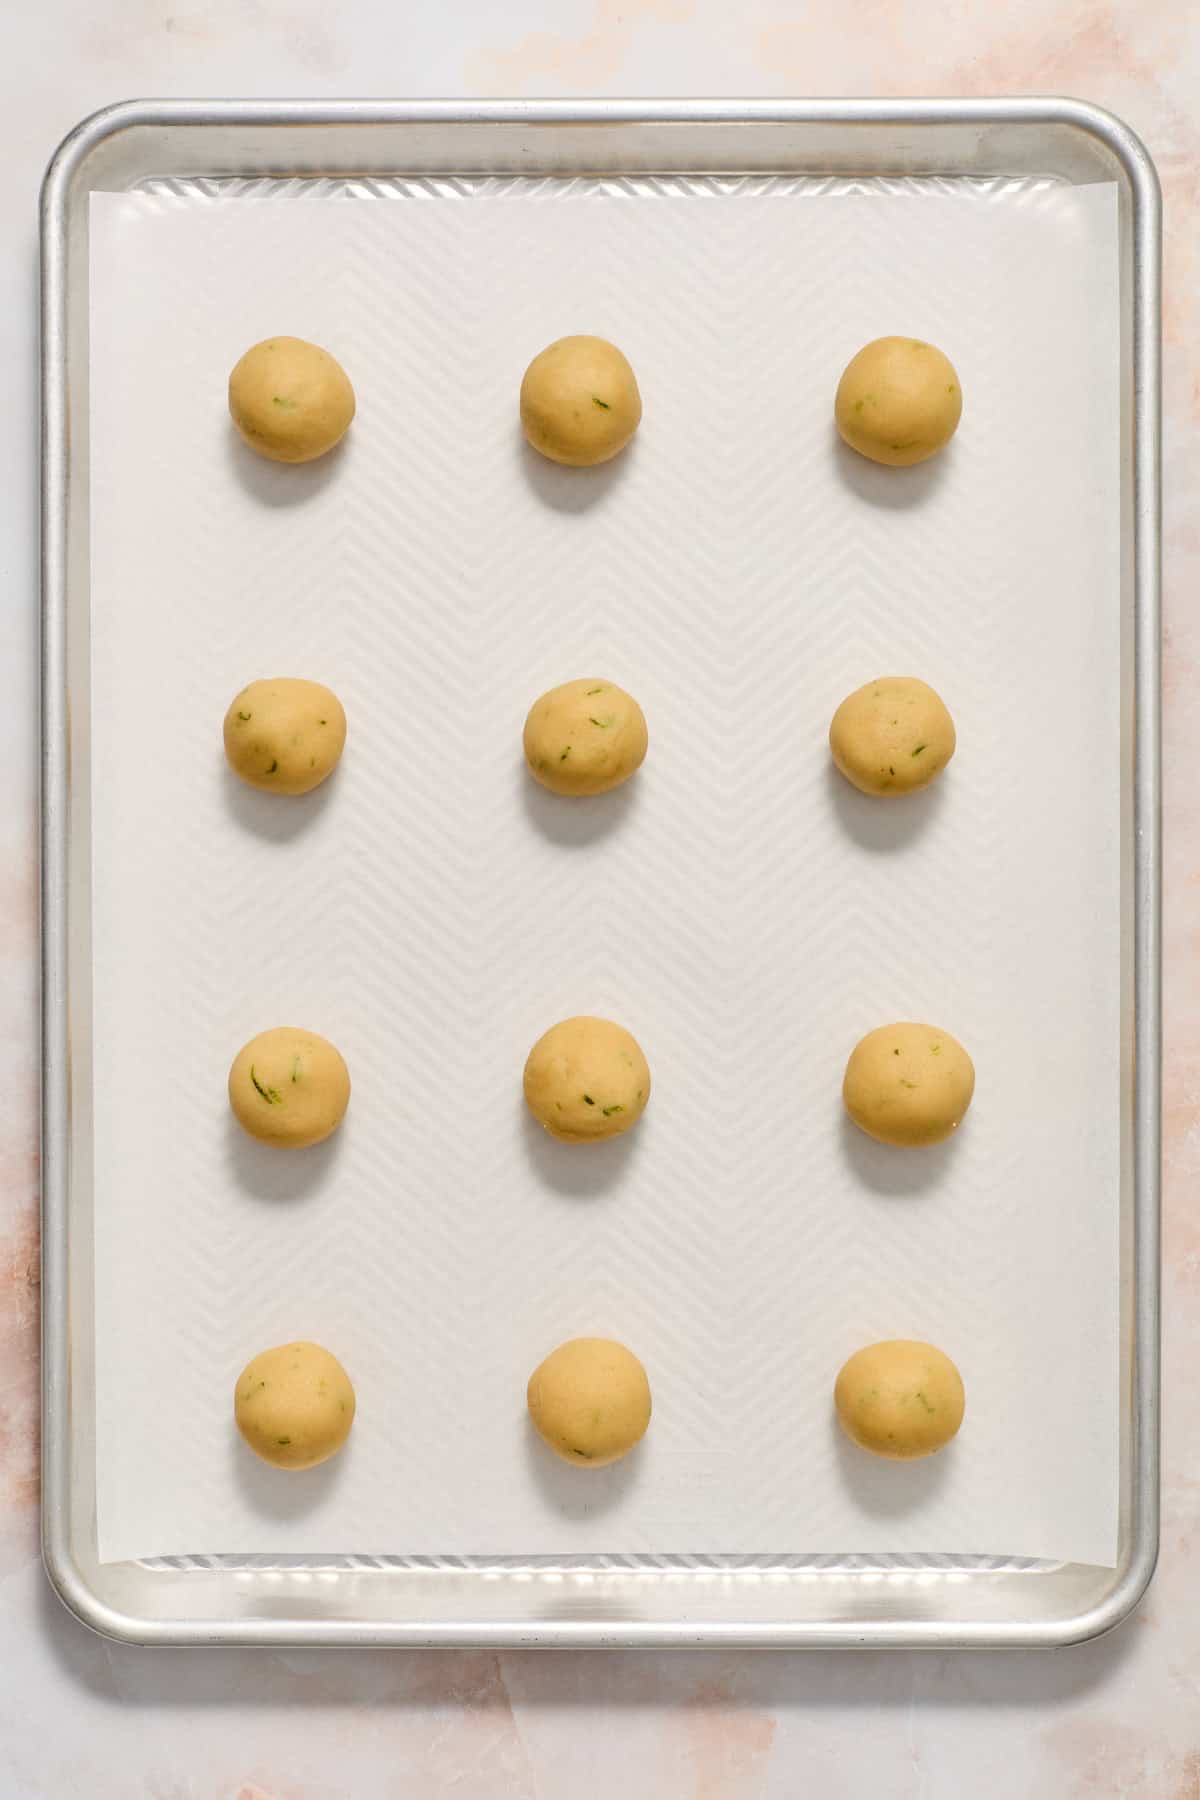
Step 5: Pull the dough together and roll into about 1 1/2 inch cookie dough balls. You should not need to chill the key lime cookie dough, but if they spread too much you can chill for about 15 minutes.
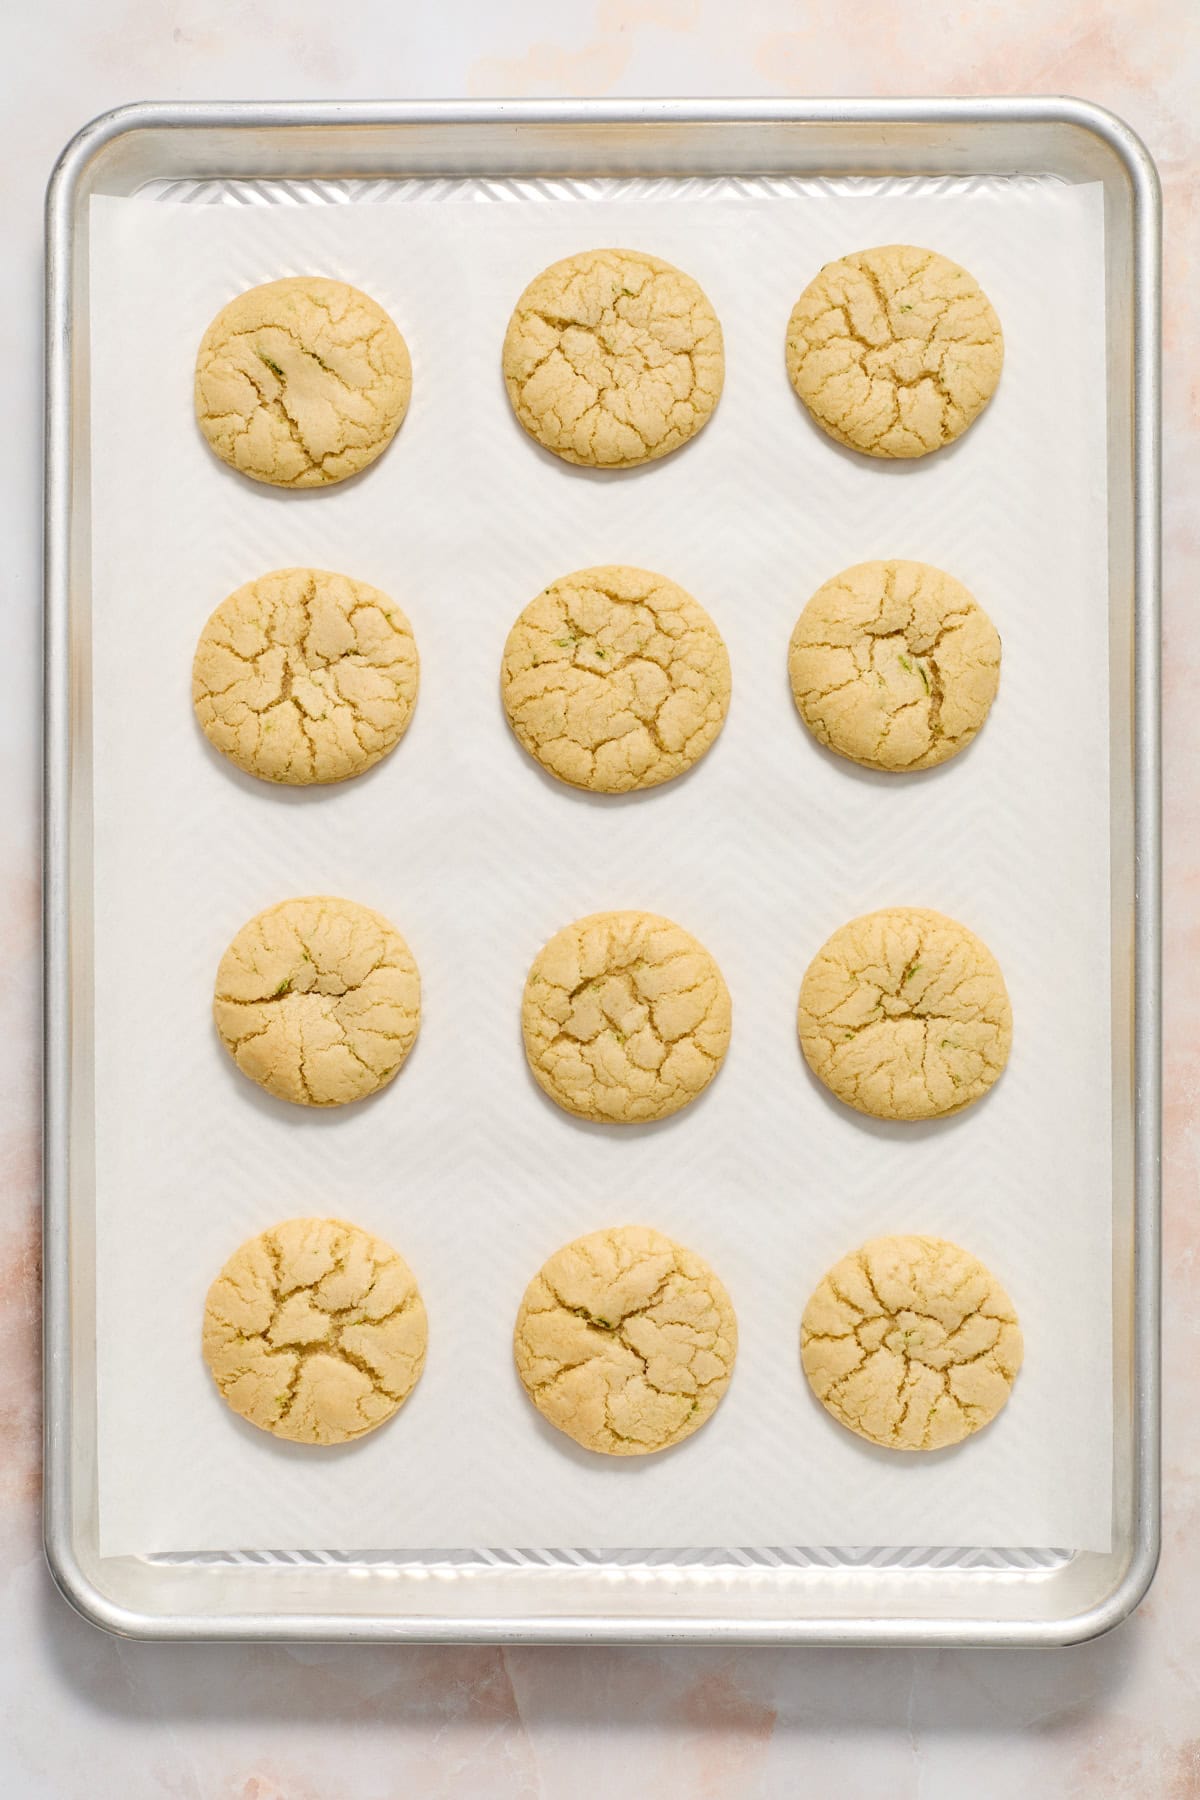
Step 6: Bake in preheated oven for about 9-11 minutes. Pull them out just before you think they are ready if you like your cookies soft and chewy.
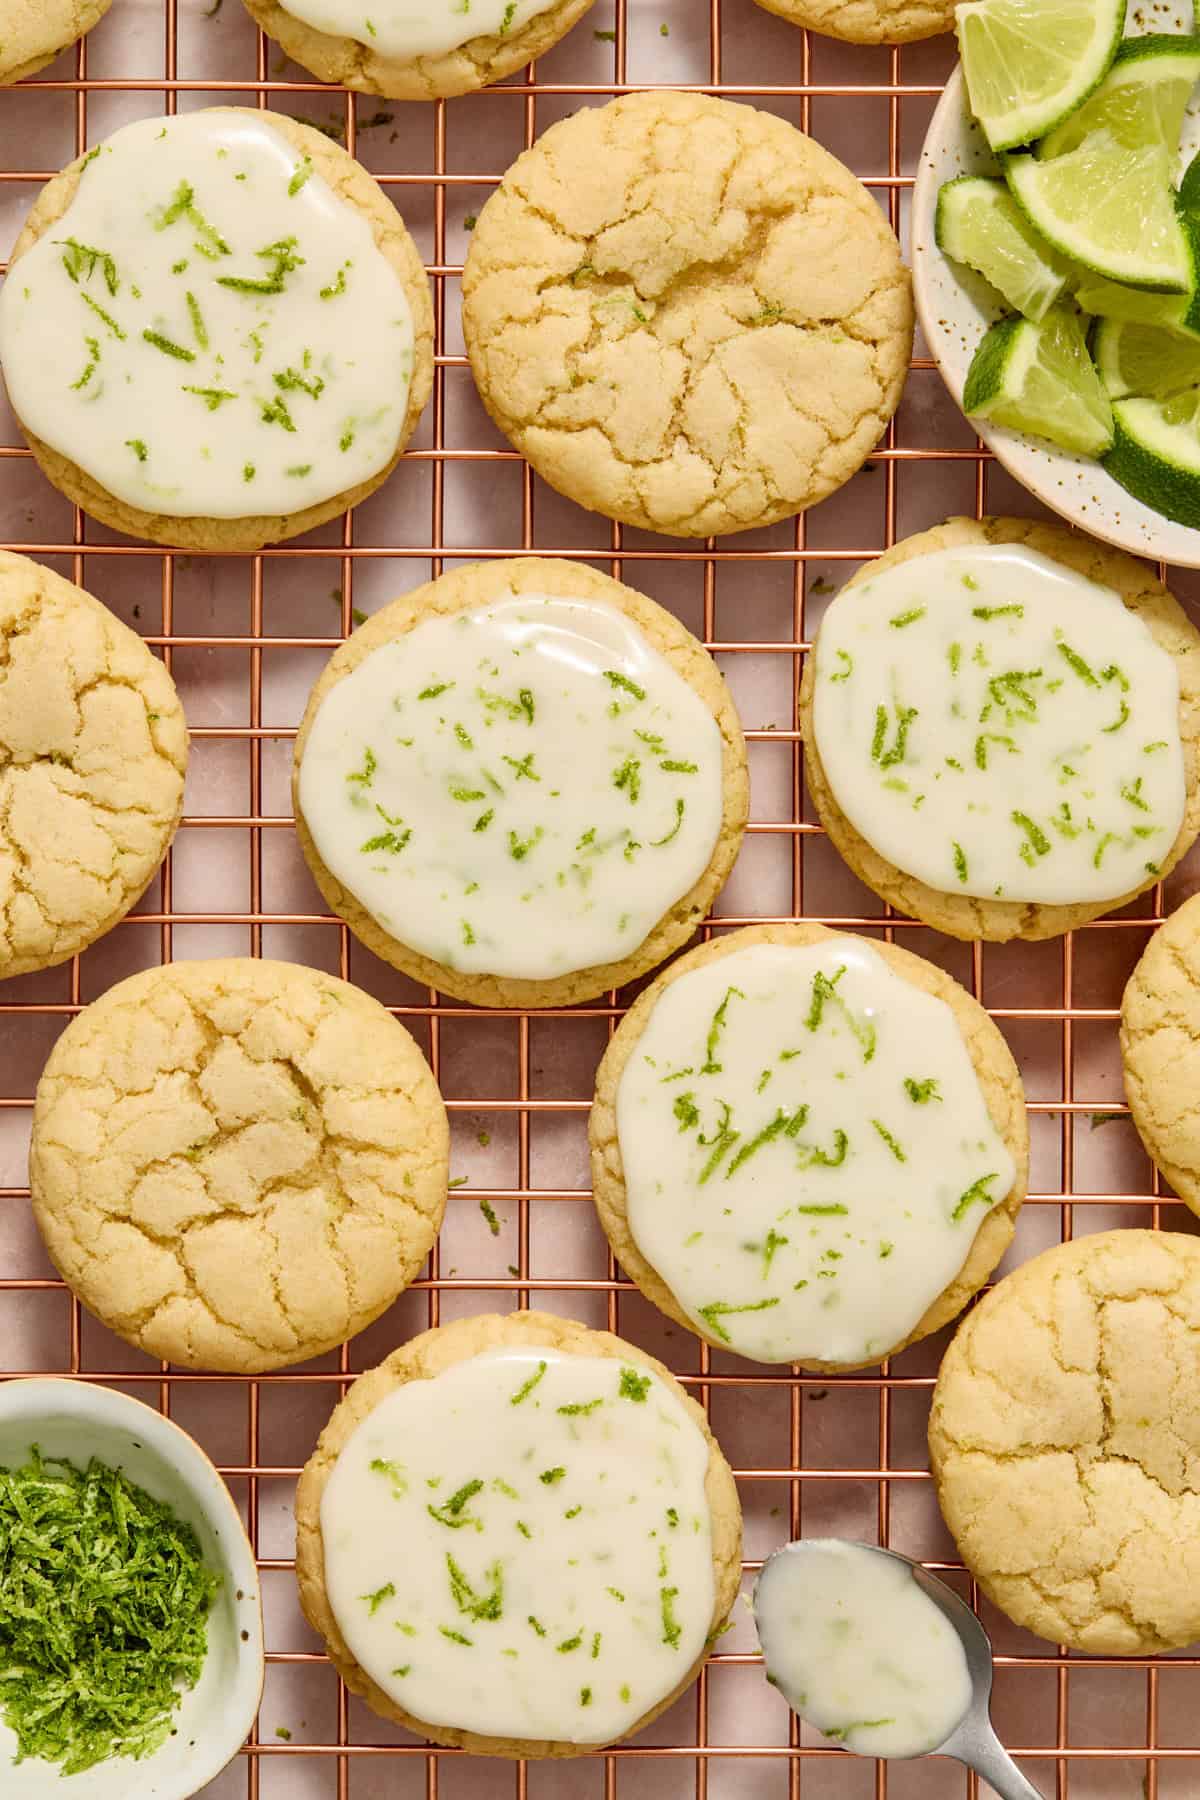
Step 7: Allow the key lime cookies to cool on a wire rack before icing. Mix the lime icing ingredients together and adjust the thickness by adding more liquid or more powdered sugar. I like to let the key lime icing sit for about 5-10 minutes before icing the cookies as it is less runny when icing. You can dip the cookies in the lime frosting or spread the icing over top. Whichever you prefer! Sprinkle with extra key lime zest to make them look even more beautiful.
Recipe Tips
Make sure your butter is softened. This is a huge factor in the texture of these key lime cookies. You don’t want the butter too hard or starting to melt. Softened butter should hold its shape well but make a slight imprint when you press into it with your finger.
Don’t over bake your cookies. To get that super soft and chewy texture that is not too dry, you want to pull these cookies out of the oven almost before you think they are ready. The edges don’t really brown and the cookies may still look a touch puffy but that is ok.
Roll into smooth balls versus using a cookie scoop. This will not impact the taste of the cookies, but I found the look of the cookies was much prettier when rolled into balls versus using a cookie scoop. This is probably more of a personal preference, but I love pretty cookies and I imagine most people do as well!
Storage
While these cookies will typically get gobbled up super fast, you may still need to store some for a bit. At room temperature, you can store them in an airtight container for up to 4-5 days. I find them to be the best texture within the first three days but are perfectly edible still a couple days more.
You can refrigerate them if preferred for about 5 days. If you would like to freeze baked cookies, make sure they are completely cooled before freezing. I think it’s better freezing them without the key lime glaze and then adding it to the cookies once thawed, but you can freeze them iced if preferred.
Separate each cookie with a piece of parchment paper or wax paper so the icing doesn’t get stuck to the cookie on top of it if they are stacked!
Freezing The Cookie Dough
If freezing the cookie dough, I prefer rolling the dough into balls and then freezing. Put them in a freezer safe bag or container spaced out until frozen.
You can freeze the dough for up to 3 months. You can bake from frozen, adding an extra 2-4 minutes to baking time or thaw to room temperature and then bake according to normal directions.
Other Cookie Recipes:
- Birthday Cake Cookies
- Gluten Free Oatmeal Cookies
- Egg Free Sugar Cookies
- Red Velvet Cake Cookies
- Pumpkin Spice Molasses Cookies
- Lucky Charm Cookies
- Peppermint Chip Cookies
HUNGRY FOR MORE? Subscribe to my newsletter and follow me on Facebook, Instagram and Pinterest for all the latest!
Key Lime Cookies

Ingredients
Cookies:
- ½ cup unsalted butter (113g)* , softened to room temperature
- 1 large egg, room temperature
- ¾ cup sugar (150 g)*
- ¼ cup light brown sugar (50g)*
- 1 tsp vanilla extract
- 2-3 tsp key lime zest
- 1 ¾ cup flour (219g)*
- 1/2 tsp baking soda
- 1/2 tsp salt
Key Lime Glaze:
- 1 cup powdered sugar
- 1 Tbsp key lime juice
- 1-2 Tbsp milk
- ¼ tsp vanilla
- ½ tsp key lime zest
- Pinch of salt, optional
Instructions
For The Cookies:
- Preheat oven to 350°F. Whisk together flour, salt and baking soda in a small bowl and set aside. Combine butter, brown sugar and sugar in a separate mixing bowl and beat with an electric mixer on high to cream for about 1-2 minutes until light and fluffy texture.
- Add in the egg and vanilla and beat until mixed in. Add in the lime zest and then 1/3 of the flour mixture beating only until mixed in. Continue slowly adding the flour mixture until dough forms.
- Roll the dough into 1 1/2 inch balls and arrange on parchment lined cookie sheet. Bake for about 8-10 minutes. Allow to cool on the cookie sheet for 2-3 minutes and then transfer to cooling rack.
- Once cookies are completely cooled, whisk together the lime glaze ingredients, adjusting liquid or powdered sugar to desired thickness. Allow the glaze to sit for several minutes and then dip cookies or spread the glaze over top with a knife.
- Allow the icing to set and then enjoy! Store remaining cookies in an air tight container for 4-5 days.
Notes
Nutrition
Nutrition information is automatically calculated, so should only be used as an approximation.
Shop This Post:
 Buy Now →
  Buy Now →
  Buy Now →
  Buy Now →
The cookies taste fabulous, but I’m taking off a star because I followed the recipe exactly (even using a food scale to weigh ingredients) and the cookies came out paper thin and not thicker like the recipe picture shows.
Baking, especially cookies is like chemistry—sometimes the most subtle things can cause a big shift. Butter is a touch too warm, oven runs a bit too hot, too cool etc. sometimes it’s a matter of over beating. I’ve made this cookie recipe so many times I’ve lost count, always out fave, and they are pretty consistent, but sometimes, some teeny tiny thing can impact them. I’m just happy yours were still edible and it wasn’t a full waste of groceries!!