This post may contain affiliate links.

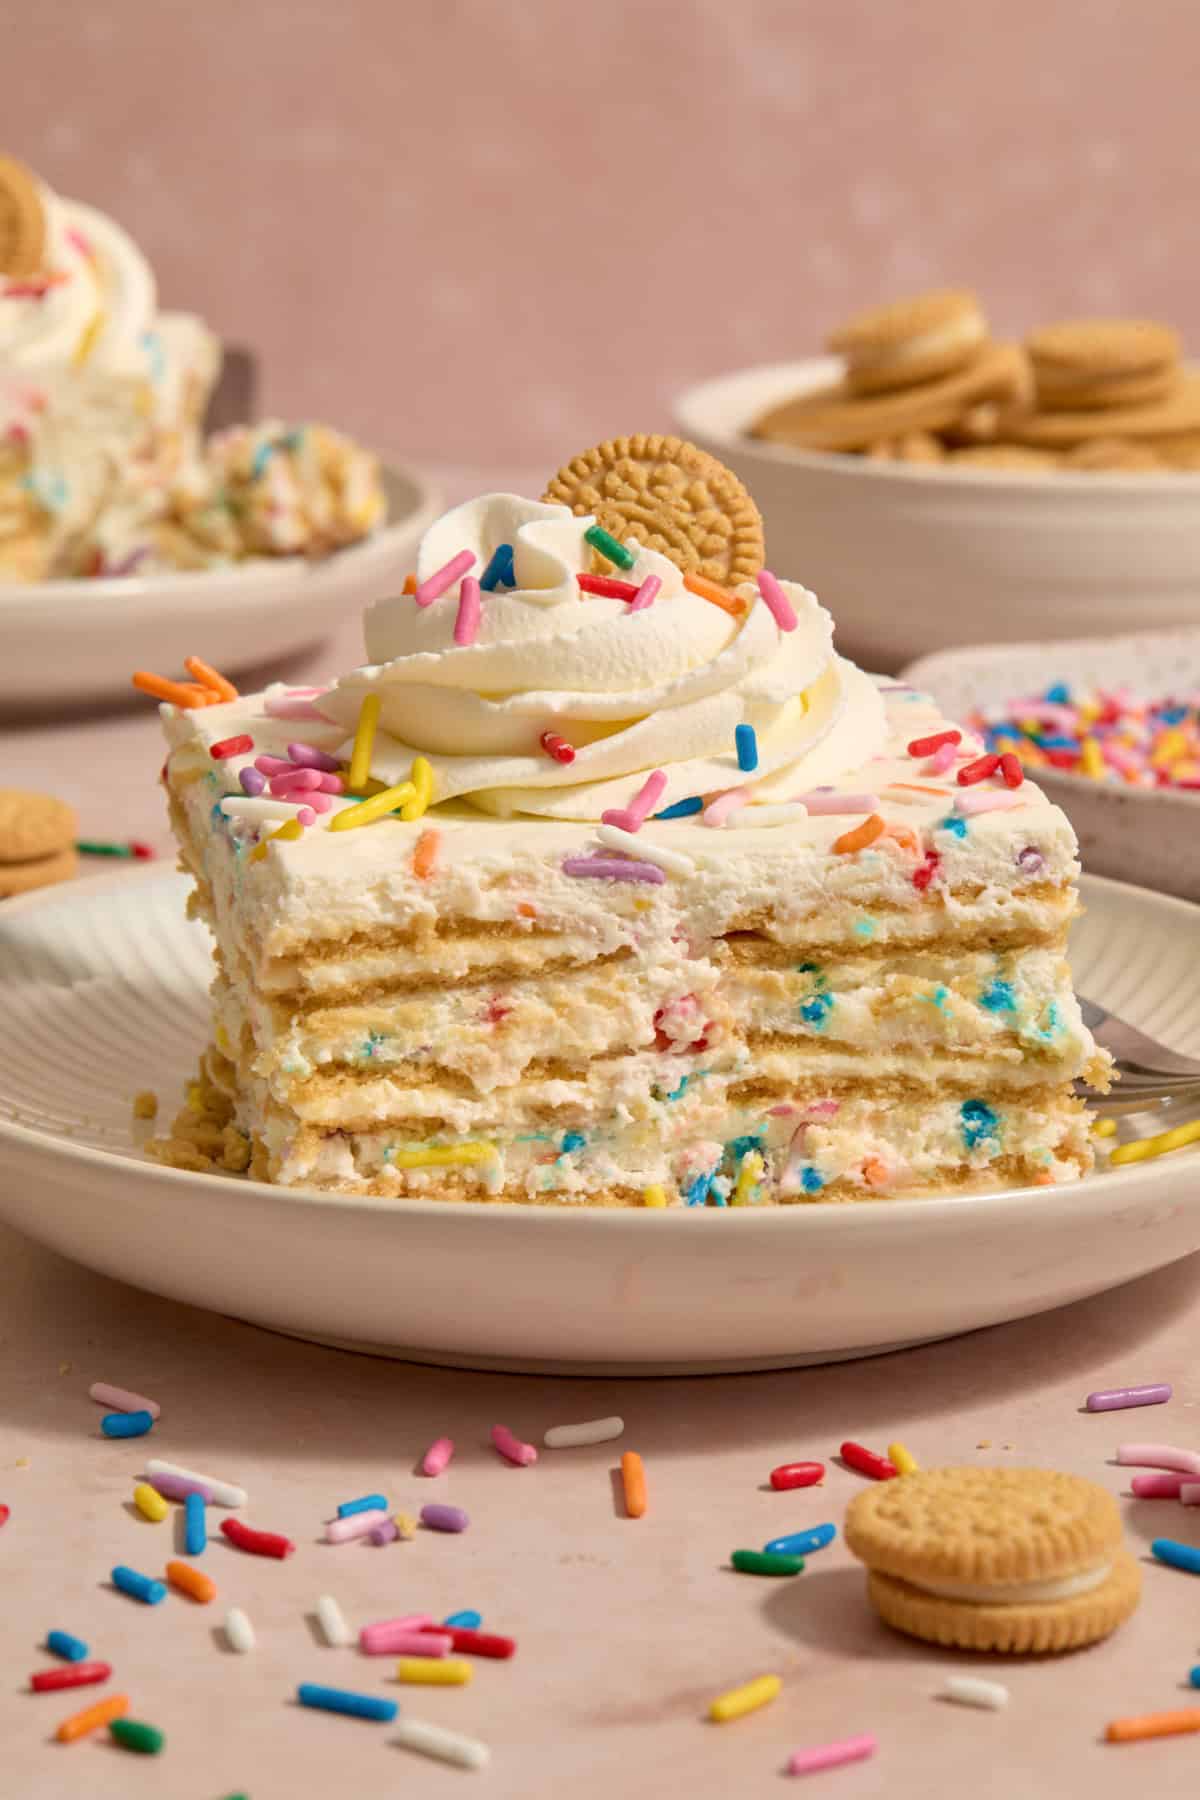
This simple funfetti icebox cake is a perfect treat to celebrate any occasion. Only about 20 minutes to prep, 6 ingredients, no baking required, and chilled to a perfect texture. Creamy rainbow sprinkle filled layer between layers of golden Oreo thins–this is a party in every single bite!
No-bake dessert recipes are my favorite, especially in the summer! I love a good icebox cake–they are so simple to make and a perfect dessert recipe that requires only some mixing and then layering.
This funfetti icebox cake will surely be a new family favorite! Try these other favorite no-bake treats: Chocolate Icebox Cake, No Bake Chocolate Pie, Strawberry Cream Cheese Icebox Cake, No-Bake Oreo Cheesecake Cups or this No-Bake Funfetti Cheesecake for more sprinkle fun!
Why We Love This Funfetti Icebox Cake

Everything is better with sprinkles, that’s a fact! I LOVE Golden Oreos so much and after making this No-Bake Funfetti Cheesecake, I knew I needed an even easier dessert recipe that used the same flavors. And this rainbow sprinkle filled, no-bake funfetti dessert is exactly that!
This funfetti icebox cake:
- requires only 6 ingredients
- is prepped in under 20 minutes
- can easily be varied with any color of sprinkle for a holiday, favorite team and more
- is kid-friendly
- has the perfect creamy texture combined with fluffy Golden Oreo thins after softened–it’s an experience!
Can’t wait to hear how much you love it!
Ingredient Notes
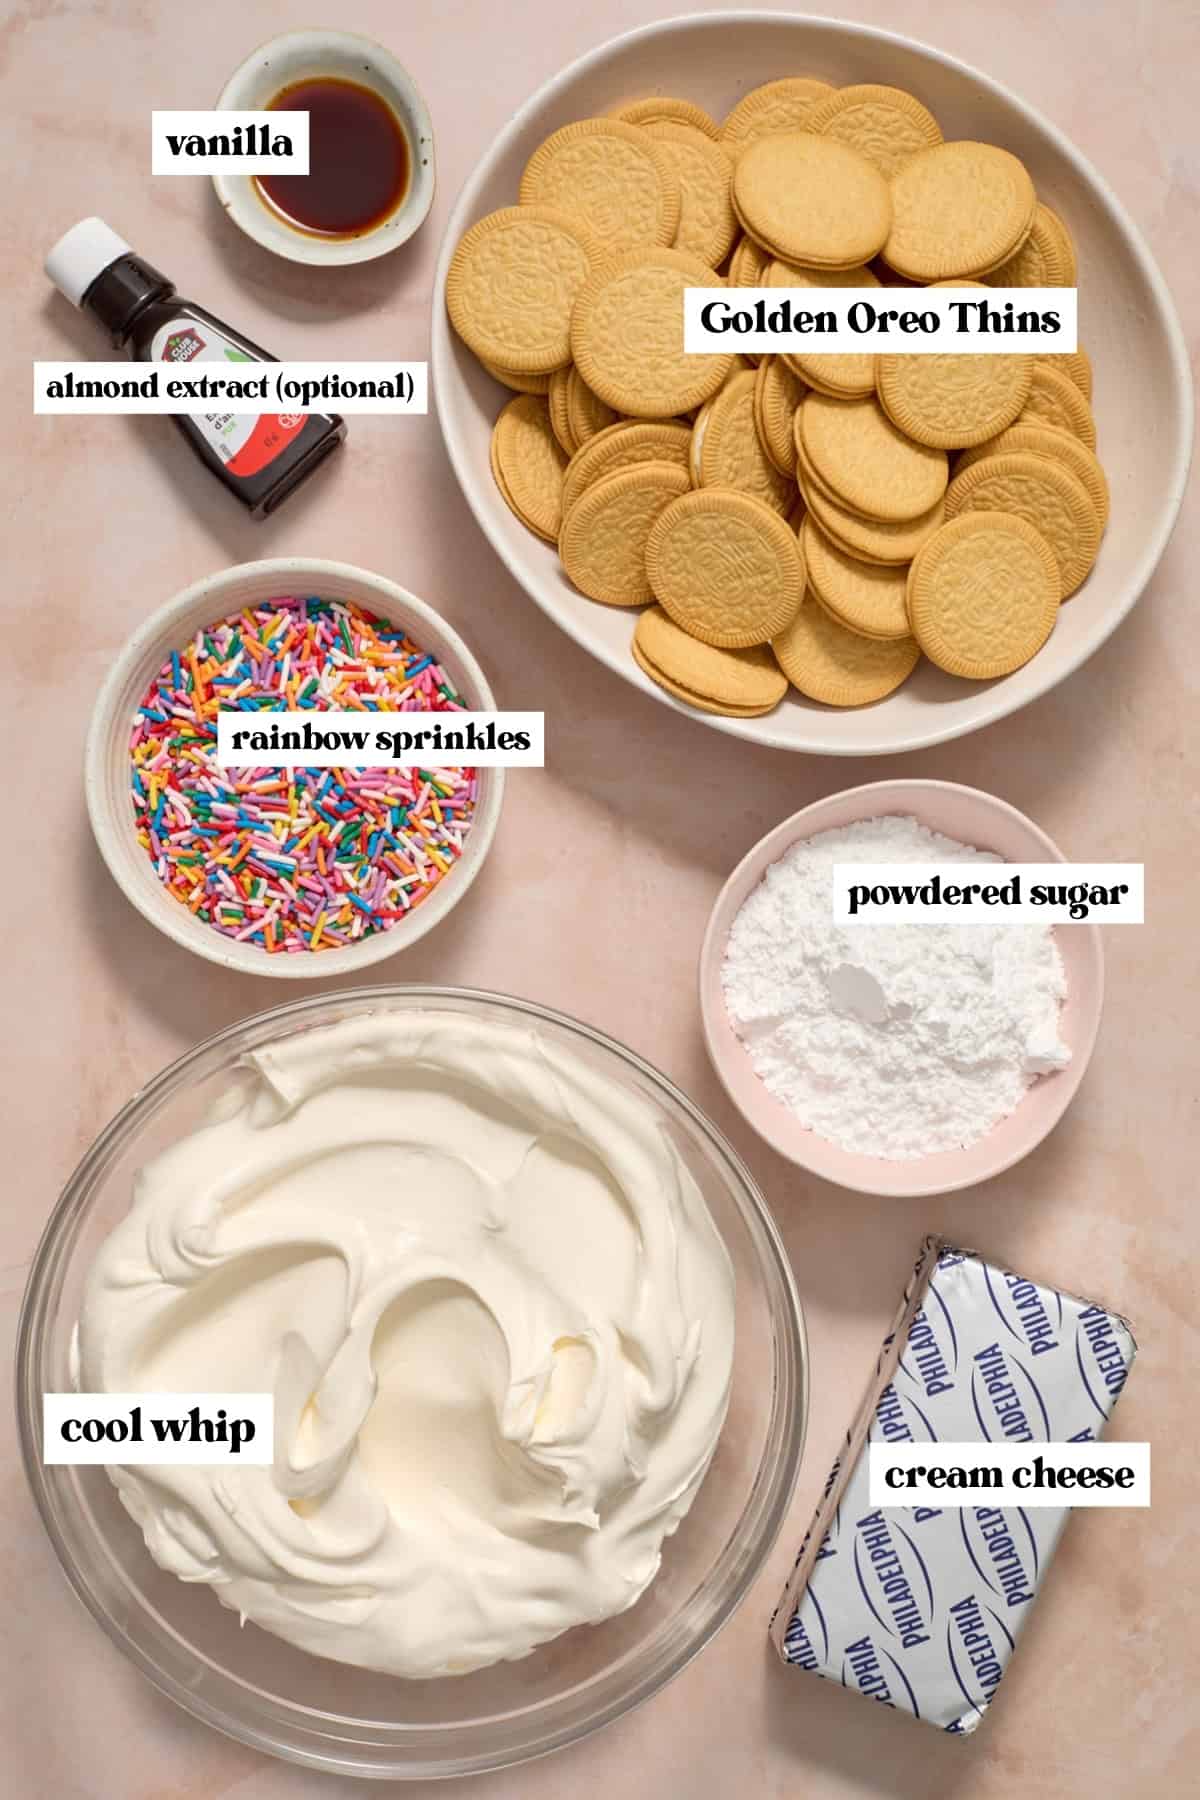
- I used the Golden Oreo thins in this icebox cake although the regular Golden Oreos will work–it will give the dessert more height and make it much richer–you can opt for only 2 layers of cookies if you are using the classic size–especially if you wan this gluten-free since they don’t make the thins gluten-free yet.
- I really wanted to make this a super simple dessert so opted for cool whip over the heavy whipping cream, however, the recipe includes an option with heavy cream/homemade whipped cream if you prefer!
- Some sprinkles will bleed a lot into the filling so you want to choose rainbow jimmies, the little rods and avoid naturally dyed sprinkles as they tend to bleed a lot into the filling. If this doesn’t bother you, by all means, you can use your favorite, but it’s likely they will run through. Avoid using nonpareils as well.
- I like to add almond extract to give this dessert more of a birthday cake or sugar cookie flavor. This is totally optional. If you don’t have it or want to skip it, just add more vanilla instead!
Ways To Vary This Recipe
- change the color of the sprinkles: make them red and green for Christmas, red, white and blue, or your favorite team colors, etc.
- use a different Oreo or cookie: you can use classic Oreo thins for a more chocolatey treat. You can certainly use graham crackers like I use in this Strawberry Cream Cheese Icebox Cake!
Step-By-Step Instructions

Step 1: Using an electric hand mixer, beat the cream cheese, powdered sugar, vanilla extract and almond extract (if using), until smooth and creamy.
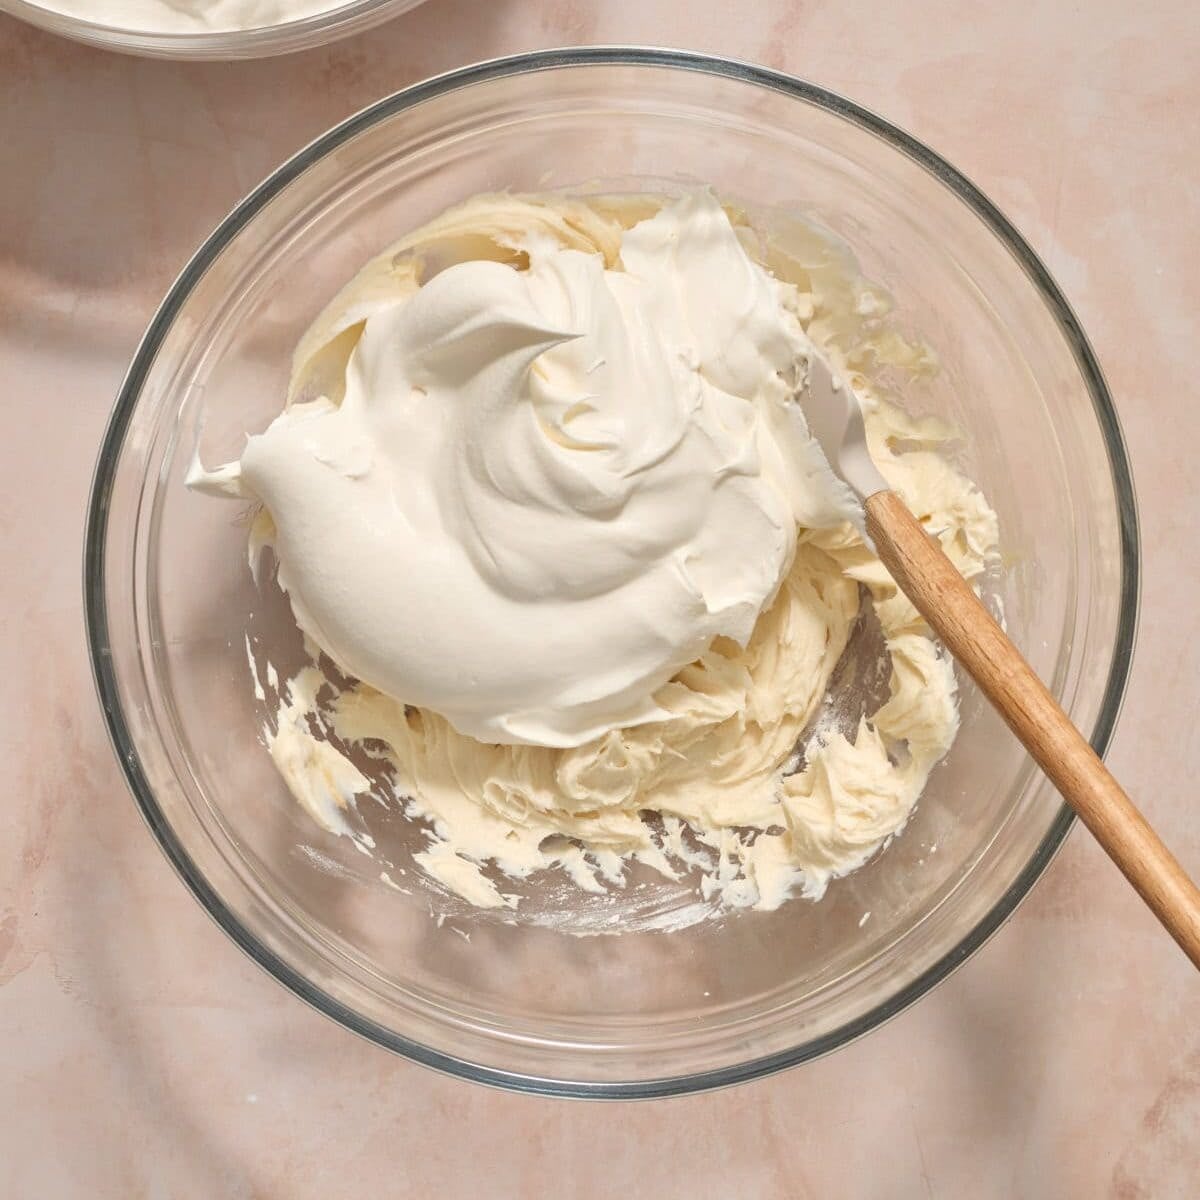
Step 2: Fold in the cool whip, or whipped cream if you made it homemade until incorporated.
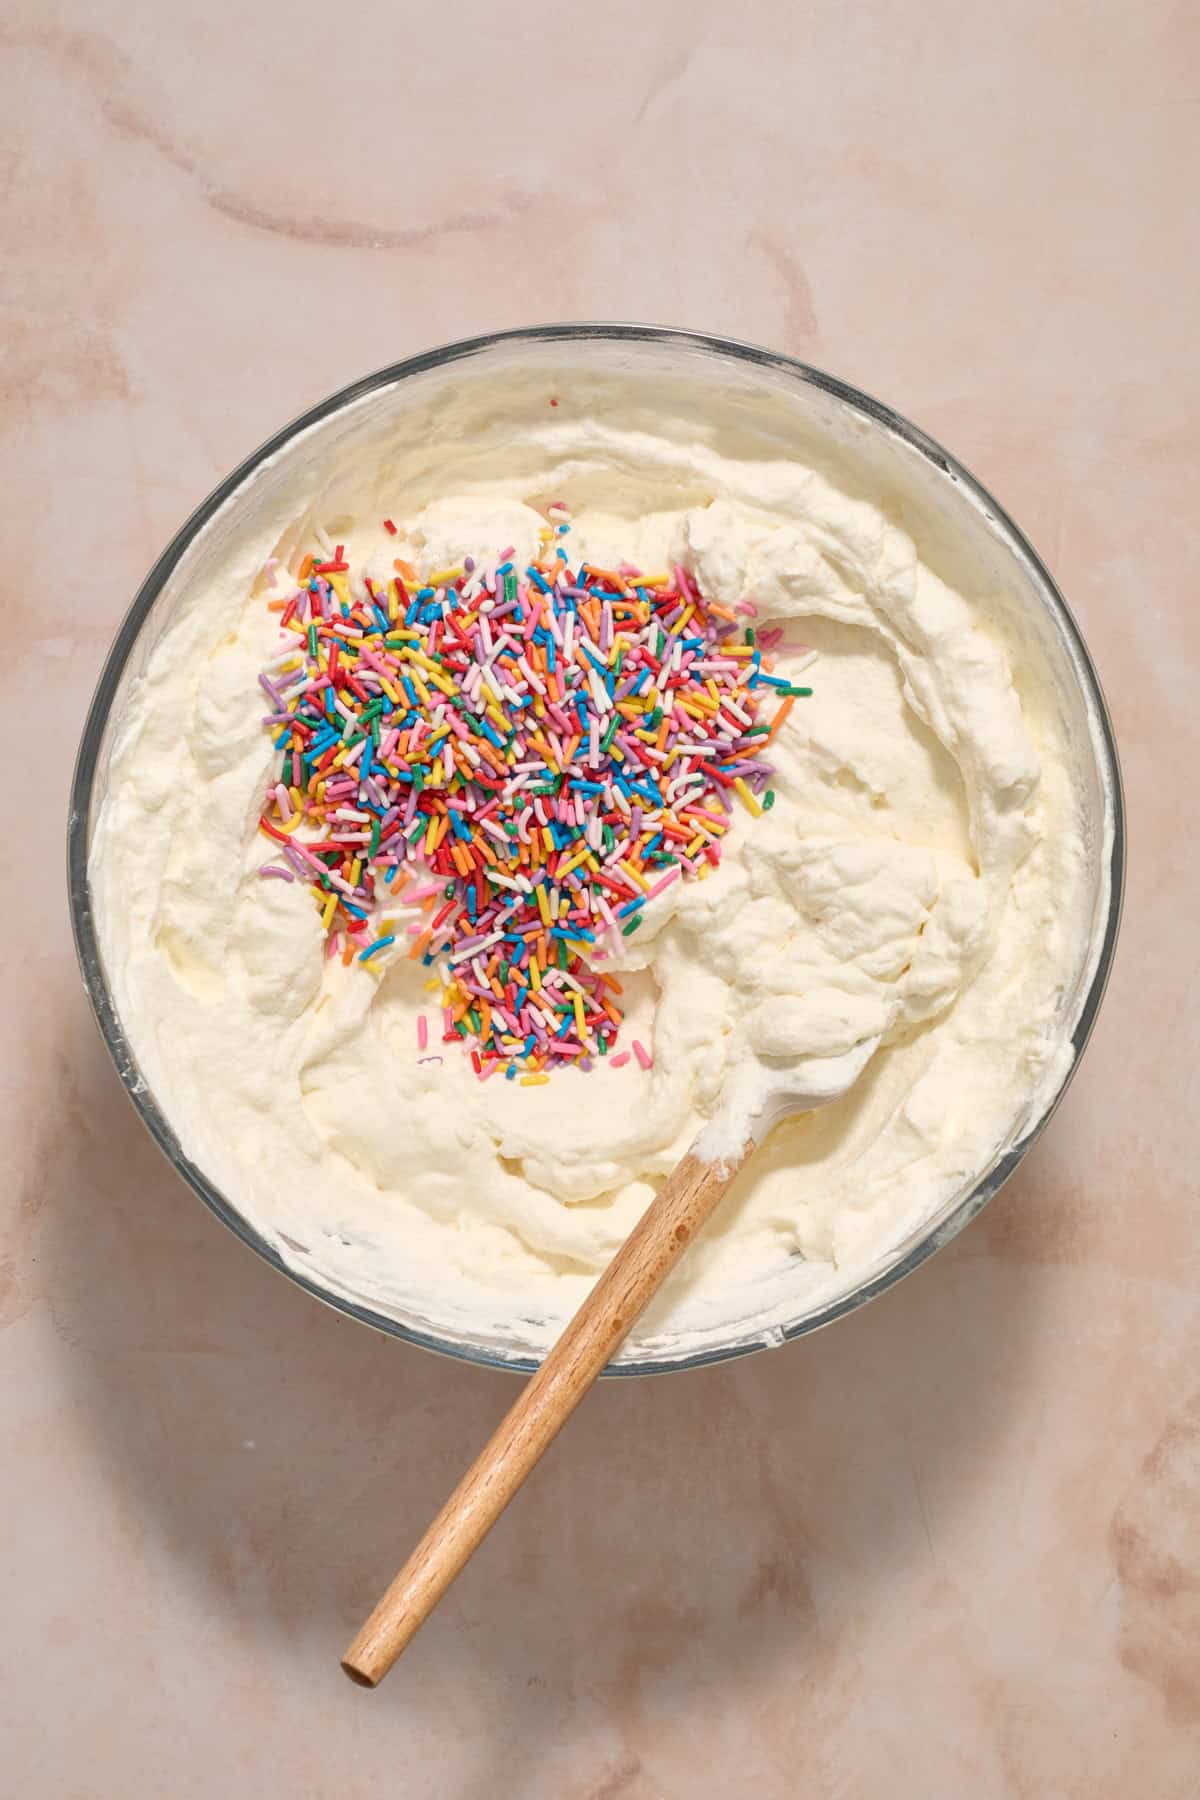
Step 3: Very gently fold in the rainbow sprinkles.
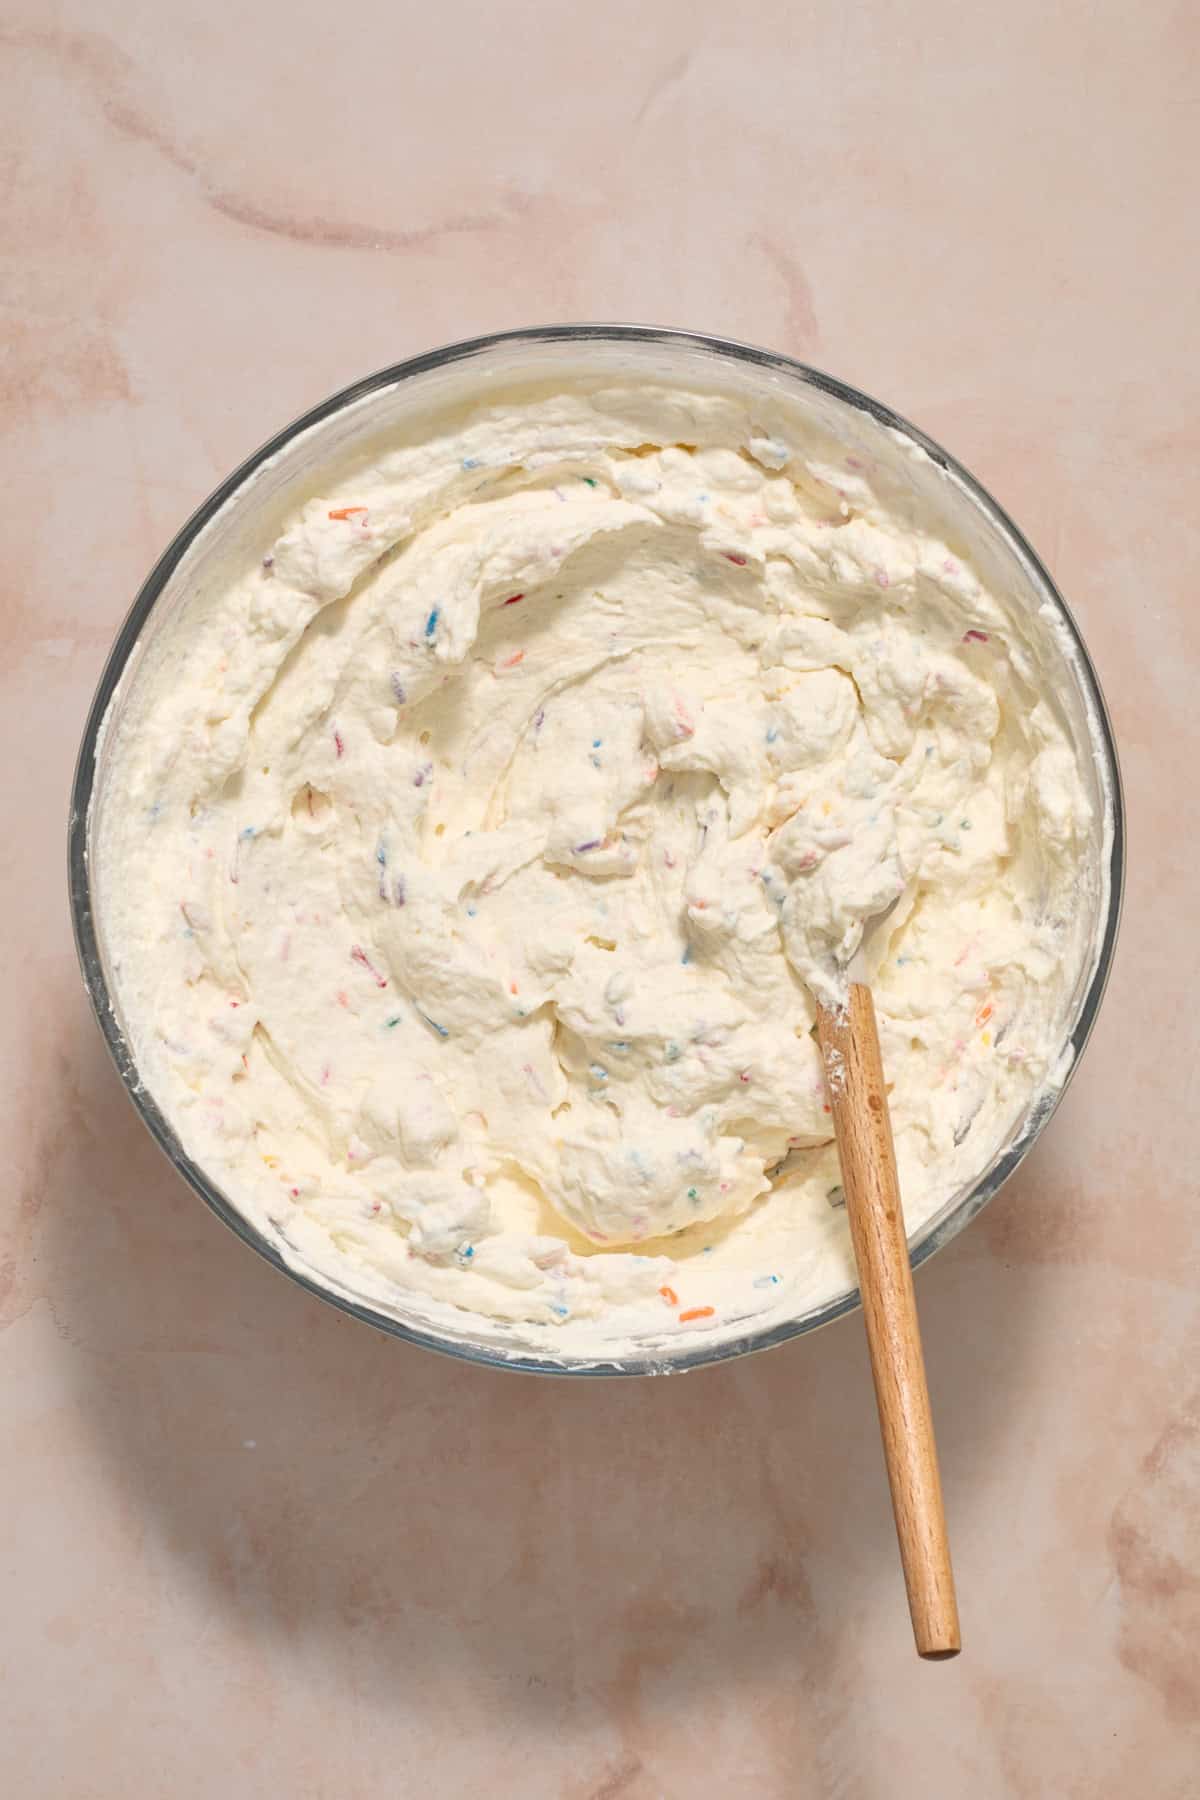
Step 4: Try to stir as little as possible once the sprinkles are added to prevent color from bleeding.
Assembling the Cake
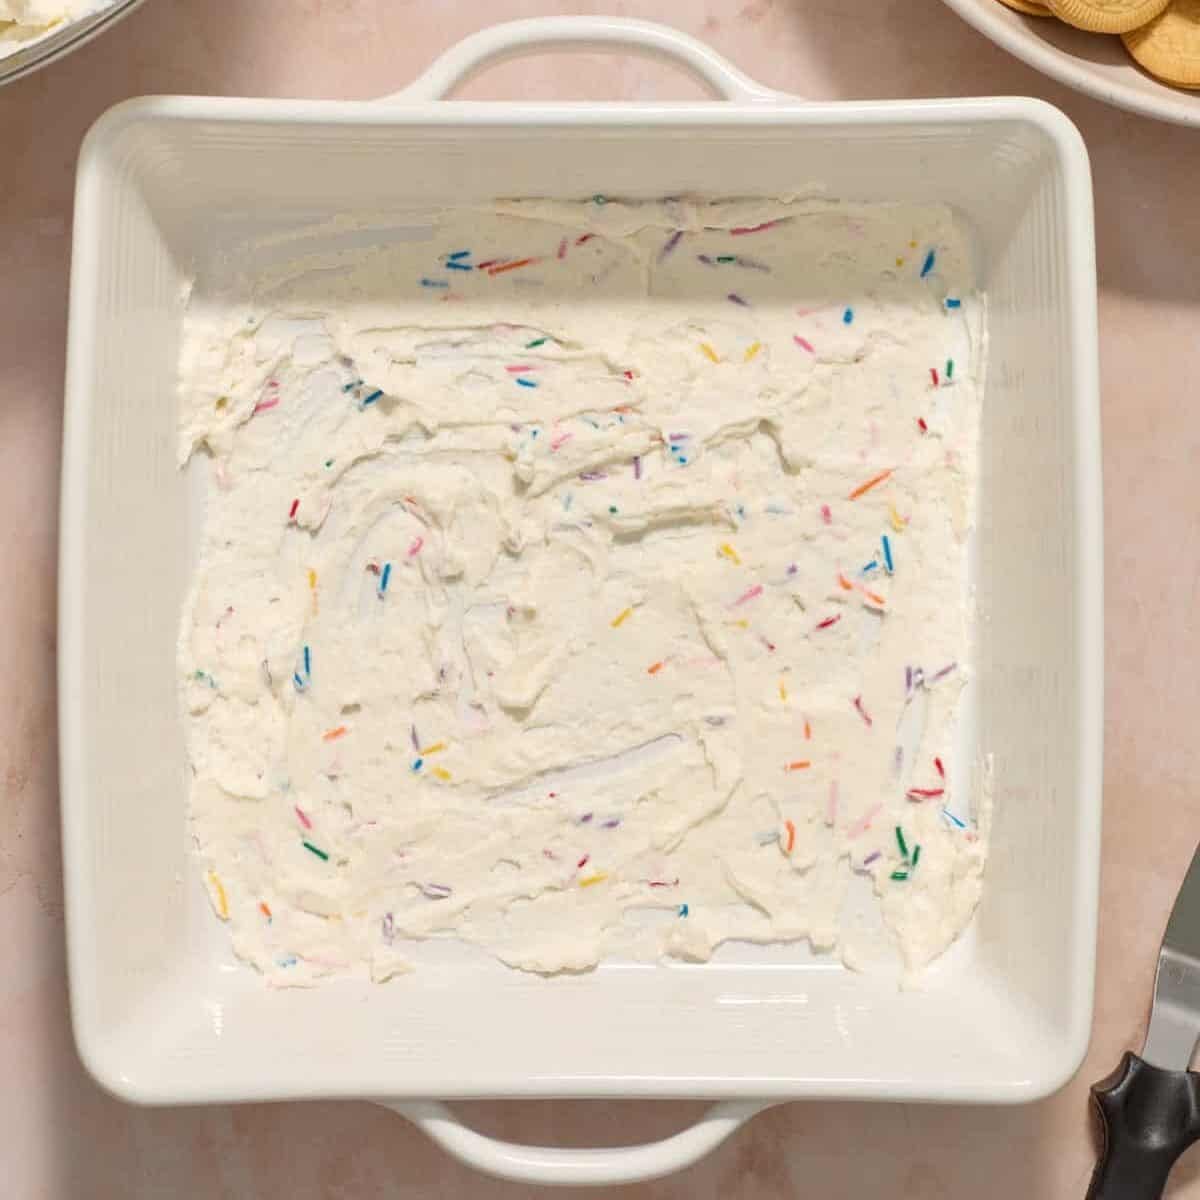
Step 1: Spread a very thin layer of the cream mixture on the bottom of a 8×8 inch pan, approx. 3-4 Tbsp. is what I use.
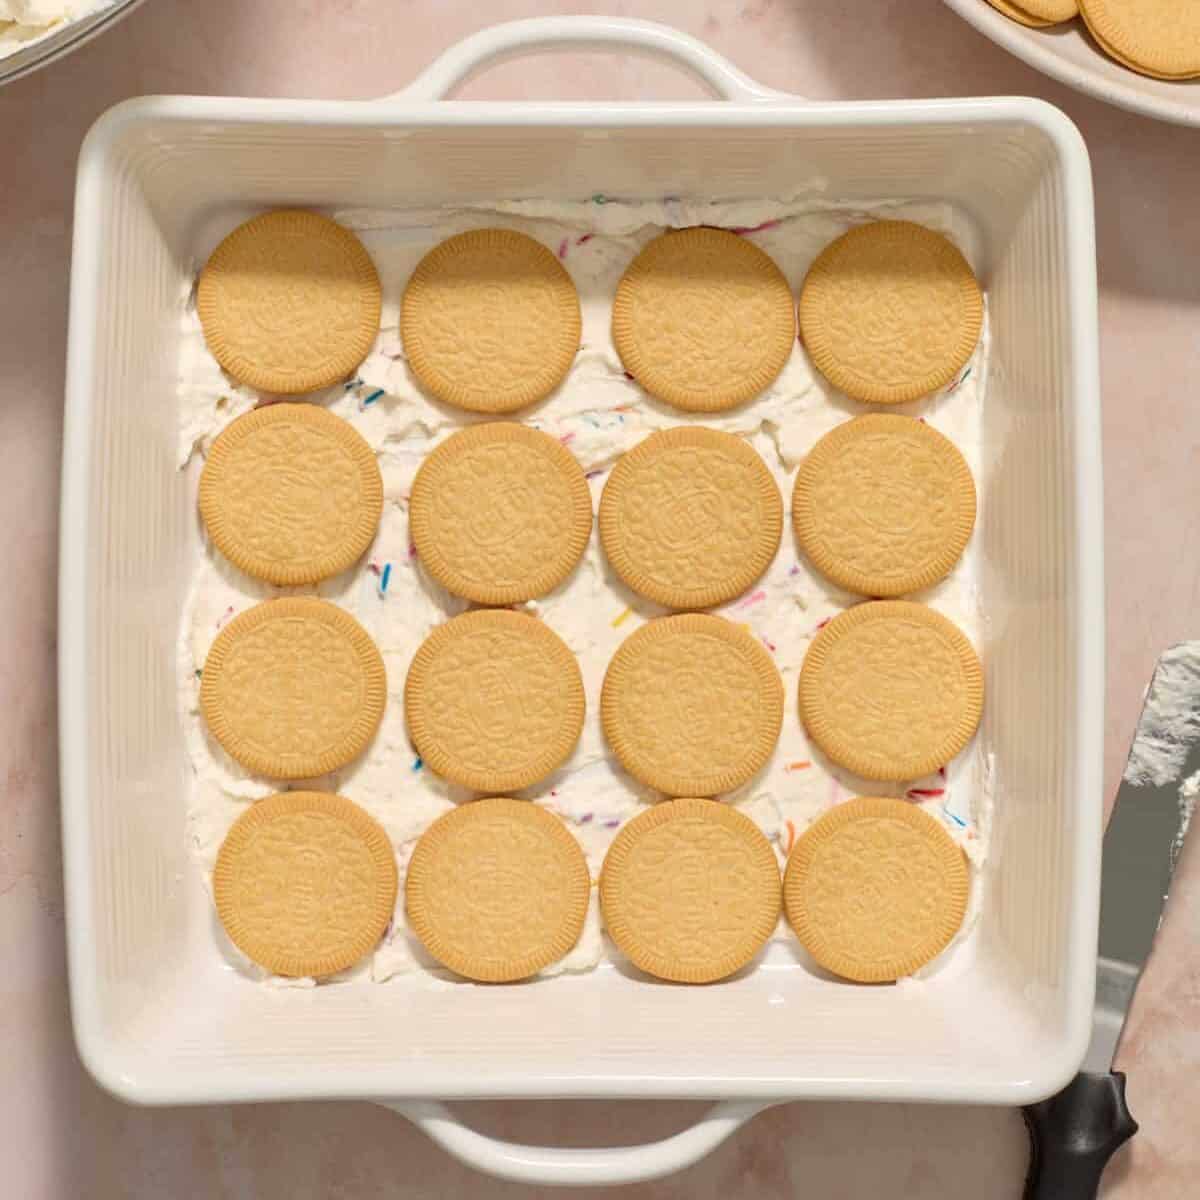
Step 2: Add a single layer of Golden Oreo thins (16 cookies—will easily go 4×4 and then the outer edge you have to break in half) to cover the bottom of the pan.

Step 3: Spread approx. 1/3 of the cream cheese/whipped cream mixture evenly over the layer of Golden Oreos.
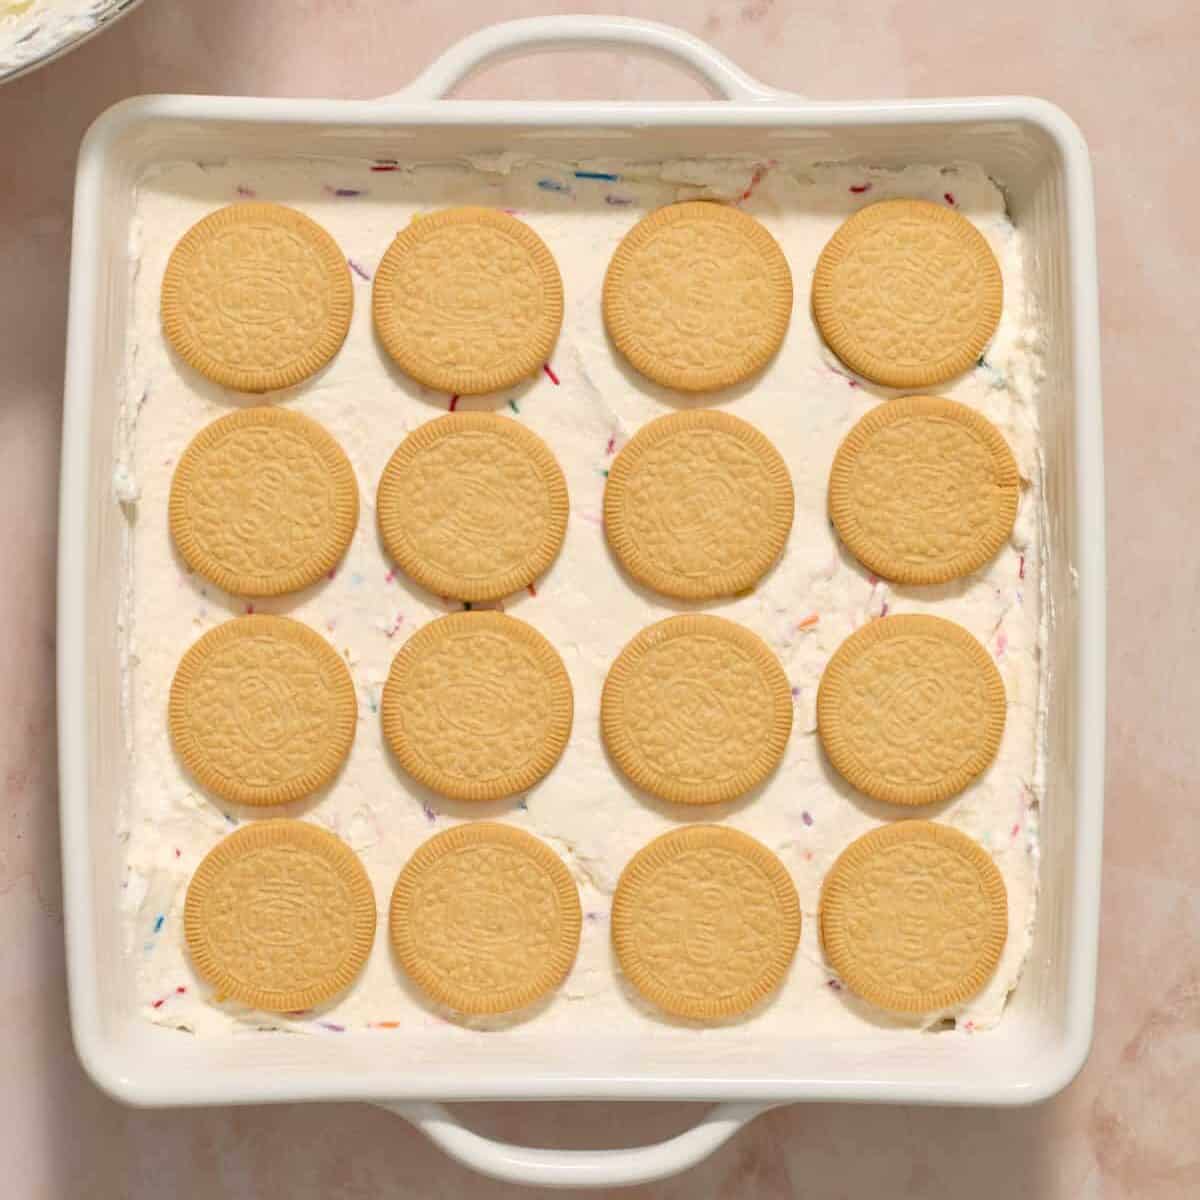
Step 4: Place 16 more Golden Oreos in an even layer over the mixture to cover.

Step 5: Spread a second layer of the cream cheese mixture over the Golden Oreos. Spread evenly. Cover with a final layer of 16 Golden Oreos and spread the remaining cream cheese mixture over top.

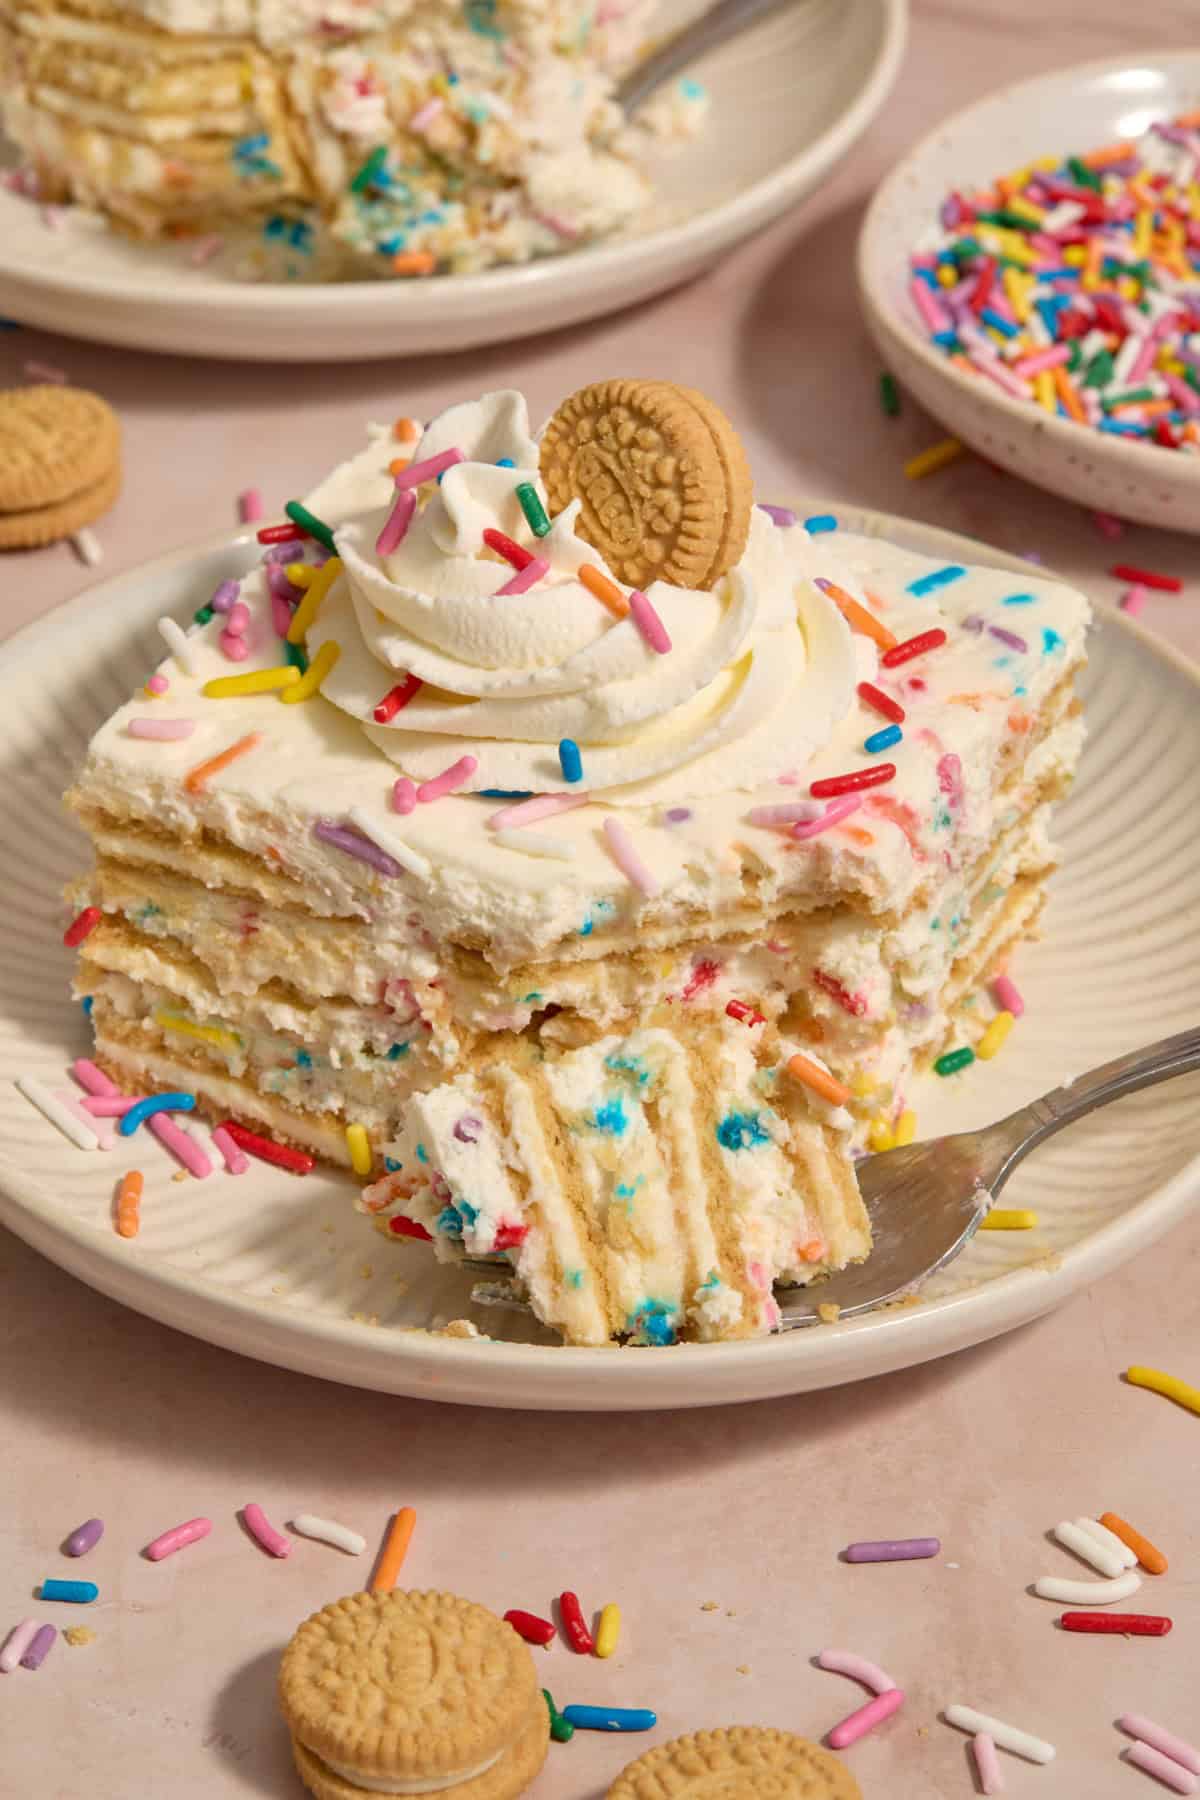
Step 6: Chill for at the very least for about 4-5 hours or until the cookies are softened and easy to cut through. I prefer chilling overnight for at least about 12 hours to allow the Oreos to really soften and become more cake like. Add remaining sprinkles over top of the cake before serving. You can pipe whipped cream over each slice with some more rainbow sprinkles and a golden oreo thin!
Recipe Tips
Make sure to chill the dessert until the cookies have softened. I like to prep this the night before I plan to serve it to give it enough time to soften the Oreos enough that they become cake-like.
Use sprinkles that are colored all the way through versus dyed only on the outside. Some sprinkles are white inside and colored only on the outside. For the most color, make sure your jimmies have solid color through the enitre rod.
Storage
Store in the refrigerator in an airtight container for up to 5 days. The texture will be ideal within the first 48 hours and the cookies will become a bit more soggy in later days, but it is still edible and we continue to eat off it!
You can freeze this dessert in a freezer-safe sealed container for about 3 months. Thaw it in the refrigerator overnight.
HUNGRY FOR MORE? Subscribe to my newsletter and follow me on Facebook, Instagram and Pinterest for all the latest!
No-Bake Funfetti Icebox Cake

Ingredients
- 48 Golden Oreo Thins
- 4 cups cool whip, (or 2 cups heavy whipping cream + ½ cup powdered sugar whipped to stiff peaks)
- 8 oz block cream cheese, softened
- 1 ½ tsp vanilla
- ½ tsp almond extract, (optional)
- ½ cup powdered sugar
- ½ cup rainbow sprinkles, plus more for serving
Instructions
- Prepare The Cream Layer: Using an electric hand mixer, beat the cream cheese, powdered sugar, vanilla extract and almond extract (if using), on medium speed until smooth and creamy.
- Fold in the cool whip until fully incorporated. Gently fold in sprinkles, trying to stir as gently and little as possible so they don’t bleed too much.
- Assemble The Icebox Cake: Spread a very thin layer of the cream mixture on the bottom of a 8×8 inch pan, approx. 3-4 Tbsp. is what I use. Add a single layer of Golden Oreo thins (16 cookies—will easily go 4×4 and then the outer edge you have to break in half) to cover the bottom of the pan.
- Spread approx. ⅓ of the cream cheese/whipped cream mixture evenly over the layer of Golden Oreos. Place 16 more Golden Oreos in an even layer over the mixture to cover.
- Spread a second layer of the cream cheese mixture over the Golden Oreos. Spread evenly. Cover with a final layer of Golden Oreos and spread the remaining cream cheese mixture over top.
- Chill and Serve: Chill for at the very least for about 4-5 hours or until the cookies are softened and easy to cut through. I prefer chilling overnight for at least about 12 hours to allow the Oreos to really soften and become more cake like.
- Add more sprinkles over top of the cake before serving. You can pipe whipped cream over each slice with some more rainbow sprinkles and a golden Oreo thin or mini Golden Oreo! Refrigerate leftovers for about 3-4 days.
Notes
Nutrition
Nutrition information is automatically calculated, so should only be used as an approximation.
Shop This Post
 Buy Now →
  Buy Now →
Golden Oreo Thins Sandwich Cookies
Buy Now →
Leave a comment