This post may contain affiliate links.


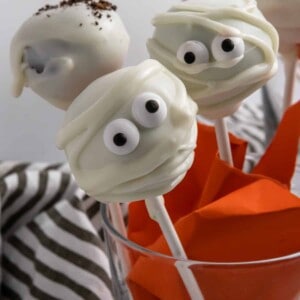
Cake pops can be fun and simple to make–these are even a no bake version! Halloween Cake Pops are so easy to make, fun to decorate and even better to eat! You don’t have to spend hours whipping up this favorite holiday treat!
Making cake pops doesn’t have to be a hassle, and they don’t have to take hours to throw together.
In fact, with these super simple Halloween Cake Pops, you may even find yourself enjoying whipping them up!
If you love, LOVE cake pops, but you are low on time and energy–this is the Halloween treat made just for you.
If you didn’t think a “No Bake” cake pop was possible, you are in for a treat!
These easy cake pops are:
- No bake, seriously, you don’t have to bake a cake first!
- Super Versatile–make any fun colors, characters, and more.
- Nice and light, but still flavorful.
The secret is grabbing a fresh Angel Food Cake from the grocery bakery. You will instantly cut over an hour off your cake pop venture!
Too good to be true? Not at all! If you love no bake recipes, grab extra Oreos and make this simple Halloween Oreo Dirt Cake as well this season.
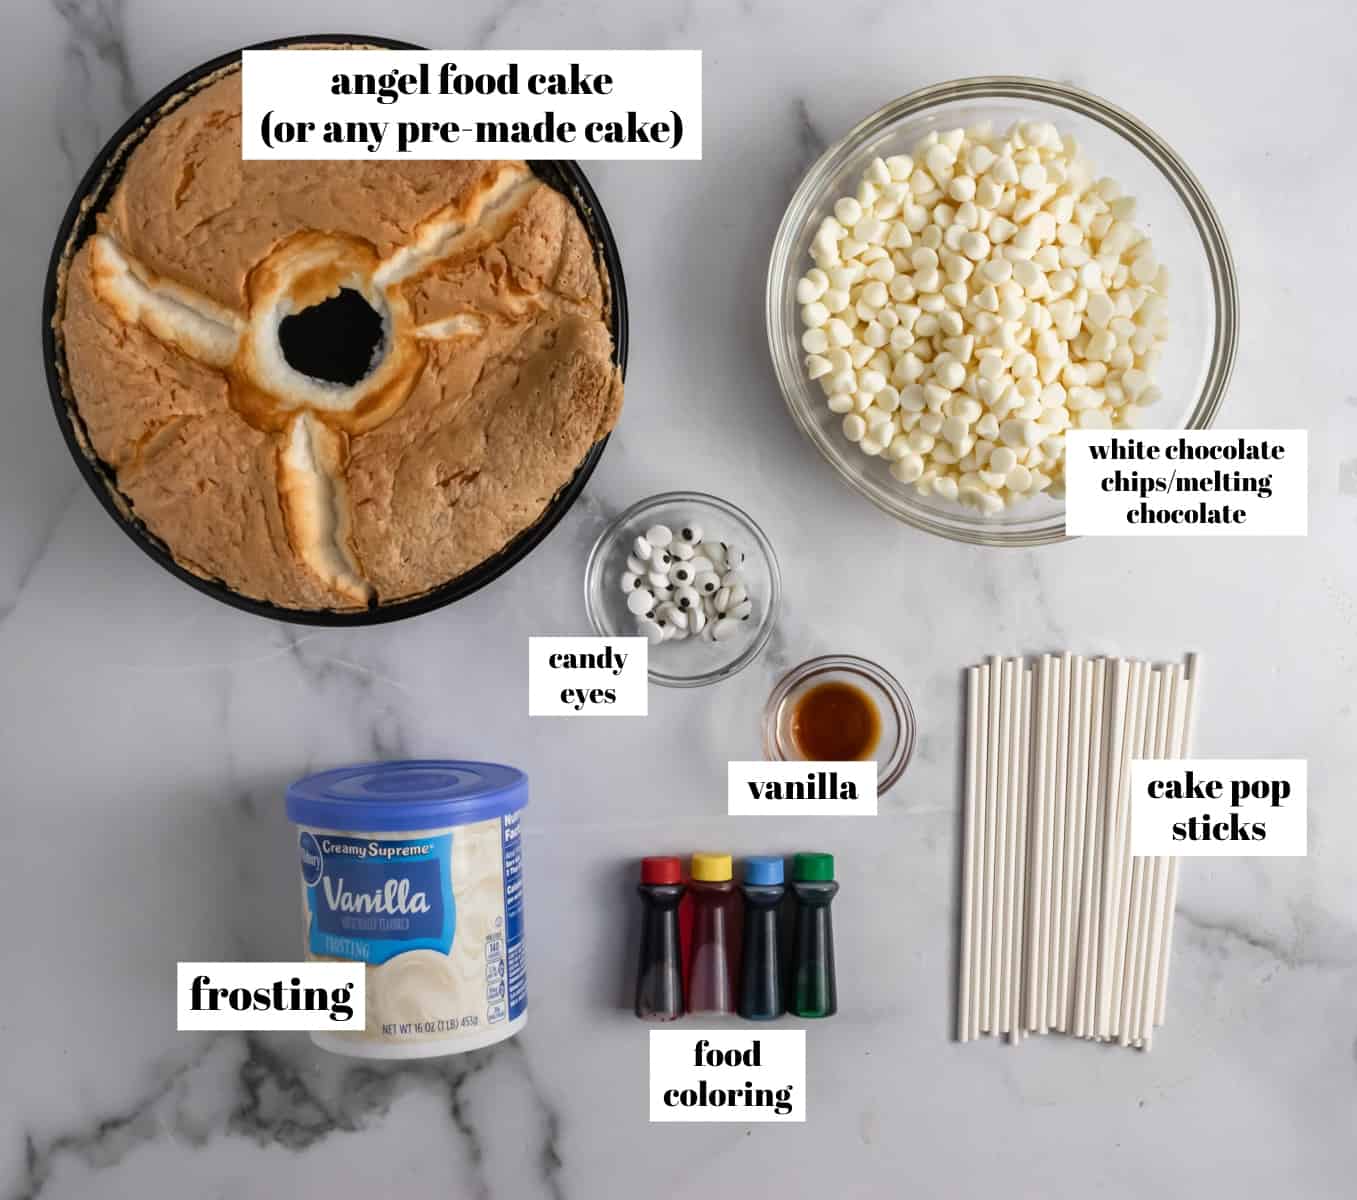
What you need to make these:
- The grocery bakery pretty much always has an angel food cake–it’s the only cake that I can count on to buy without frosting. If you can randomly get your hands on another flavor un-iced cake, give that a shot as well! Also, you can make your own cake if you would like–but when time isn’t on your side, it’s not always an option.
- Any kind of melting chocolate or melts will work. I prefer white chocolate chips.
- Optional ingredients for decorating: Oreos crushed up, sprinkles, other colored chocolate melts, piping icing to draw faces on pops, etc.
How to make these cake pops:
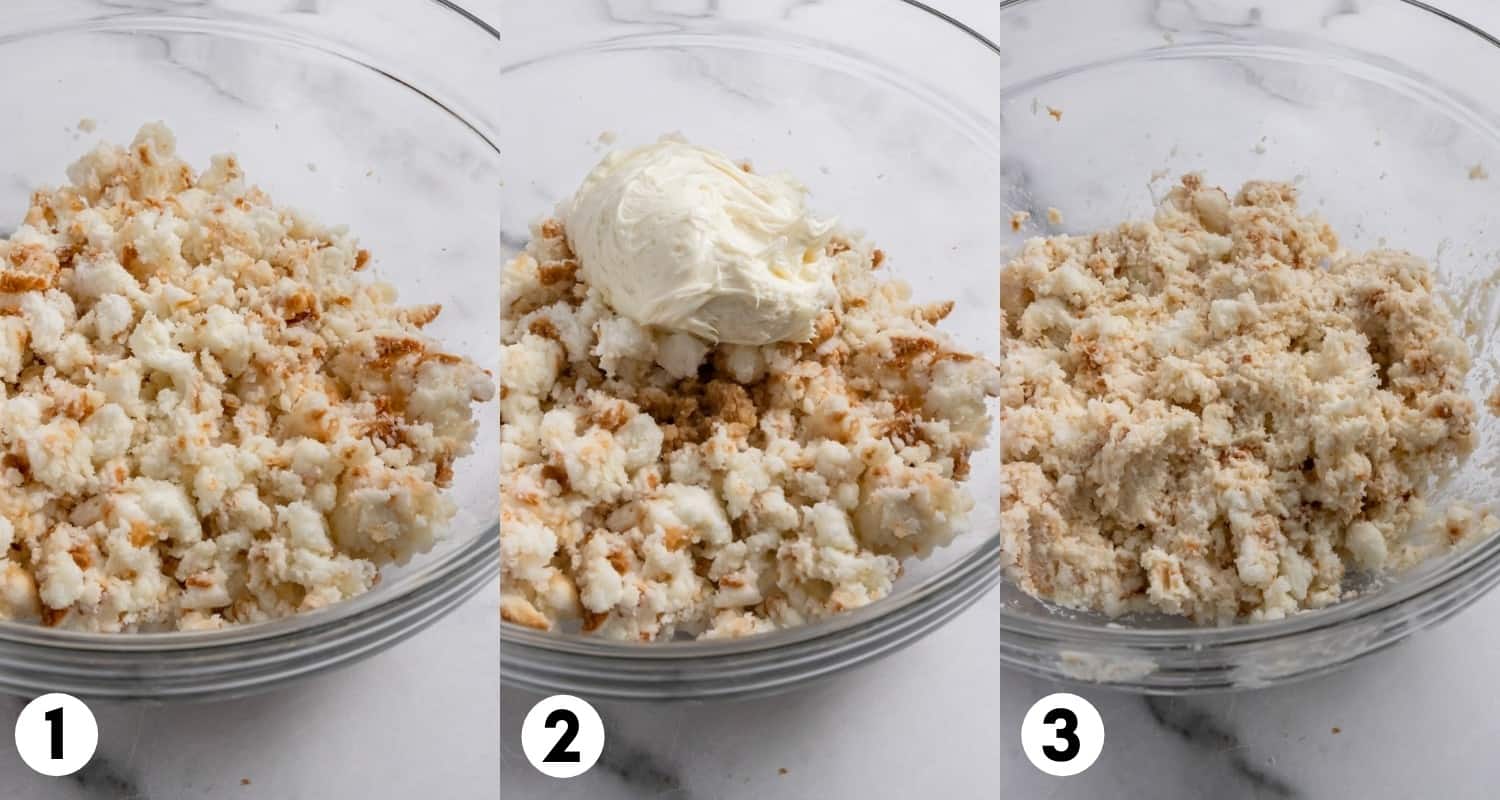
- Add the cake to a medium bowl and using your hands, crumble the cake up into very small pieces. (step 1)
- Add the vanilla and frosting to the crumbled cake and stir or use your hands once again to combine and fully incorporate the frosting into the cake. (steps 2 and 3)
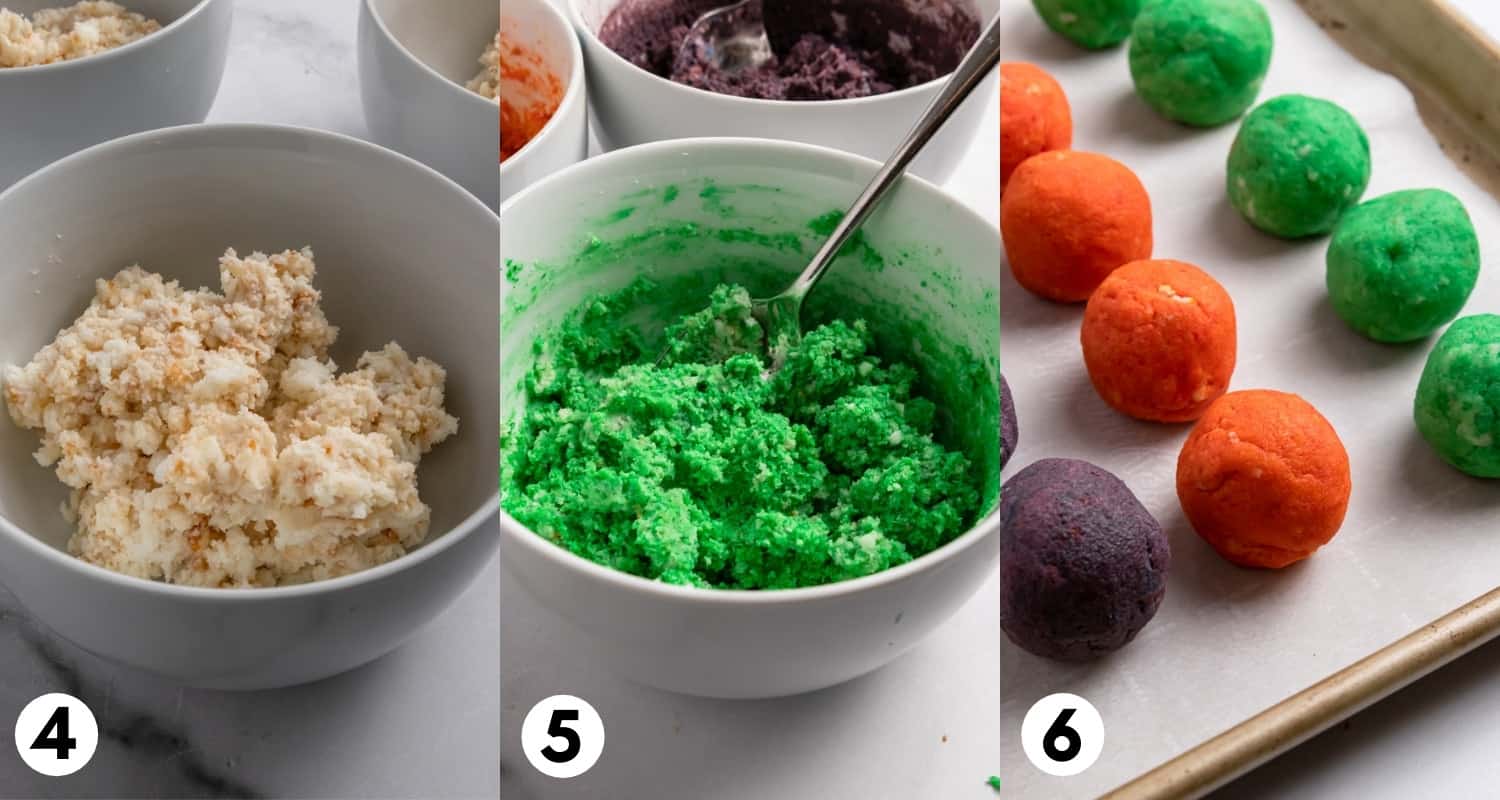
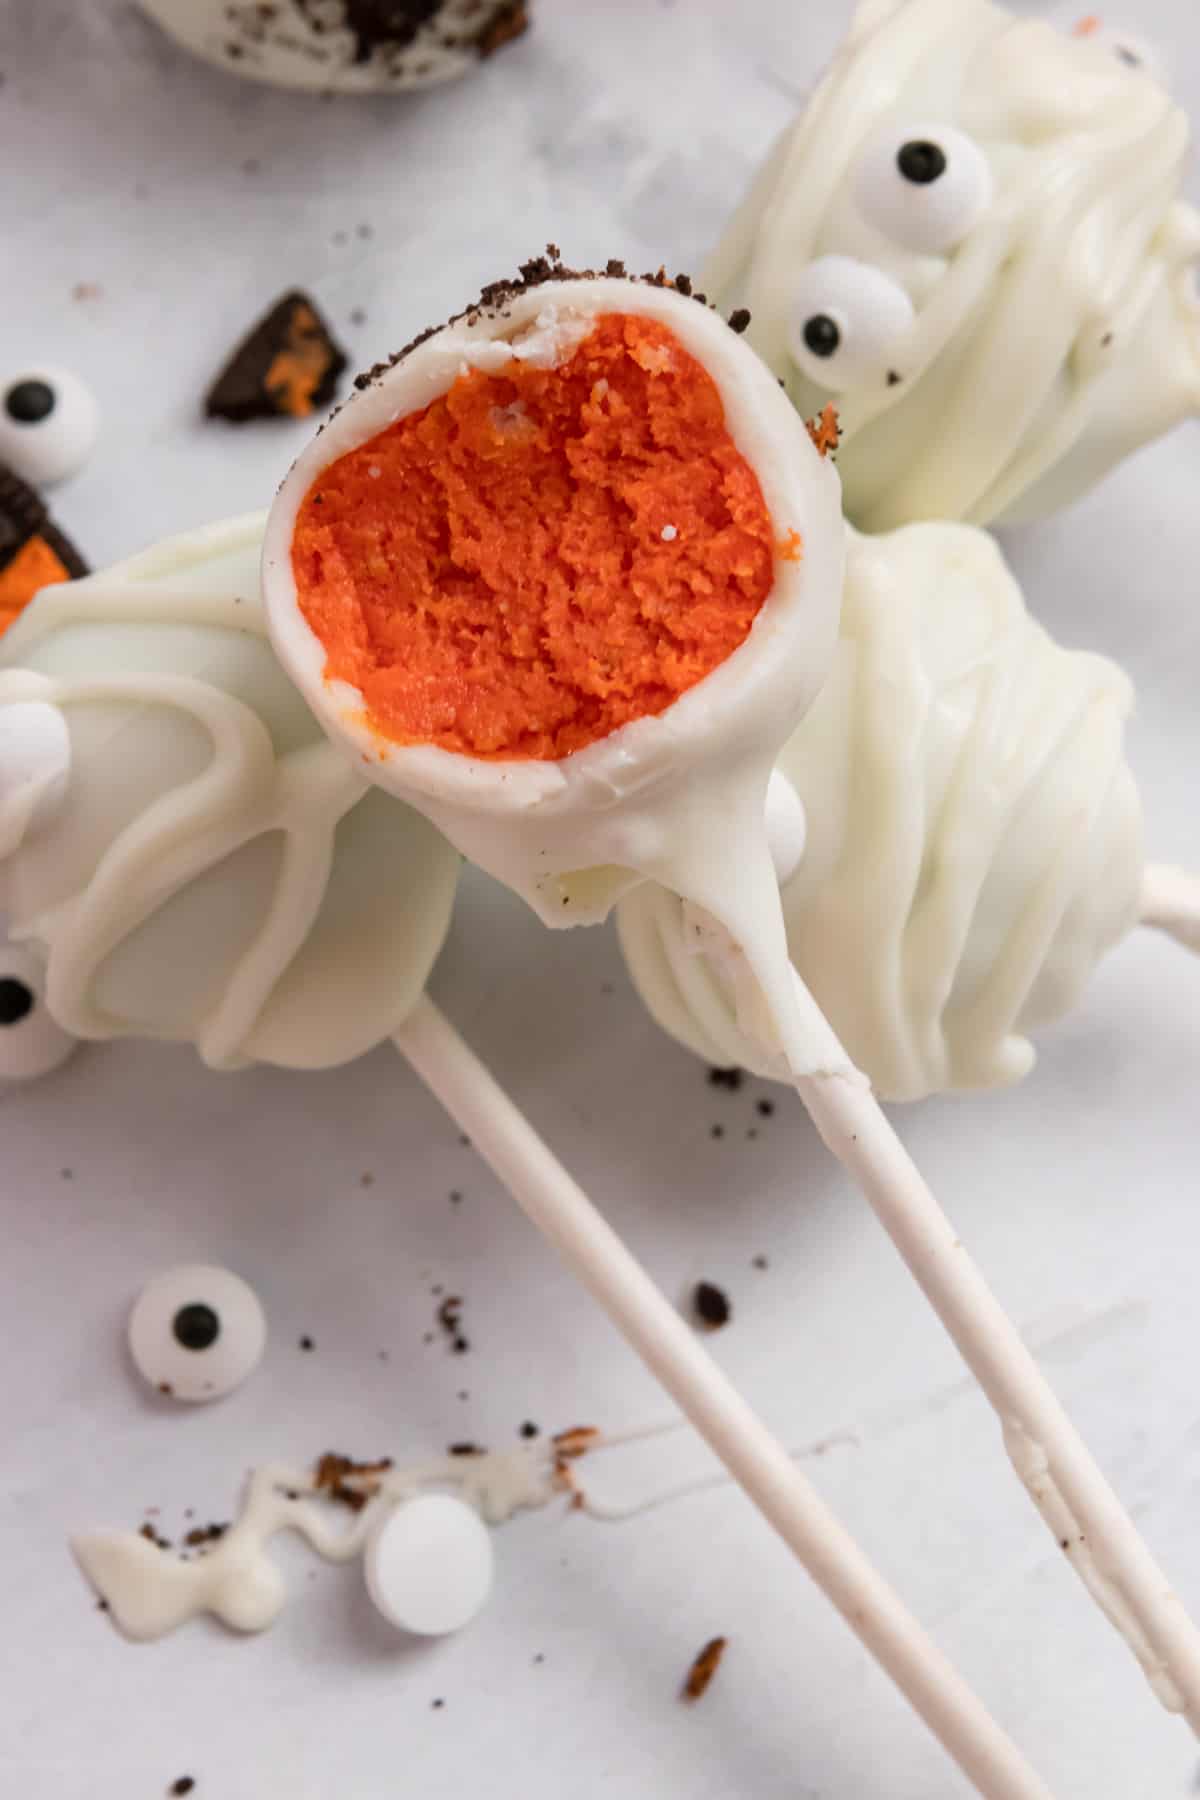
- If you plan on dying your cake pops, separate the cake ball “dough” equally into separate bowls. Add the amount of dye you would like and stir well to combine and allow the color to spread. If using classic food coloring, I achieved the colors here with about 25 drops of dye in each bowl. For the orange, it was about 12 red and 13 yellow drops. The purple was about 13 red and 12 blue drops. Adjust to get the color you like. (steps 4 and 5)
- Freeze dough for about 10 – 15 minutes to make it easier to roll into balls. Then roll into about 1 1/2 inch balls and place on a parchment lined plate or pan. I got about 18 balls from a 12 oz. Angel Food Cake. Since Angel food cake isn’t as dense as other cakes, it takes a bit more cake to make a really solid cake ball. (step 6)
- From here on out, the more time you can keep the cake balls in the freezer, the better off you are. This will make for easier coating when it comes time. I try to put them all in the freezer and then work just a couple at a time.
- While cake balls are in the freezer, take about 1/3 cup of the melting chocolate or chocolate chips and melt them in a small bowl by microwaving in 15-20 second increments and stirring well after each round. You do not want to burn the chocolate so stir well to allow any chips to melt in.
- Place the tip of each cake pop stick into the melted chocolate and then press the stick into each cake ball. This will act as a “glue” to help keep the cake ball from falling off the stick when coating. (step 7)
- Freeze the cake pops to allow these to set. You can let the cake pops freeze here for as little as 10-15 minutes or up to several hours. The longer the better in my opinion!
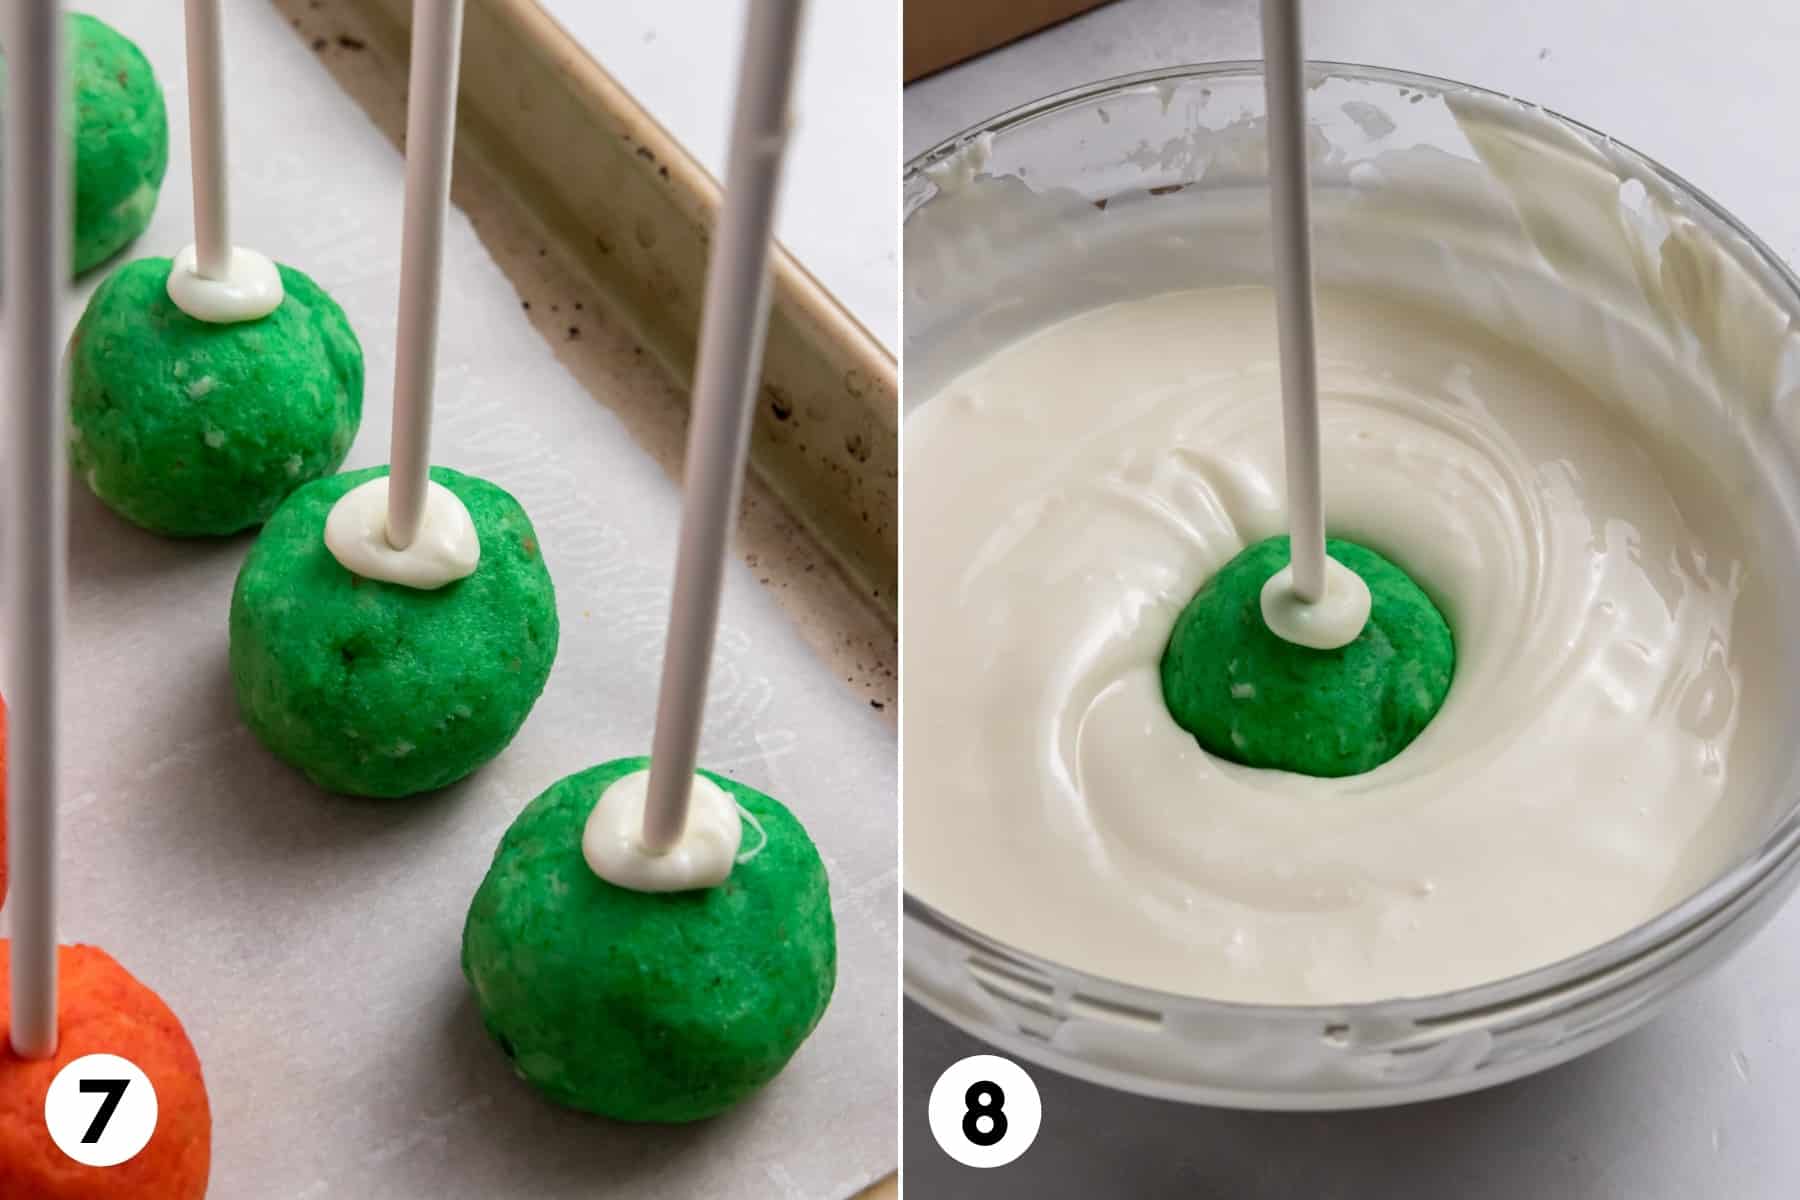
- When you are ready to coat your Halloween cake pops, melt the rest of the chocolate in 15-20 second increments and stir well as you did before. For best results, use a small, deep bowl for easier dunking. Dunk each cake pop fully into the melted chocolate and slowly pull the cake pop out allowing the excess chocolate to fall off. (step 8)
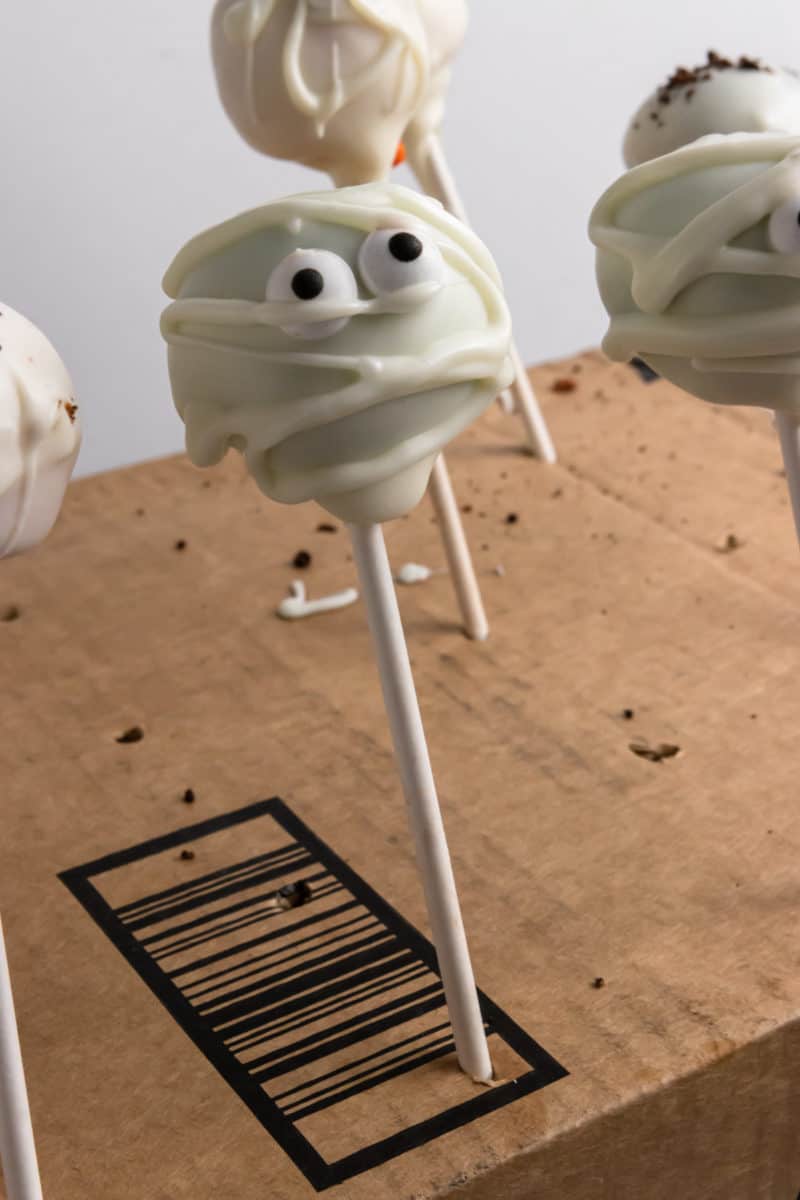
- Place each pop into a piece of styrofoam, a cup or a good old fashion box with holes cut into it for drying. If adding eyeballs, add them before the chocolate is dry.
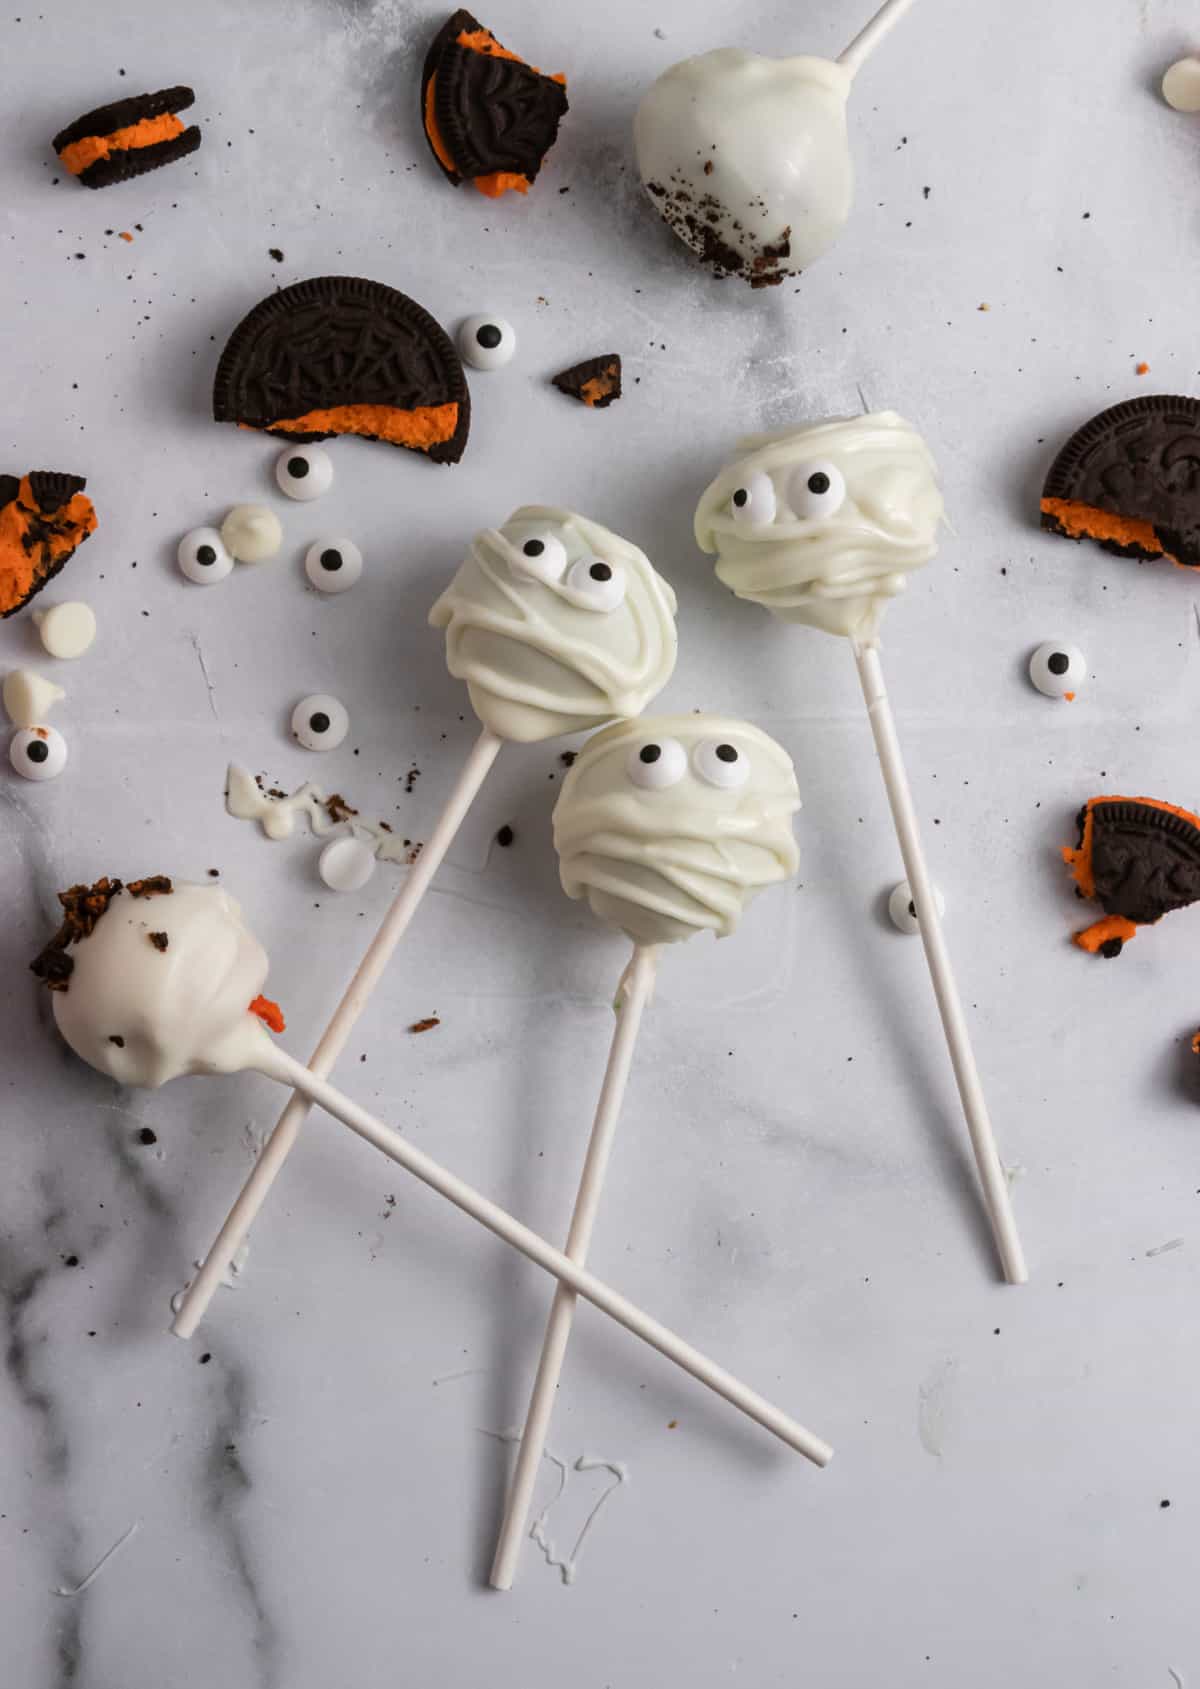
- Decorate if desired with orange and black sprinkles, crushed up Halloween Oreos, and more. (I wanted to try making bats by dying my chocolate black and then using half an oreo for the wings. If anyone tries this, let me know!)
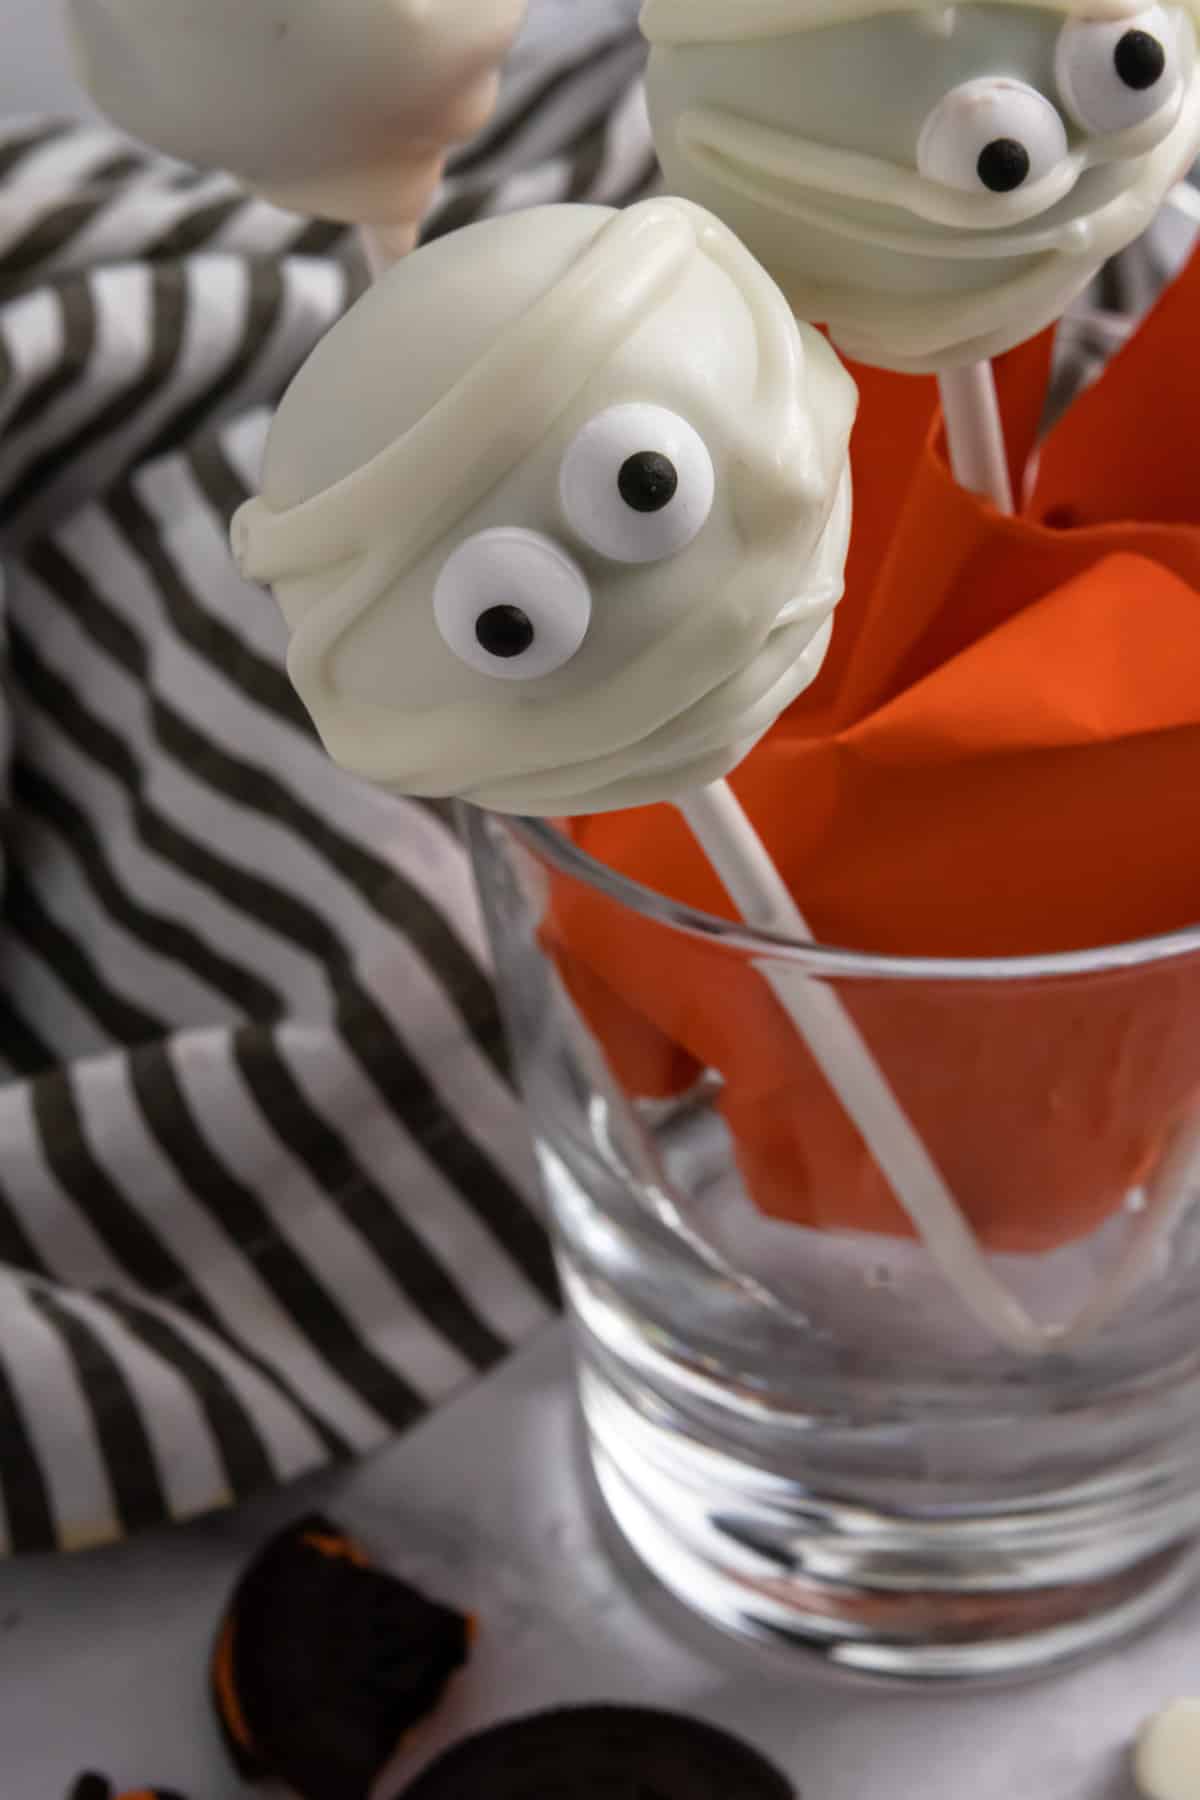
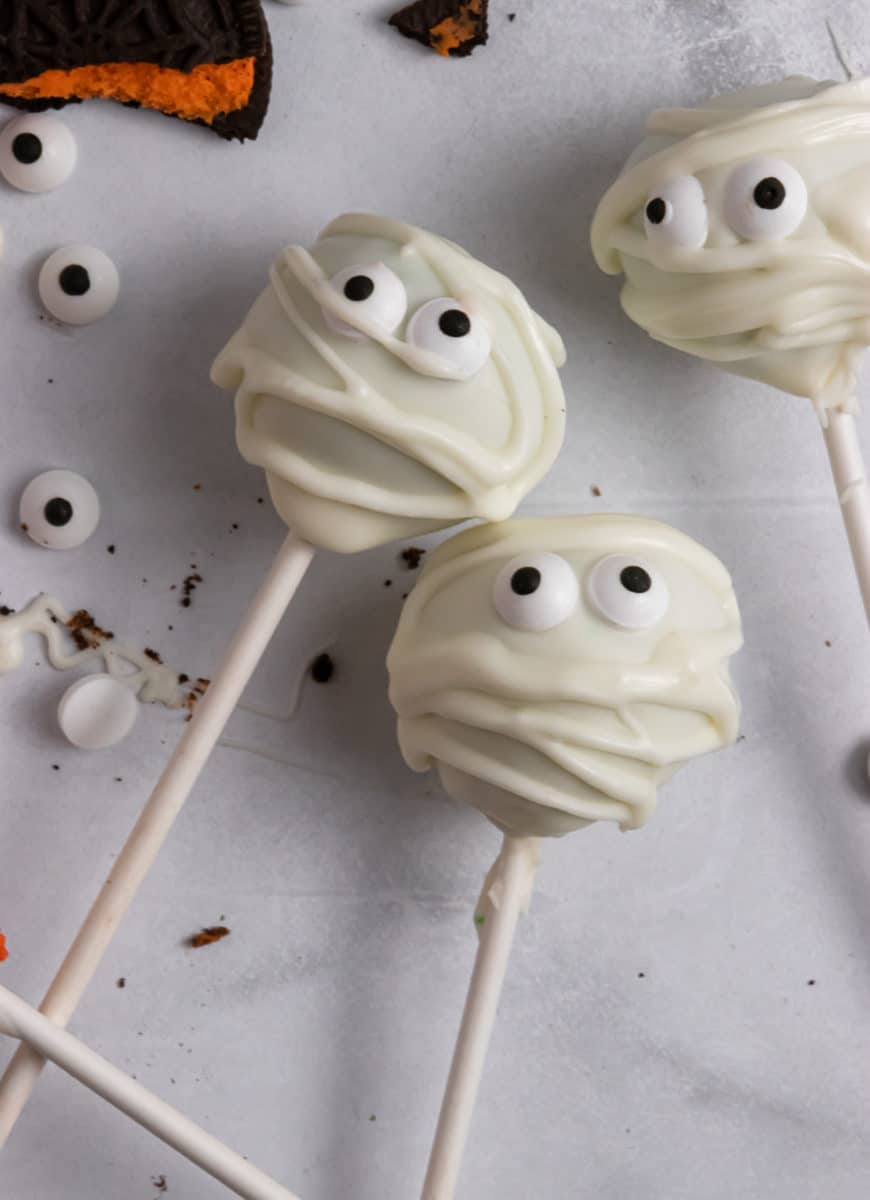
- If you want the mummy look, transfer some of the melted white chocolate into a plastic bag and cut a small tip. Once the cake pop has dried, lay it down and drizzle the layers of the mummy over top.
Pro-Tips and Notes:
- You do NOT want to burn your melting chocolate. There really is no return once it is scorched. I suggest you stir very well every 15-20 seconds from the microwave. When almost all of the chips are melted, keep stirring to allow the last few to melt into the mixture versus microwaving anymore.
- To make it easier for coating with white chocolate chips, you can add about 1/2 tsp of vegetable oil to the chocolate to thin it out slightly for easier coating (Thanks Sally’s Baking Addiction for the tip!
- Since Angel Food cake is a much lighter cake, you really want to roll the cake pops into tight balls. Otherwise, they could become flimsy.
- There are no rules when it comes to these Halloween Cake Pops. Seriously, any colors, any decorations, the sky is the limit. Shift the colors for a specific holiday even! I see red and green for Christmas already!
- You can skip the cake pop sticks and just make them more of a cake pop truffle if desired. Don’t let being out of sticks keep you from these simple, delicious treats!
Fun Idea: There was only a little of each color left in the end when I was rolling into balls. I took a little of all three colors and combined them.
You could make it a cute Halloween game and have the crazy cake pop be the lucky one. Who wouldn’t love a prize and a cake pop??
Check out these other fun treats:
- Golden Oreo Truffles
- Banana Mummy Pops
- Reeses Pieces Cookie Dough Bites
- Funfetti Cookies
- Pumpkin Spice Molasses Cookies with Cream Cheese Icing
DID YOU MAKE ONE OF MY RECIPES? LEAVE A COMMENT AND LET ME KNOW! I ALSO LOVE TO SEE YOUR LEMONS + ZEST RECIPES ON SOCIAL MEDIA–TAG ME @LEMONSANDZEST ON INSTAGRAM OR FACEBOOK!
Halloween Cake Pops
Ingredients
- 1 Angel Food Cake, baked (12 oz.)
- ¾ c vanilla frosting
- 1 tsp vanilla extract
- 2 ½ c white chocolate chips* or melting chocolate
- food coloring
- optional: sprinkles, crushed Oreos, candy eyeballs, etc.
- 18 – 20 cake pop sticks
Instructions
- Place the baked cake into a medium bowl and use hands to crumble the cake into very small pieces. Add in the frosting and vanilla and stir or use hands to fully incorporate the icing into the cake.
- Separate the cake dough mixture into 3 bowls, equally. (If dying 3 colors, if not, separate into however many colors you plan to dye.) Add about 25 drops of food coloring into each bowl: (for green: 25 drops green, for orange: 13 drops yellow, 12 drops red and for purple: 13 drops red and 12 drops blue). Stir the dye into the mixtures well and add more color until you get the color you like. Freeze for at least 10-15 minutes.
- Roll the cake pop dough into 1 ½ inch tight balls. Place on parchment and set in the freezer. Melt 1/3 cup of the white chocolate in 15-20 second increments in the microwave. Stir well between each time you heat. Pull several cake balls at a time and dip a cake pop stick tip into the melted chocolate and then press the stick into the cake pop half way (see image above). Complete with the rest of the pops and freeze another 15-20 minutes, and up to several hours.
- When ready to coat the cake pops, heat the rest of the melting chocolate in the microwave again in 15 – 20 second increments , stirring well each time, making sure not to over cook.
- Dunk each cake pop, straight down into the bowl of melted chocolate and slowly lift up, allowing excess to fall off. After about 10-15 seconds, place in an upright position to dry–in a box, styrofoam, or cup. Sprinkle with sprinkles, crushed Oreos, add eyes and more.
- Store these cake pops covered in the refrigerator for up to one week.
Notes
- You do NOT want to burn your melting chocolate. There really is no return once it is scorched. I suggest you stir very well every 15-20 seconds from the microwave. When almost all of the chips are melted, keep stirring to allow the last few to melt into the mixture versus microwaving anymore.
- Since Angel Food cake is a much lighter cake, you really want to roll the cake pops into tight balls. Otherwise, they could become flimsy.
- There are no rules when it comes to these Halloween Cake Pops. Seriously, any colors, any decorations, the sky is the limit. Shift the colors for a specific holiday even! I see red and green for Christmas already!
- You can skip the cake pop sticks and just make them more of a cake pop truffle if desired. Don’t let being out of sticks keep you from these simple, delicious treats!
Nutrition
Nutrition information is automatically calculated, so should only be used as an approximation.
Leave a comment